Tools needed when changing spark plugs
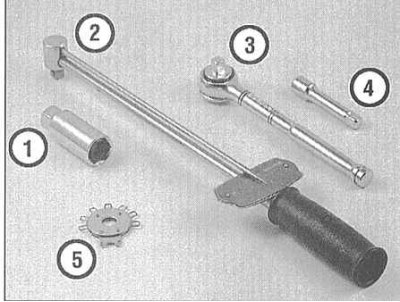
1 - Candle head - Equipped with a special elastic insert, which excludes the possibility of accidental damage to the porcelain insulator when turning out the candle.
2 - Torque wrench - Not a mandatory tool, provides a reliable guarantee of the correct tightening torque of the spark plugs.
3 - Ratchet drive - Used in conjunction with a candle head and a torque wrench.
4 - Extension - Depending on the model and its accessories, access to spark plugs can be limited to varying degrees, so the use of extensions of the appropriate shape and design will greatly facilitate the procedure.
5 - Spark Plug Gap Tool - Several types of these tools are available - make sure the tool is equipped with a feeler gauge that matches your vehicle's spark plug gap size.
Note. If the original spark plugs are re-installed on the engine after checking the condition, they must be screwed strictly into the previous cylinders, make the appropriate marking.
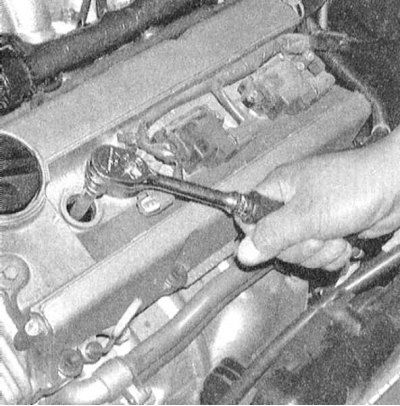
1. Most spark plug replacements require a special spark plug head (with elastic lining inside) complete with a ratchet drive, as well as a set of wrench drive extensions and a device for checking and adjusting the interelectrode gaps. A special tool is also available for safely disconnecting the BB wire tips from the spark plug shanks, although its use is not strictly required. Using a torque wrench will allow you to achieve the correct tightening torque for the candles.
2. It is best to keep a set of replacement spark plugs with a correctly adjusted electrode gap in the car at all times. When buying new spark plugs, make sure that they meet the requirements of your car engine in terms of their parameters. The necessary information is given in the Specifications to this Chapter, as well as on the VECI label attached under the hood (in case of discrepancies, preference should be given to information from VECI).
3. Proceed to turning out the candles only after the engine has completely cooled down. In order not to waste time in vain, use the pause to check the status of the replacement kit.
4. The gap between the electrodes of the spark plug is checked by inserting the appropriate meter probe into it and must meet the requirements given on the VECI label (see also Specifications). The probe should slip with slight resistance between the side and center electrodes of the spark plug. The gap can be adjusted using a special tool, usually included in the meter - bend the side electrode of the spark plug accordingly.
 | 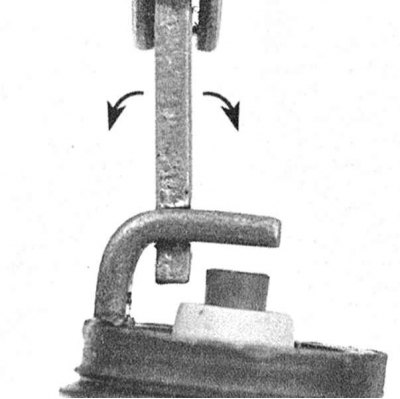 |
5. If the side electrode is not positioned exactly above the center electrode, adjust its position accordingly. Check for cracks or other damage in the porcelain insulator of the spark plug. The presence of any kind of defects in the insulator is unacceptable.
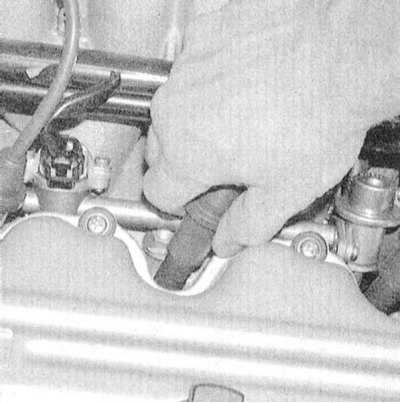
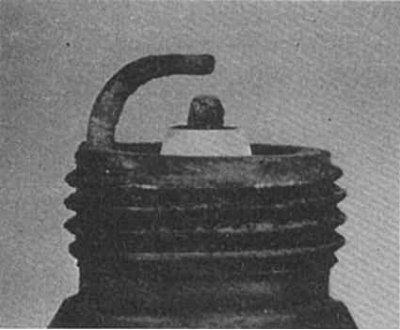
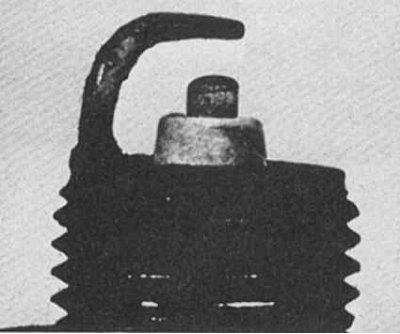
6. On 1993 and 1994 models. issue to avoid confusion during assembly, mark the wires with spark plugs before disconnecting. Disconnect the BB wire from the spark plug of the first cylinder. Pull only on the tip, and in no case on the wire! It would be wise to use a special tool.
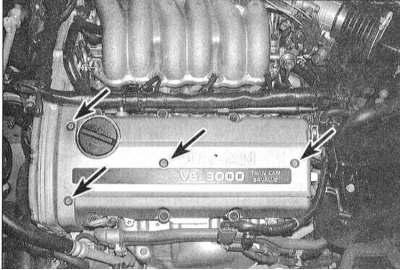
7. If you have a source of compressed air at hand, use it to remove debris from the spark plug niches of the engine (For this purpose, a conventional bicycle pump is no worse).
Attention! Remember to wear protective goggles when using compressed air!
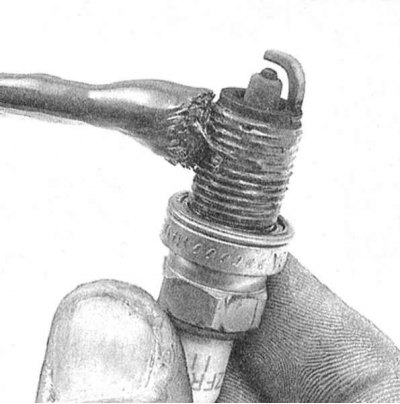
8. Turn out spark plugs.
Note. To avoid confusion with wire/coil connections, replace each spark plug in turn.
 |  |
9. Check the removed spark plug against the identification card below to give a good idea of the overall condition of the engine.
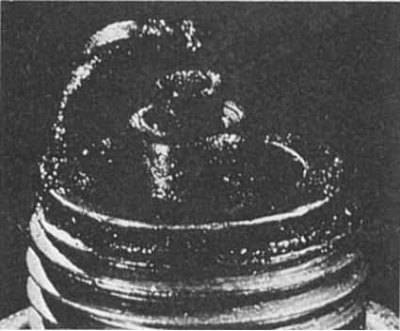
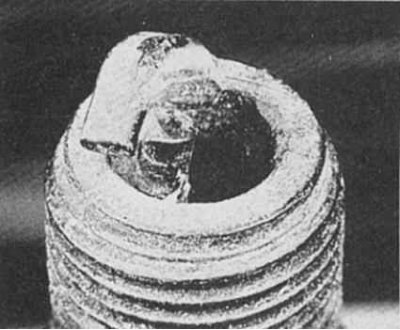
Coal deposits
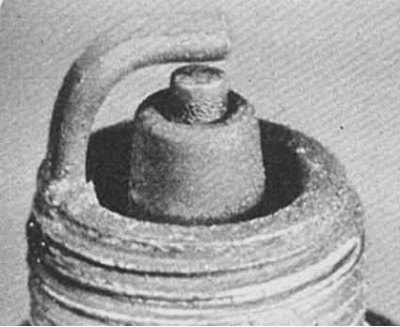
Symptoms: The presence of soot indicates an over-rich air/fuel mixture or a weak spark. Causes misfiring, difficult starting and engine instability.
Recommendations: Check if the air cleaner is clogged, if the fuel level in the float chamber is too high, if the air damper is stuck, and if the contacts are too worn. Try using plugs with a longer insulator, which increases fouling resistance.
The normal state of the candle
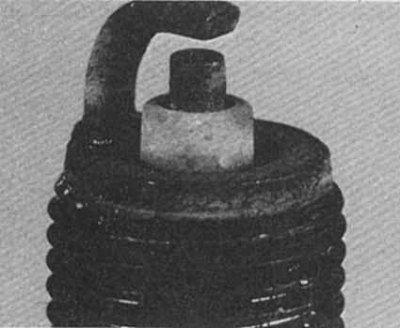
Symptoms: Gray-brown color and slight wear of the electrodes. The number of glow plugs corresponds to the type of engine and its general condition.
Recommendations: When replacing spark plugs, use spark plugs of the same type.
Oiling
Symptoms: Lubrication of the spark plug is caused by wear on the valve stem seals. Oil enters the combustion chamber through worn valve guides or piston rings. Causes misfiring, difficult starting and engine instability.
Recommendations: Carry out mechanical restoration work and replace the spark plugs.
Ash formation
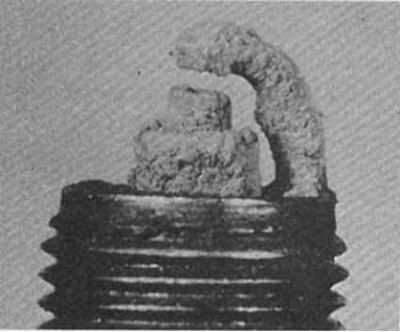
Symptoms: Soft brownish deposits on one or both spark plug electrodes. The source of their formation is the additives used in oil and/or fuel. Excessive buildup can insulate the electrodes and cause misfiring and engine instability when accelerating.
Recommendations: If deposits build up quickly, change the oil seals to prevent oil from entering the combustion chambers. Try changing the brand of fuel.
Overheat
Symptoms: Porous, white insulator, electrode erosion and absence of any deposits. This will shorten the life of the spark plug.
Recommendations: Check if the glow rating of the installed plugs meets the requirements of the Specifications, if the ignition timing is set correctly, if the air-fuel mixture is supplied too lean, if there are vacuum leaks in the intake pipeline and if the valves are stuck. Also check the coolant level and check if the radiator is clogged.
Wear
Symptoms: Rounding of the electrodes with a slight accumulation of deposits at the working end. The color is normal. Causes engine start difficulty in cold, wet weather and increased fuel consumption.
Recommendations: Replace the spark plugs with new ones of the same type.
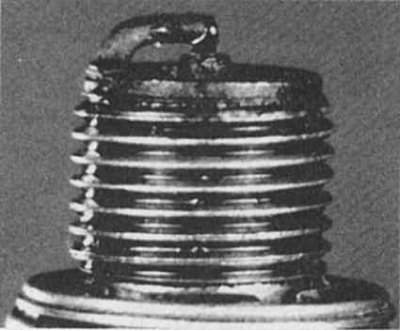
Too early ignition
Symptoms: The electrodes are melted. The insulator is white, but may be dirty due to misfiring or foreign particles entering the combustion chambers. May lead to engine failure.
Recommendations: Check the glow number of the installed candles, the ignition timing, the quality of the mixture (isn't it too poor), whether the cooling system is clogged and the lubrication system is functioning properly.
Detonation

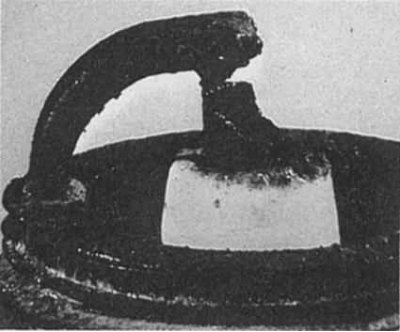
Symptoms: Insulators may be chipped or cracked. Insulator damage can also result from inaccurate spark plug gap adjustment. May damage pistons.
Electrically conductive gloss
Symptoms: The insulator has a yellowish color and a polished appearance. It speaks of a sudden increase in temperature in the combustion chambers during sharp acceleration. At the same time, ordinary deposits are melted, acquiring the appearance of a varnish coating. Causes misfiring at high speeds.
Recommendations: Change spark plugs (colder, while maintaining driving style).
Splashing

Symptoms: After misfiring for a long period of time, deposits can loosen while maintaining the operating temperature in the combustion chamber. At high speeds, deposits flake off the piston and adhere to the hot insulator, causing misfiring.
Recommendations: Replace spark plugs or clean and reinstall old ones.
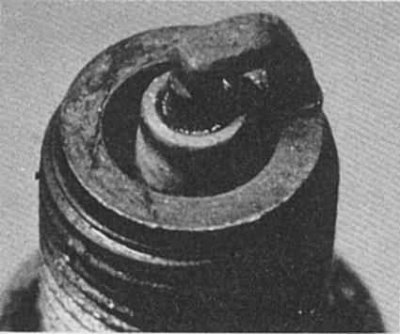
Closing the electrodes
Symptoms: Waste products of combustion enter the interelectrode space. Solid deposits accumulate, forming a jumper between the electrodes. Leads to ignition failure in the cylinder.
Recommendations: Remove deposits from the interelectrode space.
Mechanical damage
Symptoms: May be caused by foreign material entering the combustion chamber or by the piston hitting a spark plug that is too long. Lead to cylinder failure and piston damage.
Recommendations: Remove foreign particles from the engine and/or replace
10. Before screwing in new spark plugs, lightly lubricate their threaded part with anti-seize sealant. Thread one of the new spark plugs into the appropriate hole in the engine by hand. After making sure that the candle is not skewed in the thread, tighten it with the required force (with a torque wrench handy). To facilitate the process of baiting a candle, pull a piece of flexible fuel hose onto its shank. This eliminates the possibility of thread breakage, since at the slightest biting, the hose will simply begin to turn.
 | 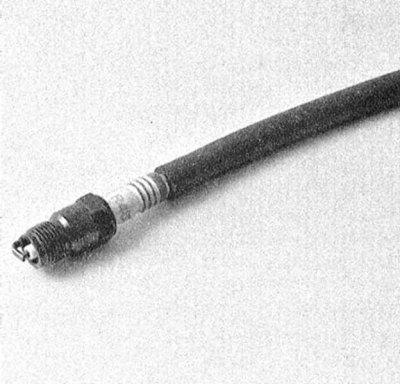 |
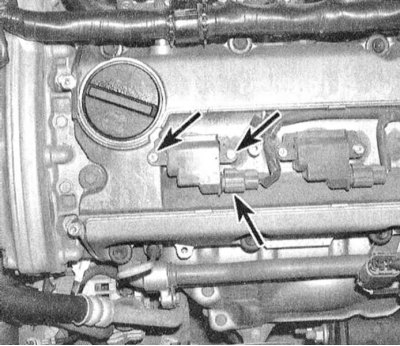
11. On 1993 and 1994 models. issue the connection of the BB wire to the candle is carried out by rotational-translational movements of its tip, - the latter should sit tightly on the shank of the candle. Used on production models since 1995, the individual spark plug coils are equipped with their own short spark plug wires - when installing, simply seat the assembly firmly on your spark plug without rotating it on the last spark plug shank.
12. Repeat the procedure for the remaining spark plugs, performing each step in turn to avoid misfiring.