Before removing the candles, make sure that the candle niches are clean to prevent foreign objects and small debris from entering the cylinders. If necessary, wipe the niches or blow them with air, using a conventional bicycle pump for this purpose.
The working part of the candles removed from the engine in good mechanical condition should be covered with a light powdery coating from light brown to gray-golden in color. After maintenance, there may be signs of wear and normal burning of the electrodes.
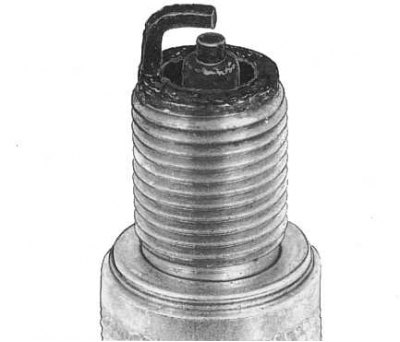
The presence of a thick layer of black oil deposits on the working part of the candles (see accompanying illustration) indicates excessive oil consumption due to poor mechanical condition of the engine, or that candles with an excessively low glow number are used.

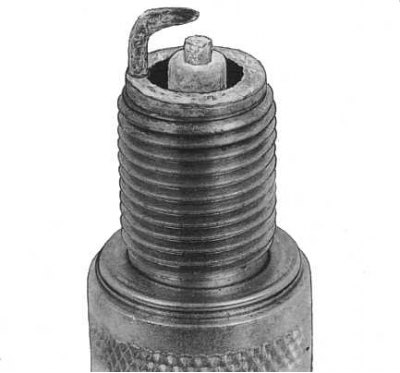
If the electrodes are eroded to the extent shown in the accompanying illustration, the spark plug should be considered worn out and must be replaced with a new, suitable type.
The presence of white or yellowish deposits on the working part indicates the driver's excessive addiction to fast driving, accompanied by engine overheating, or the use of candles with an excessively high glow number, especially when it is accompanied by cracks in the porcelain insulator and burning of the electrodes (see accompanying illustration).
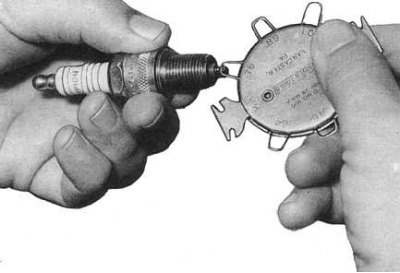
Before installing spark plugs on the engine, check the electrode gaps using a special wire-type measuring probe (see accompanying illustration). in extreme cases, you can use a blade-type probe. If it is necessary to correct the gap, bend the side electrode accordingly using the device built into the measuring probe.
Screw the spark plugs into the cylinder head by hand, then use a torque wrench to tighten them to the required torque.
When adjusting the gaps and screwing in the spark plugs, be careful - the accompanying illustration shows a section of the working part of the spark plug, illustrating a defect in the central electrode insulator in the form of cracks that usually form when excessive force is applied during the adjustment of the interelectrode gap. The cause of cracks in the insulator of the shank of the candle is more often the misalignment of the spark plug wrench when tightening the spark plug.
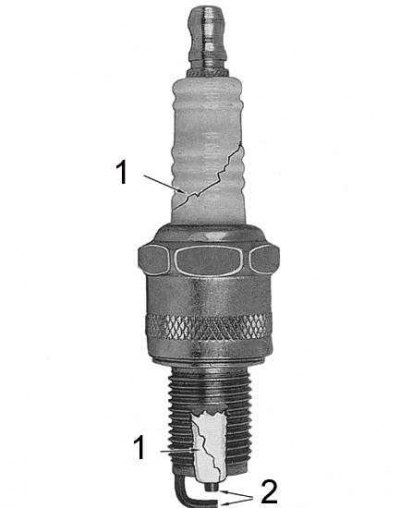
1 - crack
2 - crack
3 - electrodes
Note. If a torque wrench is not at hand, the candles should be tightened with extreme caution, since overtightening is fraught with a breakdown of the threads in the mounting holes in the body of the cylinder head made of soft aluminum alloy. After tightening the candles by hand, it will be enough to tighten them another 1/4 turn with a special candle wrench equipped with a soft insert.