Attention! Do not allow antifreeze to come into contact with exposed areas of the body and painted surfaces of the car. Wash off accidental splashes with plenty of water without delay. Remember that antifreeze is a highly toxic liquid and getting it into the body, even in small quantities, is fraught with the most serious consequences (up to death). Never leave antifreeze stored in a loosely sealed container and clean up spilled coolant on the floor without delay. Remember that the sweet smell of antifreeze can attract the attention of children and animals. Consult your local authorities for disposal of used coolant. In many regions of the world, special points have been set up to receive various types of detention. Never drain old coolant down the drain and onto the ground!
Recently, non-toxic grades of antifreeze have been developed, but they also require care in handling.
Regularly, in accordance with the schedule of routine maintenance of the car (see Section Nissan Maxima Maintenance Schedule), the cooling system must be emptied, flushed and filled with a fresh mixture of antifreeze and water. This kind of maintenance helps to prevent the development of corrosion inside the cooling path and significantly increases the efficiency of the system. During maintenance, the condition of all system hoses and the radiator filler cap must also be checked (see Section Check of a condition and replacement of the hoses located in an impellent compartment). Defective components must be replaced. Remember the precautions to be taken when servicing the cooling system (see warning at the beginning of Section).
Emptying
1. Apply the parking brake and chock the wheels. The direct execution of maintenance procedures should be started only after the engine has completely cooled down, i.e. a few hours after the end of the trip.

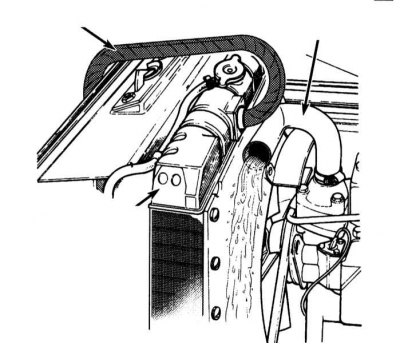
2. After waiting for the final cooling of the engine, remove the cap from the radiator filler neck, put a suitable container under the drain valve located at the bottom of the radiator assembly. Pull a piece of hose with an inner diameter of about 9.5 mm onto the fitting, lower the other end into a drain container (this hose may be standard on some models). Loosen the valve and drain the coolant into a container.

3. After the coolant has drained from the radiator, move a container under the drain hole of the cylinder block (such holes are provided on each side of the power unit. Remove the plug and drain the fluid from the engine.
Note. If, after turning the plug, the liquid does not begin to flow out of the hole, clean it from traces of corrosion with a suitable screwdriver.
4. While the liquid is draining from the block, check the condition of the hoses of the cooling path and the clamps of their fastening (see Section Check of a condition and replacement of the hoses located in an impellent compartment).
5. Replace damaged or failed components (see chapter Cooling, heating systems). Screw in place and firmly tighten the drain plugs.
Flushing
1. After draining the system, remove the thermostat from the engine (see chapter Cooling, heating systems), remove it from the casing and install the latter back in its regular place (empty). The system is now ready for flushing.
2. Tighten the radiator drain valve, connect the lower radiator hose. Move the control knob for the operation of the interior heating system to maximum heating to ensure that the heater heat exchanger is also properly flushed.
3. Disconnect the top hose from the radiator and insert a garden hose into the radiator fitting. Turn on the water supply and continue flushing until a clean, clear stream comes out of the top hose.
4. In cases of particularly severe contamination or impaired patency of the radiator, remove the last (see chapter Cooling, heating systems) and deliver it for refurbishment and service to a car service workshop. Corrosion products and dense deposits are removed from the cooling system path by chemical treatment - follow the instructions of the manufacturers of the cleaning agent you purchased.
Note. With regular system flushing and coolant replacement procedures, the need for chemical treatment of the tract should not arise.
5. After flushing, empty the radiator and drain the remaining water from the cylinder block.
Refueling
1. Restore the original radiator hose connection and reinstall the thermostat.
2. Move the interior heating control knob to maximum heating.
3. Slowly fill the radiator with fresh, proportioned (see specs) mixture of antifreeze and water. Continue filling until the liquid level rises to the lower cut of the filler neck. Add coolant to the expansion tank, bringing its level to the bottom mark (FULL COLD). Wait five minutes and recheck the coolant level in the radiator, adjust if necessary.
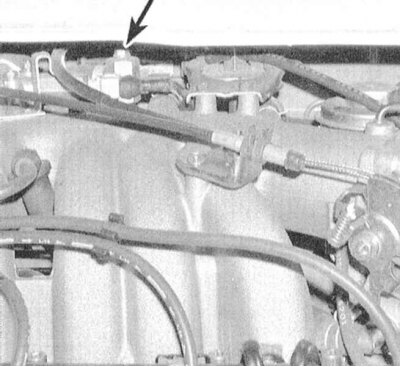
Note. On models 1993 and 1994 issue to release air trapped in the cooling path, loosen the plug specially designed for this purpose on the engine block. When coolant begins to flow from under the plug, tighten it again and correct the fluid level in the radiator.
4. Without installing a cap on the radiator, start the engine and warm it up until the thermostat valve opens (the liquid should begin to circulate through the radiator, while the upper hose of the latter will warm up).
5. Stop the engine and let it cool down. Add a little more fluid to the radiator, bringing its level to the lower cut of the filler neck.
6. By squeezing the upper radiator hose, bleed the air out of it, if necessary, add a little more coolant. Reinstall the radiator cap.
7. Move the interior heating control knob to maximum heating, turn on the heater fan at maximum speed.
8. Start the engine, warm it up to normal operating temperature and check the system for signs of leaks.