Attention! The battery should be serviced in accordance with the vehicle's routine maintenance schedule.
Note. You will need a hydrometer and charger to complete the procedures below
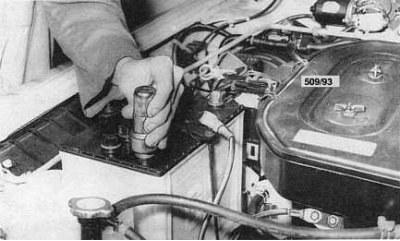
Removing
1. Disconnect the negative and positive wires from the battery.
2. Remove a clamping level and take the battery out of an impellent compartment of the car.
Installation
Installation is in the reverse order.
1. Check the condition of the battery terminals.
2. Pay attention to the correct polarity when connecting the wires. Connect and secure the positive wire first.
3. Do not overtighten the terminal clamp nuts.
4. Lubricate the terminals and wire lugs with acid-free Vaseline to prevent corrosion.
Battery care
Warning! The battery electrolyte emits highly explosive hydrogen - never approach the battery with an open flame!
1. Keep the battery and surrounding surfaces clean. Keep the top of the battery free of dirt and moisture. If necessary, clean the battery externally:
- Remove the battery from the car;
- Carefully pour hot water over the battery, making sure that it does not get inside through the vents of the filler caps;
- Wipe the battery case thoroughly.
2. Clean the battery terminals and terminal clamps with a wire brush, sandpaper, or special tool (see accompanying illustration). Remove all traces of dirt and corrosion.
3. Remove fill caps and check vent holes.
4. Check the electrolyte level in the battery banks, top up with distilled water if necessary. The electrolyte must completely hide the plates. Do not overfill the battery, do not pour the electrolyte from one jar to another.
5. If you frequently need to add water, check the battery case for signs of leaks. If cracks are found, replace the battery.
6. By measuring the output parameters of the generator, check if the battery level is too high.
7. Lubricate the terminals with acid-free Vaseline to prevent corrosion.
8. If electrolyte overflows onto the battery tray and surrounding body panels, proceed as follows:
- Treat contaminated surfaces with bicarbonate of soda;
- Rinse off the baking soda with hot water - remember that baking soda reacts violently with water, causing profuse foaming;
- After foaming stops, rinse the surfaces with clean water and let them dry;
- Remove the swollen paint from the treated surfaces;
- Coat surfaces with anti-corrosion paint.
Status Check and Charging
1. Use a hydrometer to measure the density of the battery electrolyte (follow the instructions supplied with the device). Compare the measurement results with the normative data:
| Hydrometer readings | Charge level |
| 1.110÷1.130 | Fully discharged |
| 1.140÷1.160 | Almost empty |
| 1.170÷1.190 | Depleted by about a quarter |
| 1.200÷1.220 | Half discharged |
| 1.230÷1.250 | Approximately three-quarters charged |
| 1.260÷1.280 | Fully charged |
The data are given for an electrolyte temperature of 20°C. For every 10°C above 20°C, add 0.007 to the indicated values. For every 10°C decrease in temperature relative to 20°C, subtract 0.007.
Note. It is not possible to take a correct reading of the electrolyte density if distilled water has recently been added to the jars. If the electrolyte level drops below the top of the plates, add water to the battery, then recharge the battery before measuring the specific gravity of the electrolyte.
2. If the battery level is insufficient, charge using one of the commercially available types of charger:
- Disconnect the negative and positive wires from the battery (in that order);.
- Check the electrolyte level in the jars, top up with distilled water if necessary;
- Remove the filler caps from the battery;
- Proceed further in accordance with the charger manufacturer's instructions.
3. If the battery does not perform well after charging, it should be sent for load testing using special equipment to the nearest automotive electrical repair shop. A load test combined with a specific gravity measurement will provide an adequate assessment of the battery's performance.