


Table of contents: Removal ↓ Installation ↓
Caution: Do not remove the coolant expansion tank cap while the engine is hot. Hot coolant may squirt out under pressure and cause serious burns.
Removal
1. Remove the battery.
2. Remove the breather hose.
3. Remove the air intake duct.
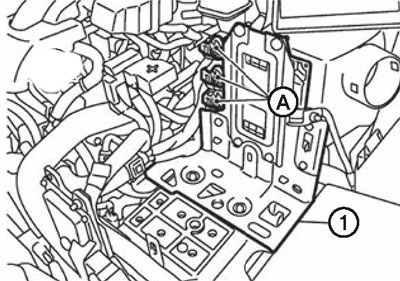
4. Disconnect the connector (A) and remove the bracket (1).
5. Remove the air filter housing.
6. Drain the coolant.
7. Remove the dipstick for checking the level of the variator working fluid.
8. Remove the filler pipe from the variator assembly.
9. Remove the sealing ring from the variator filler pipe.
10. Disconnect the working fluid cooler hose from the variator assembly.
11. Disconnect the following wire connectors:
Variator connector (A).
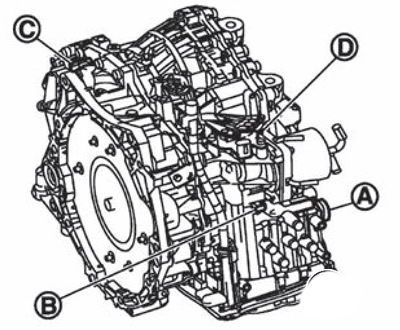
Primary speed sensor connector (B).
Secondary speed sensor connector (C).
PNP sensor connector (D).
12. Remove the wiring with holders from the variator assembly.
13. Remove the variator water hose.
14. Remove the control cables from the variator assembly.
15. Remove the starter.
16. Using a power tool, remove the engine oil pan.
17. Turning the crankshaft, unscrew the four fastening nuts (indicated by the arrow in the figure) drive disk to the torque converter.
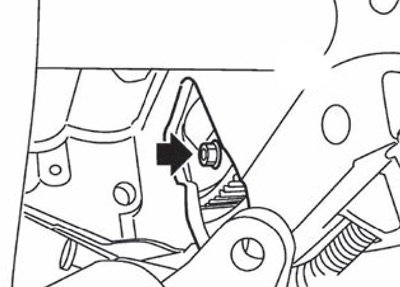
Note: Turn the crankshaft clockwise when looking at the engine from the front.
18. Remove the front exhaust pipe.
19. Separate the cash register.
20. Remove the front drive shafts.
21. Remove the front suspension subframe from the vehicle.
22. Using a power tool, remove the transfer case assembly from the variator.
23. Support the variator assembly with a transmission jack.
Caution: When installing the transmission jack, be careful not to place it under the drain plug.
24. Support the engine assembly with a transmission jack.
Caution: When installing the transmission jack, be careful not to place it under the drain plug.
25. Remove the left engine mounting insulator.
26. Loosen the bolts securing the variator to the engine.
27. Remove the variator assembly from the vehicle.
Attention.
- Secure the torque converter to prevent it from falling out.
- Securely fix the variator assembly on the transmission jack.
28. Remove the heater thermostat.
Installation
Installation is carried out in the reverse order of removal.
Note: When installing the CVT to the engine, make sure the pins are installed (indicated by arrows in the figure) inserted into the engine.
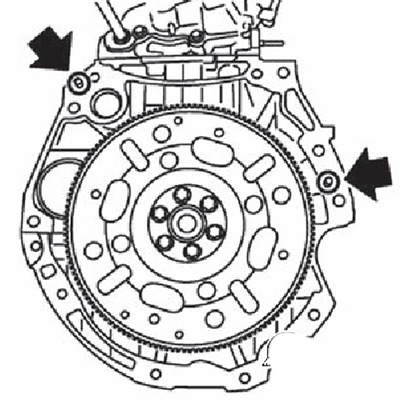
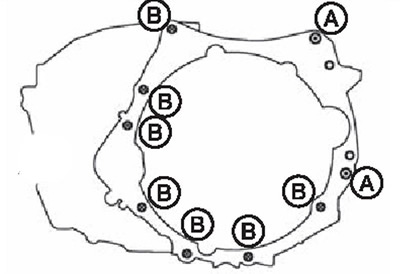
Note: When installing the variator on the engine, install the mounting bolts according to the tables below.

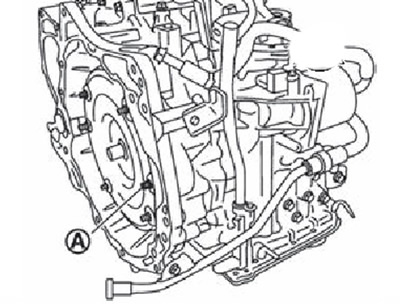
Screw the mounting pin (A) onto the torque converter mounting stud on the drive disk (special tool 31197Sa000).

If there is no special locating pin, turn the torque converter so that the stud (A) for the locating pin aligns with the starter installation location.
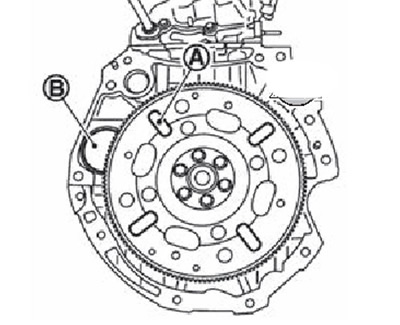
Turn the crankshaft so that the hole (A) for inserting the guide pin of the drive disk is aligned with the installation position (B) of the starter.
Note: If the drive plate guide pin is not used, insert the torque converter stud into the drive plate hole, aligning the hole with the torque converter. It is necessary to take into account the fact that the stud inserted into the drive plate hole installed does not match the torque converter stud.
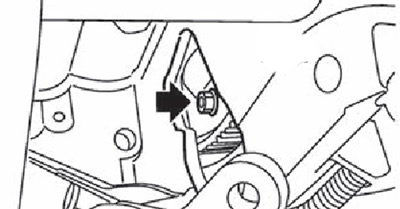
Aligning the position of the mounting nuts (indicated in the figure by an arrow) drive disk with a torque converter, tighten the nuts, and then tighten to a torque of 51 Nm.
Note.
- Turn the crankshaft clockwise when looking at the engine from the front.
- When tightening the torque converter nuts after securing the crankshaft pulley bolts, be careful not to loosen the pulley bolts.
- After installing the torque converter, turn the crankshaft a few revolutions to ensure that the variator rotates freely.