Note. The following is just a description of the withdrawal. Installation is in the reverse order.
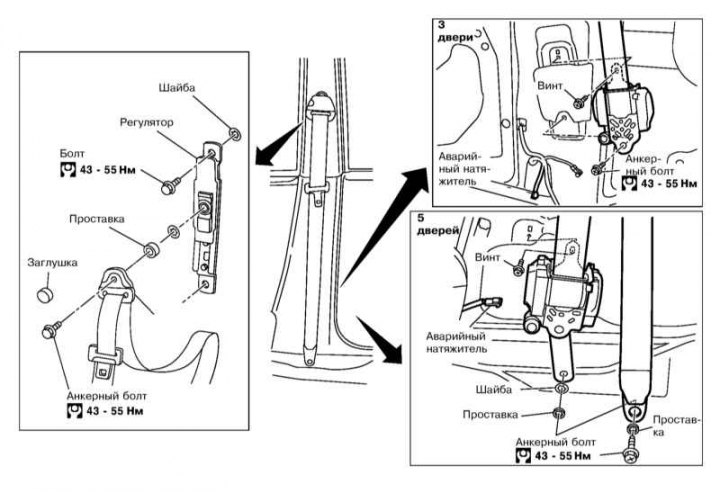
Front seat belt installation components
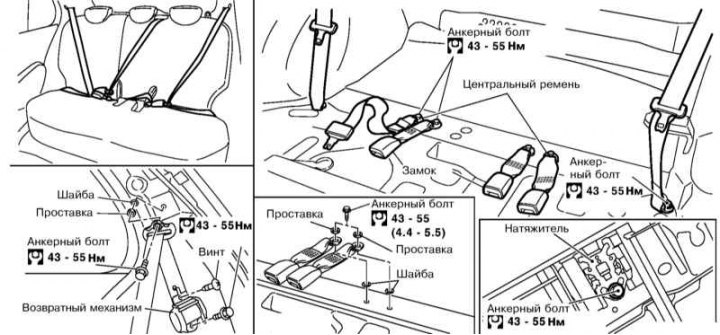
Rear seat belt installation components
On models with emergency seat belt tensioners, observe the following precautions:
- Before removing the tensioner, turn off the ignition, then disconnect the negative and then the positive wire from the battery;
- Repair and disassembly of the tensioner is not allowed;
- Tensioners that have been impacted, dropped to the floor, or damaged (dents, cracks) must be replaced without fail;
- To remove the tensioner block, the use of a percussion tool is not allowed;
- It is not allowed to use lubricants, cleaners or any similar means and expose the tensioner to temperatures above 100 degrees;
- After the pretensioner has been deployed, the seat belt must be replaced complete with the pretensioner.
Front belt tensioner
1. Remove the plug and unscrew the anchor bolt.
2. On 5-door models, remove the lower section of the B-pillar facing, and on 3-door models, remove the rear side trim section.
3. Disconnect the emergency tensioner connector.
4. Turn out a bolt of fastening of an emergency tensioner and the bottom anchor bolt.
5. Remove tensioner assembly.
Front belt buckle
1. Remove the front seat (see Section Removal and installation of a forward seat).
2. Detach the seat belt sensor harness connector retainer from the rear of the seat cushion.
3. Remove the inner trim panel of the seat cushion.
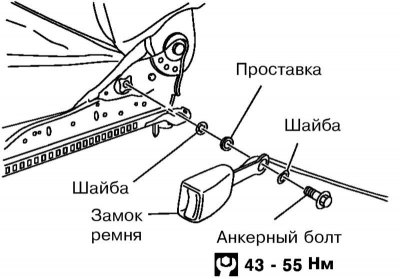
4. Turn out an anchor bolt and remove the lock.
Rear belt
1. Remove the rear seat cushion (see Section Removal and installation of a back seat).
2. Remove interfering trunk trim components (see Section Removal and installation of other finishing panels).
3. Remove the top and bottom anchor bolts.
4. Align the tensioner mounting screw and belt anchor bolt and remove the belt assembly.
5. If necessary, unscrew the bottom anchor bolt and remove the belt buckle.