Side compartment components
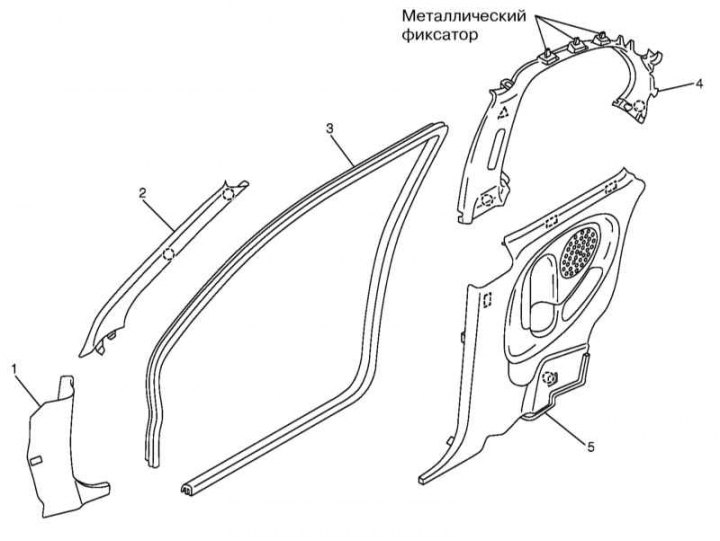
Side compartment components 5-door models
1/2 - Lower/upper A-pillar trim section; 3/7 - Front / rear door trim; 4 - Overlay of a threshold of a forward door; 5/6 - Upper/Lower B-Pillar Trim Section
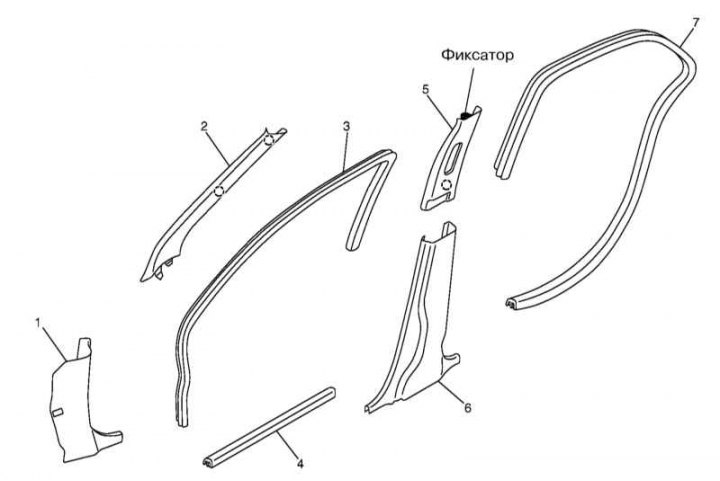
Side Trim Components for 3-Door Models
1/2 - Lower/upper A-pillar trim section; 3 - Front door trim; 4 - Rear window trim; 5 - Rear side trim section
1. To remove trim panels, release them from their latches. If necessary, remove adjacent trim components.
2. To remove the upper B-pillar trim, you must first remove the upper seat belt anchor (see Section Removal and installation of forward seat belts).
3. To remove the rear side section of the interior trim, first remove the seat cushion.
4. To remove the rear window trim, first remove the rear side trim section, the upper side trim section of the luggage compartment, and the upper seat belt anchor (see Section Removal and installation of forward seat belts).
5. Installation is carried out in the reverse order. Use new clamps and make sure that the panels are firmly attached to them.
Ceiling finish
Ceiling trim installation components
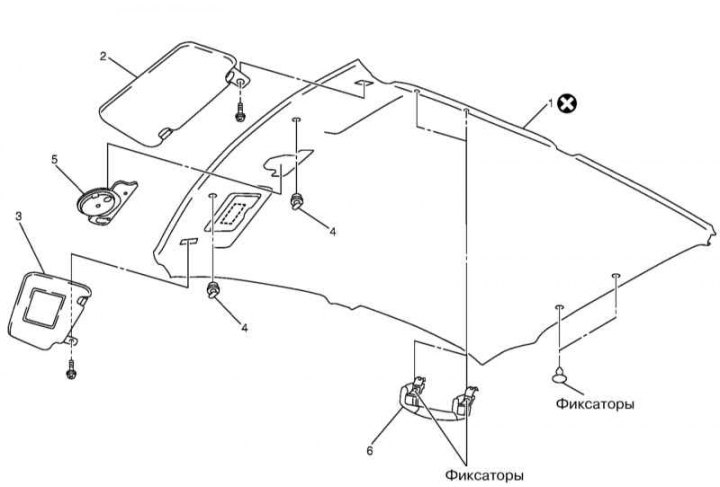
1 - Ceiling decoration; 2, 3 - Sun visors; 4 - Holders for sun visors; 5 - Cabin lamp; 6 - Ceiling handle
1. Remove the upper A-pillar trim sections and tailgate opening seal.
2. Remove the upper side sections of the luggage compartment trim
3. Remove the ceiling handles by pressing their latches towards the passenger compartment.
4. Remove sun visors and interior light (see chapter Onboard electrical equipment).
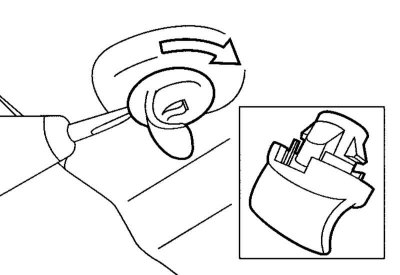
5. Remove the sun visor holders by inserting a screwdriver into the slot and turning it 90 degrees.
6. Release the panel from the rear holders, cut the adhesive tape and remove the headlining trim panel.
7. Installation is carried out in the reverse order.
Luggage compartment trim
Trunk Trim Components
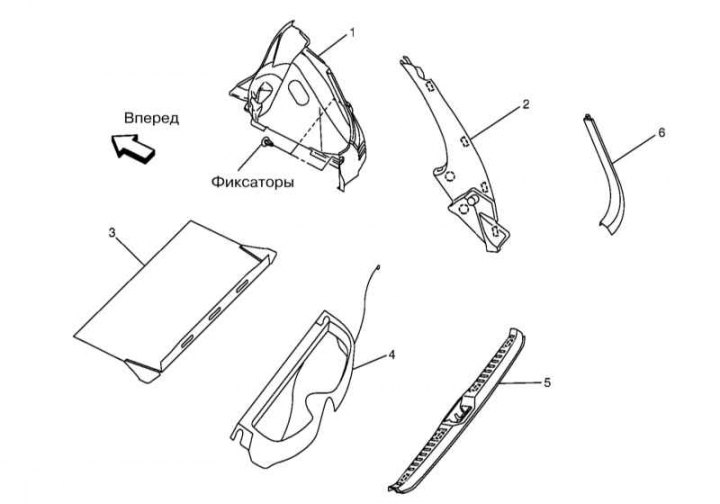
1, 2 - Lower / upper side section of the luggage compartment trim; 3 - Floor covering of the luggage compartment; 4 - Finishing the rear shelf; 5 - Lower lining of the tailgate opening; 6 - Rear luggage compartment trim panel
1. To remove trim panels, release them from their latches. If necessary, remove adjacent trim components.
2. To remove the lower side section, you must first remove the backrest and rear seat cushion (see Section Removal and installation of a back seat).
3. Installation is carried out in the reverse order. Use new clamps and make sure that the panels are firmly attached to them.