20.1 On 4-cylinder engines, install an oil separator with a screen before assembly
2. Turn out bolts of covers, get covers and spread out them in an order of their installation. Remove the old main bearing shells from the covers and cylinder block and wipe the covers and beds clean.
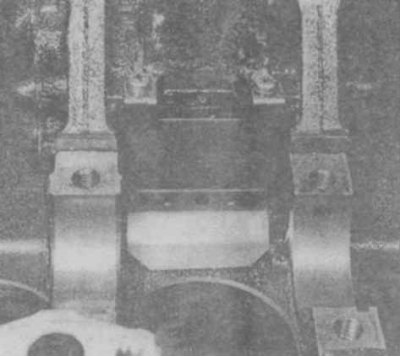
3. Clean the outer surface of the new main bearings with oil grooves and install them in the bed of the cylinder block. Insert the appropriate matching inserts into the covers. Make sure the protrusion on the liner aligns with the notch on the block or on the cover. In addition, the oil passage hole in the bed of the cylinder block must align with the hole in the liner (photo).
20.3 Liners in the cylinder block
Attention! It is not allowed to install the insert in places, by hammer blows, as well as scratching during installation.
Attention! Do not lubricate the insert at this stage.
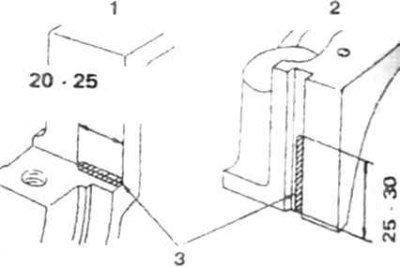
4. On V6 engines, a shouldered liner is installed in the rear cover and cylinder block bed; on 4-cylinder engines, such an insert is installed in the middle cover.
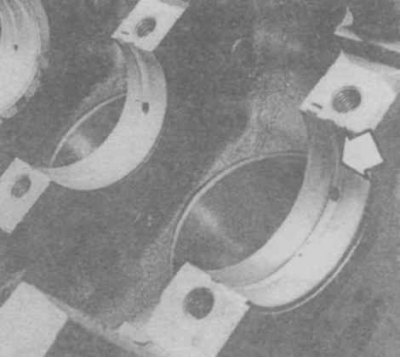
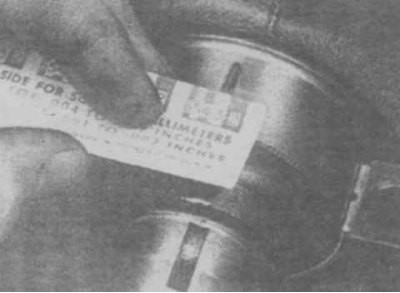
5. Install the crankshaft and measure the clearances in the main bearings. To do this, put a piece of calibration wire on each crankshaft main journal parallel to its axis (photo). Clean the surfaces of the liners in the covers, install the covers and tighten the bolts in three steps to the specified torque in the sequence shown (photo). Unscrew the bolts and carefully lift the covers, compare the thickness of each of the crushed wires with the scale on the package and determine the gap (photo).

20.5a Pieces of gauge wire for measuring clearances in main bearings
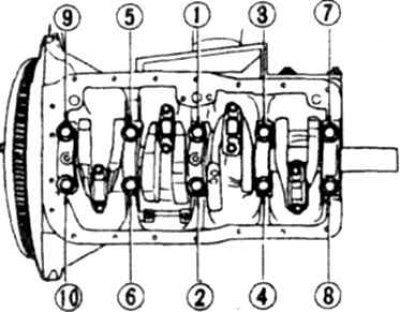
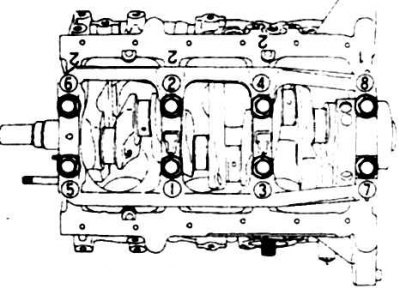
20.5b Bolt tightening sequence for main bearing caps on 4-cylinder engines
20.5v Cap bolt tightening sequence on V6 engines
20.5g Determination of clearance in main bearings
6. If the gap is not correct, then the reason may be the wrong selection of the size group of the liners. Make sure that there is no dirt or oil between the bearings and the surfaces of the covers when measuring. If the width of the crushed wire at the ends is very different, then the crankshaft main journal has a taper.
7. Remove the remnants of the wire from the necks and remove the crankshaft.
8. Lubricate the crankshaft main journals and install in the cylinder block. Reinstall the covers so that the arrows point towards the front of the engine. On 4-cylinder engines, the rear cover is installed with sealant (photo).
20.8 Installing the rear cover on 4-cylinder engines
1. Cylinder block; 2. Back cover; 3. Places for applying sealant
9. Tighten the bolts in three steps to the specified torque.
10. Install the pilot bearing in the crankshaft (on vehicles with manual transmission).
11. Check up freedom of rotation of the crankshaft.
12. Check the end play of the crankshaft (see above).
13. On 4-cylinder engines, install side seals (photo).
20.13 Installing the side seal on 4-cylinder engines