Examination
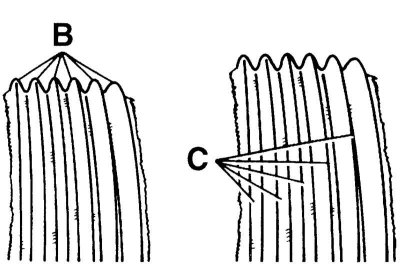
Wear on the edges of the ribs of the drive belt
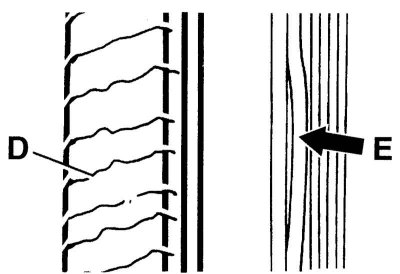
Transverse cracks (D) on the reverse side of the belt and detachment of the ribs (E)
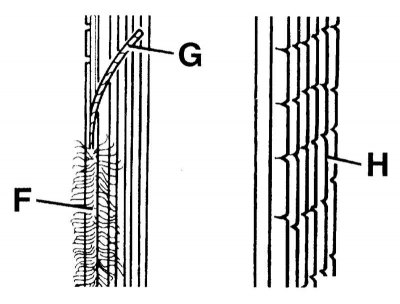
Flaking of the side ribs (F), cracks (H) and detachment of lateral ribs (G)
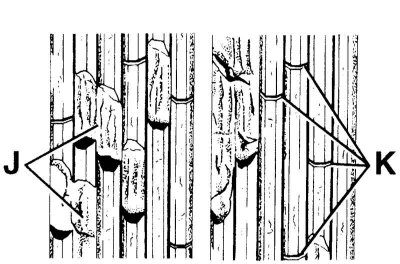
Rib separation (J), cracks (K)
Drive belt tension (wedge or multi-ribbed) is automatically adjusted, but it should be checked periodically along with the condition of the belt.
1. Run your fingers along the entire length of the belt, feeling for cracks or splits. Also check the belt for scuffs and polished areas. The belt should be inspected from both sides, which implies the need to twist it. Along the way, check for rust, cracks and burrs on the pulleys. On the working surface of the belt, the presence of shallow perpendicular cracks is allowed. If these cracks do not go beyond the boundaries of one rib and are not very deep, there is no need to replace the belt.
2. Make sure that the belt is correctly positioned on the pulleys.
3. Replace drive belt if necessary (see chapter Engine).
4. The tension is checked using a special tool in the places indicated in the illustrations in Specifications.
Tension adjustment
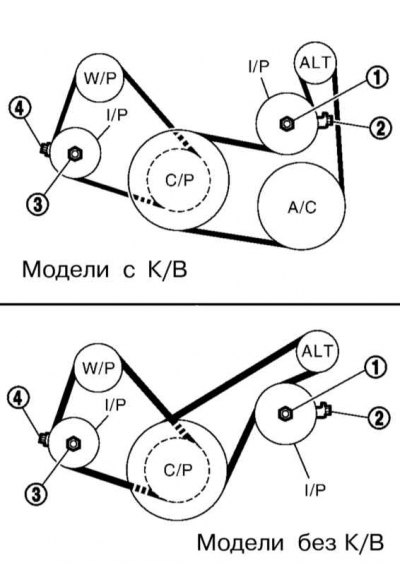
W/P - Water pump; I/P - Intermediate roller; C/P - Crankshaft; ALT - Generator; A/C - A/C compressor; 1.3 - Locknut; 2.4 - Adjusting bolt
1. Belt tension is adjusted using the tensioner adjusting bolt.
2. Remove the locker of the right wheel arch and give the locknut of the intermediate pulley.
3. Tighten the locknut by hand and loosen it a half turn counterclockwise.
4. Adjust belt tension (see Specifications), by turning the tensioner adjusting bolt.
5. Tighten the locknut to 24.5÷31.4 Nm.
6. Turn the crankshaft 2 turns clockwise and check the belt tension again.