
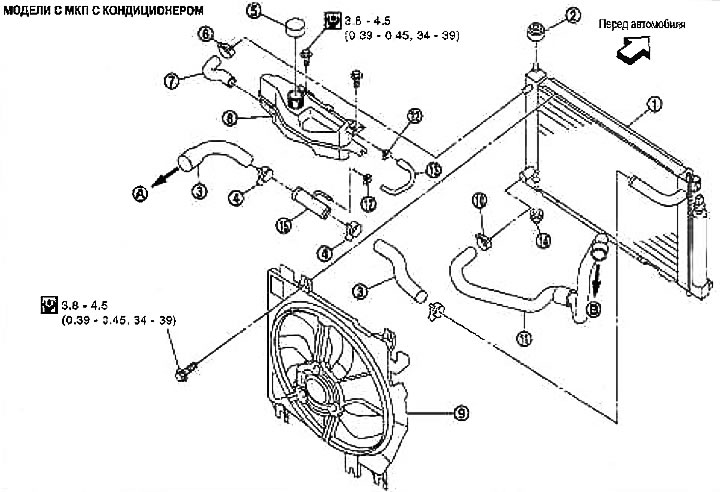
1. Cooling fan assembly; 2. Hose clamp; 3. Radiator hose (upper); 4. Radiator; 5. Radiator cap; 6. Rubber cushion (upper); 7. Rubber cushion (lower); 8. Radiator hose (lower); 9. Bracket; 10. Tank cover; 11. Tank; 12. Reservoir hose; A. To the outlet; B. To suction tube; C. To radiator
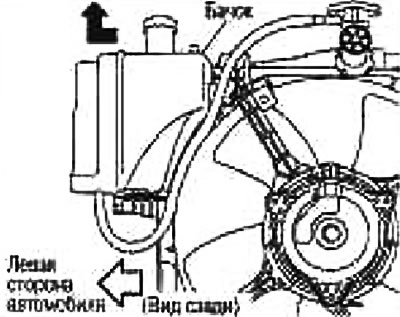
1. Radiator; 2. Rubber cushion (upper); 3. Radiator hose (upper); 4. Hose clamp; 5. Tank cover; 6. Hose clamp; 7. Reservoir hose; 8. Tank; 9. Cooling fan in; 10. Hose clamp; 11. Radiator hose (lower); 12. Hose clamp; 13. Reservoir hose; 14. Rubber pad (lower); A. To the outlet; B. To the suction tube
Removing
1. Disconnect both cables from the battery.
2. Drain the coolant.
Caution: Drain the coolant when it is cold. Do not remove the radiator cap when the engine is hot. High-pressure coolant splashing out of the radiator can cause severe burns.
3. Turn off fixing bolts and shift a box of the relay.
4. Remove the following components:
- Tank (on models with manual gearbox with air conditioning);
- Radiator grill. See chapter Body;
- Radiator core support (top). See chapter Body;
- Wiring connectors;
- Air duct. See chapter Mechanical part of the engine.
5. Disconnect the upper and lower hoses from the radiator.
6. Disconnect the automatic transmission fluid cooler hose.
7. Remove the tank (on models with manual gearbox with air conditioning).
Separate the tank from the fan shroud. Applying force in the direction of the left side of the car, remove the tank upwards.
8. Remove the cooling fan assembly from the heatsink.
Installation
Installation is carried out in the reverse order of removal, taking into account the following:
When installing the radiator core support (bottom) make sure that the upper and lower supports for the radiators of the air conditioner condenser fit into the mounting holes of the radiator core supports (top/bottom).