Removing
1. Drain the coolant.
Caution: Do not remove the radiator cap when the engine is hot. High-pressure coolant splashing out of the radiator can cause severe burns.
Drain the coolant when it is cold.
2. Turn the front wheels to the right.
3. Remove the protective pad of the front fender (right). See chapter Body.
4. Before loosening the drive belt, loosen the water pump pulley mounting bolts.
5. Remove the drive belt. See chapter Mechanical part of the engine.
6. Remove the water pump pulley.
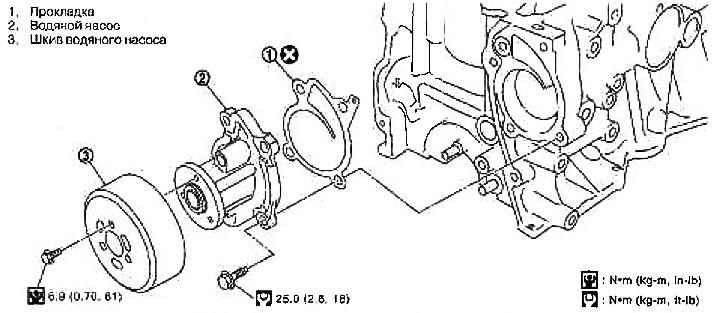
7. Remove the water pump.
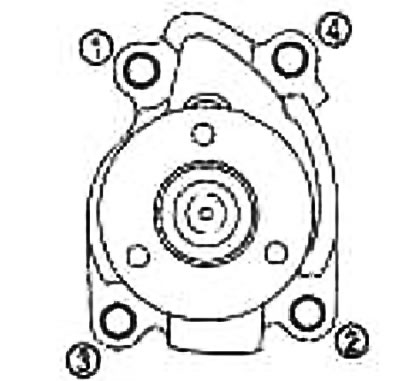
Loosen the mounting bolts in the reverse order shown in the figure.
When removed, the coolant remaining in the engine will pour out. Collect it in a container.
Attention:
- Do not allow water pump vanes to come into contact with other components.
- The water pump cannot be disassembled and must be replaced as an assembly.
Check after removal
Check that there is no significant contamination or rust on the water pump body and on the vanes.
Check for play on the blade shaft. Check if the shaft rotates freely by hand.
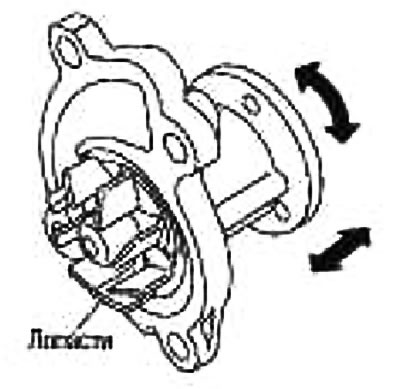
If abnormality is found, replace the water pump.
Installation
Installation is carried out in the reverse order of removal, taking into account the following:
Water pump installation
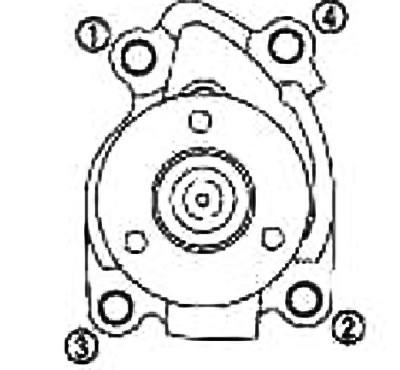
Tighten the mounting bolts in the order indicated by the numbers in the figure.
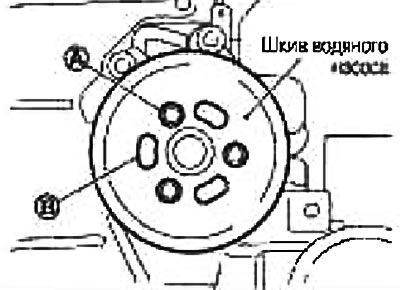
Water pump pulley
Attention: Do not insert mounting bolts (A) into oval holes (IN).
Check after installation
Check for engine coolant leaks using the radiator cap adapter (special tool: EG17650301) and pump (suitable tool) (models without air conditioning) or with a pump and an adapter for the reservoir cap (models with air conditioning).
Start the engine and warm it up to normal operating temperature. Perform a visual check to make sure there are no coolant leaks.