Removing
1. Remove the protective pad from the front right fender. See chapter Body.
2. Loosen locknut (A) tension pulley and adjust the belt tension by turning the adjusting bolt (IN).
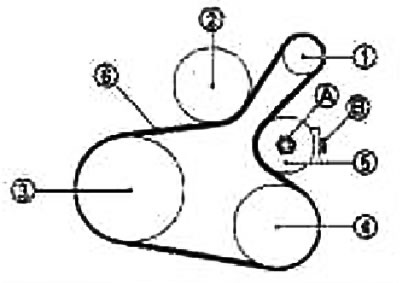
1. Generator; 2. Water pump; 3. Crankshaft pulley; 4. Air conditioner compressor (on models with air conditioning);Idler pulley (on models without air conditioning); 5. Idler pulley; 6. Drive belt
3. Remove the drive belt.
Installation
1. Press the idler pulley in the loose direction and tighten the lock nut (A) by hand with the following torque: 4.4 Nm (0.45 kg m)
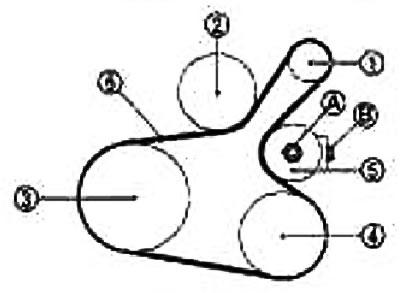
1. Generator; 2. Water pump; 3. Crankshaft pulley; 4. Air conditioner compressor (on models with air conditioning); Idler pulley (on models without air conditioning); 5. Idler pulley; 6. Drive belt
Note: Do not loosen the locknut from the tightened position.
2. Slide the drive belt over the pulleys.
Caution: Do not allow oil, grease and coolant to enter the pulley groove. When putting on the belt, make sure that it sits correctly in the groove on each pulley.
3. Adjust the belt tension by turning the adjusting bolt (IN). See section «Tension adjustment».
Caution: Adjust the belt tension while the locknut is hand-tight in step 1 so that the idler pulley does not tilt. When measuring the belt tension immediately after installing it, first adjust it to the standard value. Then crank the crankshaft more than two turns and re-adjust to the standard value, eliminating the variation in the amount of belt deflection between the pulleys.
4. Tighten locknut (A)
Tightening torque: 34.8 Nm (3.5 kg m)
5. Make sure the belt tension is correct.