


Table of contents: Disassembly ↓ Assembly ↓ Checking the radiator cap (on all…↓ Checking the tank cap (on models…↓ Radiator check ↓ Checking the cooling system hoses ↓
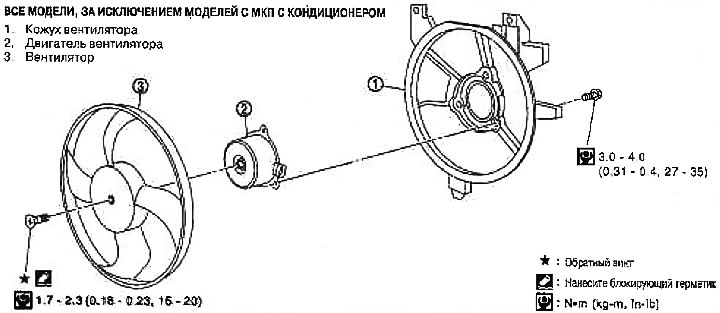
1. Fan shroud; 2. Fan motor; 3. Fan
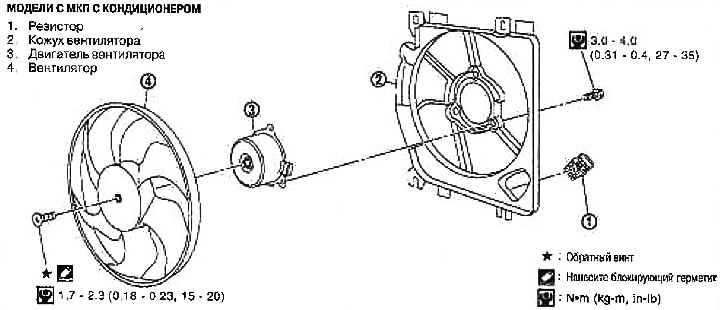
1. Resistor; 2. Fan shroud; 3. Fan motor; 4. Fan
Disassembly
1. Remove the fan.
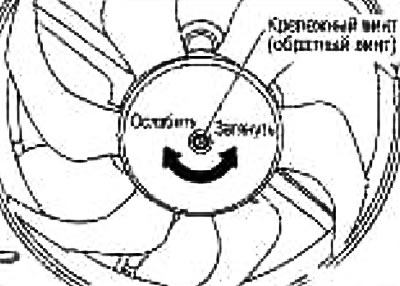
Note: The reverse screw is used to fix the fan. When removing or installing, rotate the screw in the opposite direction to the normal screw.
2. Remove the fan motor from the casing
Assembly
Assembly is performed in the reverse order of disassembly.
Apply locking sealant and tighten the screw.
Checking the radiator cap (on all models, except models with manual transmission and air conditioning).
1. Pull the vacuum valve to open it and make sure it closes completely when released.
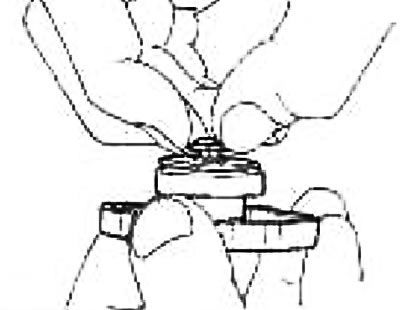
Make sure the radiator cap vacuum valve seat is free of dirt and damage.
Make sure that there are no abnormalities when opening and closing the vacuum valve.
2. Check the cap release pressure.
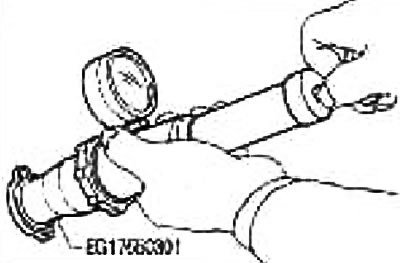
Standard: 78-98 kPa (0.8-1.0 kg/cm²)
Limit: 59 kPa (0.6 kg/cm²)
When connecting the radiator cap to the pump, apply water or engine coolant to the cap seal.
If the vacuum valve is abnormal or the opening pressure is not normal, replace the radiator cap.
Caution: When installing the radiator cap, thoroughly wipe the radiator neck and remove waxy deposits and foreign particles.
Checking the tank cap (on models with manual transmission and air conditioning)
Attach the adapter to the pump as shown in the figure.
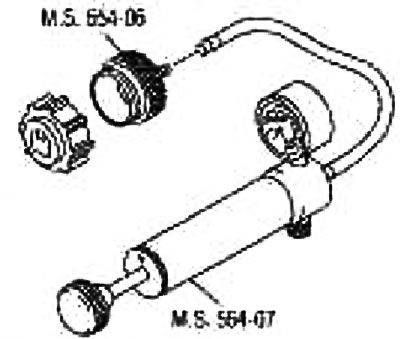
When connecting the reservoir cap to the pump, apply water or engine coolant to the cap seal.
Check the tank cap release pressure.
140 kPa (1.43 kg/cm²)
If engine coolant is leaking through the cap or there are signs of leakage, replace the reservoir cap.
Radiator check
Check if the radiator is clogged with dirt. If necessary, clean the radiator as follows:
Do not bend or damage the radiator fins.
When cleaning the radiator without removing it from the vehicle, remove all adjacent parts, such as the cooling fan shroud and horns. Wrap the wiring and connectors with protective tape to prevent water from getting in.
1. Water the radiator core from the back side with water from a hose vertically downwards.
2. Again, pour water over the entire surface of the radiator core once per minute.
3. Stop watering if dirty water no longer flows from the radiator.
4. Blow air through the radiator core from the back side vertically downwards.
Apply compressed air at a pressure below 490 kPa (5 kg/cm²) and at a distance of more than 30 cm.
5. Blow air over the entire surface of the radiator core again once per minute until no more water comes out.
Checking the cooling system hoses
Check that the hoses are connected correctly, that there are no leaks, cracks, chafing, wear, or looseness.