Attention! Proceed with the procedure only after the final cooling of the power unit.
Upper section of the inlet pipeline (injection chamber)
1. Relieve the pressure in the supply system (see chapter Power and exhaust systems).
2. Disconnect the negative cable from the battery.
Attention! If the stereo system installed in the car is equipped with a security code, before disconnecting the battery, make sure that you have the correct combination to activate the audio system!
3. Remove the intake duct (see chapter Power and exhaust systems).
4. Remove ignition coils (see chapter Engine electrical equipment). Mark and disconnect the hoses and wiring harnesses attached to the injection chamber and throttle body.
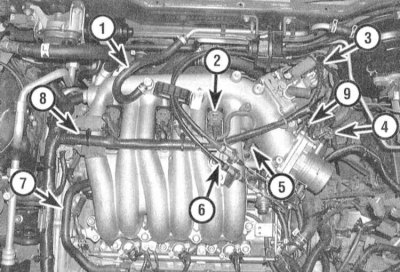
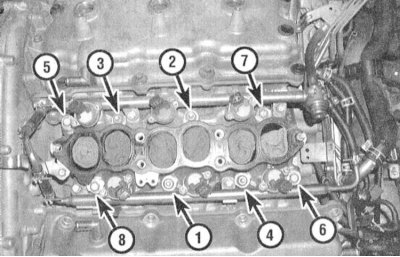
1 - Hose of the vacuum brake booster; 2 - Ignition coils; 3 - Wiring for the IAC valve / quick idle speed solenoid valve; 4 - TPS / throttle closed position switch; 5 - PCV valve hose; 6 - Gas/tempostat cables; 7 - Breather pipes; 8 - Wiring harnesses; 9 - Coolant hoses
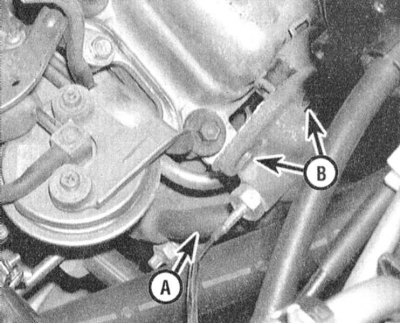
5. Remove the EGR guide tube and upper intake manifold support brackets from the rear of the upper plenum chamber.
Note. Access to the EGR guide tube and pipe brackets is extremely limited.

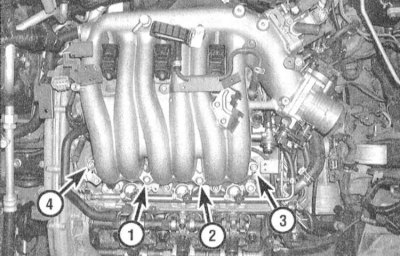
6. Acting in the reverse order shown in the illustration, loosen the bolts securing the upper section of the inlet pipeline. Remove the upper pressure chamber with the throttle body connected to it.
7. Before installing the top section, thoroughly clean the mating surfaces of the pipeline and the top delivery chamber. After completely removing traces of the old gasket and sealant from the surfaces, wipe them with a rag soaked in solvent.
8. Put a new gasket on the intake manifold studs (mark ahead), then place the upper injection chamber on top of the lower section of the pipeline and, moving in a strictly defined order, tighten the fixing bolts with the required force. Further installation is carried out in the reverse order of the dismantling of the components.

Lower section of the inlet pipeline
1. Remove the top section of tubing.
2. Mark and disconnect all hoses and electrical wiring interfering with the dismantling of the lower section.
3. Remove the fuel line with injection injectors from the pipeline (see chapter Power and exhaust systems).

4. Acting in the reverse order shown in the illustration, in several steps (1/4 turn per approach) Loosen the pipeline mounting bolts/nuts until they can be turned out by hand.
5. If pipeline "stuck" and does not lend itself to separation from the cylinder heads, tap it with a hammer through a block of wood.
Attention! Never pry the pipeline with a lever under the mating surface.
6. Thoroughly clean the mating surfaces of the pipeline and cylinder heads, completely removing traces of the old gasket material and sealant from them and then wiping them with a cloth soaked in acetone.
7. Install new gaskets and piping - make sure the components are correctly positioned on the mounting studs. Screw nuts.
8. In a strictly defined order, in several stages, tighten the pipeline fasteners with the required force.
Note. Nut tightening torques are different from bolt tightening torques.
9. Further installation is carried out in the reverse order to the dismantling of the components. Don't forget to fill the cooling system and change the engine oil (see chapter Settings and ongoing maintenance).
10. Start the engine and check for signs of fuel, coolant, and vacuum losses.