


Battery and charging system
Low battery level
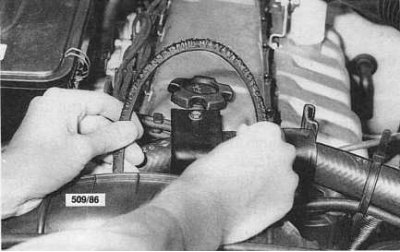
The generator drive belt(s) is broken or loose. Check the condition of the belt (see accompanying illustration). Adjust the tension or replace the belt(s).
The generator voltage regulator is faulty. Replace the defective unit.
The battery is faulty. Install a new, properly charged battery of the correct type.
The generator is faulty. Perform the necessary repairs or replace the generator.
The charging circuit wiring is faulty. Check, make necessary repairs or replace the harness.
The electrical connectors of the charging circuit are faulty. Check, make necessary repairs or replace defective components.
The fuse link has blown. Eliminate the cause of the insert failure, replace the insert.
Note: Check the battery level (specific gravity of electrolyte) batteries (see Chapter Engine electrical systems). If the battery charge is too low, try to identify the cause by following the steps above.
Battery level too high
The generator voltage regulator is faulty. Replace the defective unit.
The generator is faulty. Perform the necessary repairs or replace the generator.
The charging circuit wiring or electrical connectors are faulty. Check, make necessary repairs or replace defective components.
Note: A sign of battery overcharging is the constant boiling of the electrolyte, usually accompanied by its discoloration.
The charge indicator lamp remains on after the engine is started, or the voltmeter registers too low a voltage
The generator drive belt(s) is broken or loose. Check the condition of the belt. Adjust the tension or replace the belt(s).
The generator voltage regulator is faulty. Replace the defective unit.
The generator is faulty. Perform the necessary repairs or replace the generator.
There is a short circuit to ground in the power supply wiring of the control lamp. Check and make any necessary corrections.
The voltmeter is faulty. Perform the necessary repairs or replace the defective device.
Charge indicator light/voltmeter not working
The light bulb burned out. Check, replace.
There is a break in the electrical wiring or the lamp socket is faulty. Check and make necessary repairs.
The generator diode has failed. Make any necessary repairs.
The voltmeter is faulty. Perform the necessary repairs or replace the defective device.
There is noise coming from the drive belt or generator
The drive belt(s) is worn out, or the pulleys are not aligned correctly. Replace belt(s) or align pulleys.
The generator mounting bolts have become loose, or the generator bearings are worn out. Tighten the fasteners or replace the bearings.
The generator drive pulley has become loose. Tighten the pulley nut to the required torque.
The generator diodes are faulty. Make any necessary repairs.
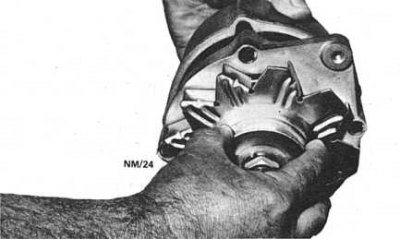
Note: To isolate the source of the noise, loosen the alternator and remove the belt(s). If the noise does not appear for a short time when the engine is started, check the condition of the belt and rotate the alternator manually to check its bearings (see accompanying illustration).
Battery and starting system
The starter does not develop enough power to turn the engine over
The battery is low. Check the charging system for proper operation and perform any necessary repairs.
The battery does not hold a charge. Check the battery condition and replace it if necessary.
The terminals or ends of the battery wires are oxidized, or the fastening of the latter has become loose. Clean and tighten the terminal clamps.
The starter is faulty. Check and make any necessary repairs.
The starter traction relay switch is faulty or the quality of the contacts is poor. Check and replace the traction relay if necessary.
Note: Check the battery charge level and the condition and tightness of all terminal connections. If necessary, check the starter motor for proper operation and make any necessary repairs (see Chapter Engine electrical systems).
Ignition system
The engine does not start
There is a defect in the primary ignition circuit. Check the circuit, make necessary repairs.
The primary or secondary winding of the ignition coil is faulty. Replace the coil.
On 4.2L models, the breaker contacts may be burned or dirty. Clean or replace the contacts, adjust the breaker.
On 3.0L models, the ignition sensor rotor air gap may be incorrectly installed. Make the necessary adjustments.
On 3.0L models, the signal rotor, stator, or control unit may fail. Replace defective components.
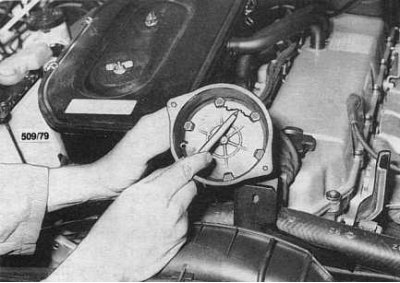
The distributor cap is cracked or there are carbon tracks on the inside of it (see accompanying illustration). Replace.
The distributor runner is cracked. Replace.
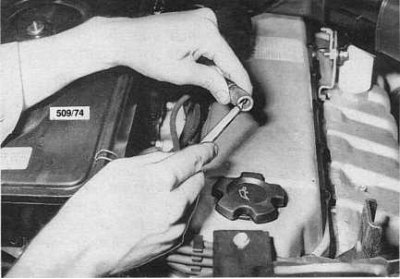
There is a defect in the high voltage wires. Check it out (see accompanying illustration), replace.
The spark plugs are faulty or the interelectrode gap setting is incorrect. Replace or clean the spark plugs and adjust the interelectrode gaps.
On 4.2L models the ballast resistor may fail. Replace the defective component.
Note: Perform the ignition system tests described in the Road Starting Failures Diagnosis Section. If an ignition system failure is detected, check the electrical system (see Chapter Engine electrical systems).
The engine rotates but does not develop the required power
The ignition timing angle setting is incorrect. Check and correct.
The centrifugal ignition timing corrector mechanism is jammed or excessively worn. Perform a major overhaul of the distributor.
The vacuum ignition advance corrector is not functioning. Check the condition of the hoses and the serviceability of the unit.
The vacuum corrector operates with reduced efficiency. The drive rod is disconnected or broken.
The spark plugs are dirty or faulty, or the interelectrode gap setting is incorrect. Replace the spark plugs, or clean them and adjust the interelectrode gap.
On 4.2L models, the breaker contacts may be dirty or misaligned. Clean and adjust the contacts, or replace them.
Condensation has accumulated in the distributor cap. Check, dry the lid and inspect it for cracks and carbon tracks.
The ignition coil is faulty. Check, replace.
The high voltage wires are faulty. Check and replace defective ones.
On 3.0L models, the ignition sensor rotor air gap may be incorrectly installed. Make the necessary adjustments.
On 3.0L models, the signal rotor, stator, or control unit may fail. Replace defective components.
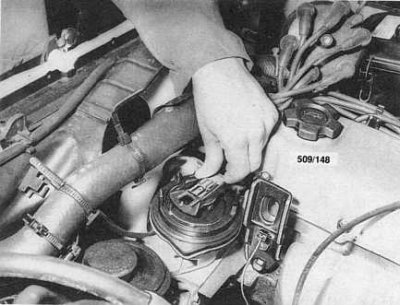
Note: To check the correct operation of the centrifugal ignition advance corrector, remove the distributor cap and turn the runner in the direction of normal rotation. After releasing, the runner should spontaneously return to its original position (see accompanying illustration).
There are misfires in the engine
The spark plugs are dirty or faulty, or the interelectrode gap setting is incorrect. Replace the spark plugs, or clean them and adjust the interelectrode gap.
Condensation has accumulated in the distributor cap. Check, dry the lid and inspect it for cracks and carbon tracks.
The porcelain insulator of one or more spark plugs is cracked.
The ignition coil is faulty. Check, replace.
The high voltage wires are faulty. Check and replace defective ones.
The runner or the speed limiter cover is faulty.