Replacing headlight bulbs
The headlights use replaceable halogen bulbs. Bulbs can be replaced from the engine compartment without removing the headlights.
Attention:
- The bulb of a halogen lamp is filled with gas under high pressure. If the bulb is dropped or scratched, the bulb may burst.
- Do not touch the glass bulb of the lamp with your fingers.
- Use bulbs of the same type and power that were originally installed in the headlights: Bulb type H4, power 55-60W.
- After replacing the lamps, it is not necessary to check and adjust the direction of the headlights. If it is necessary to adjust the headlights, contact a service station.
- Do not leave the headlight without a bulb for a long time. Moisture and dust can get inside the headlight through an open hole. A film of deposits on the reflector and lens will reduce the brightness of the headlight.
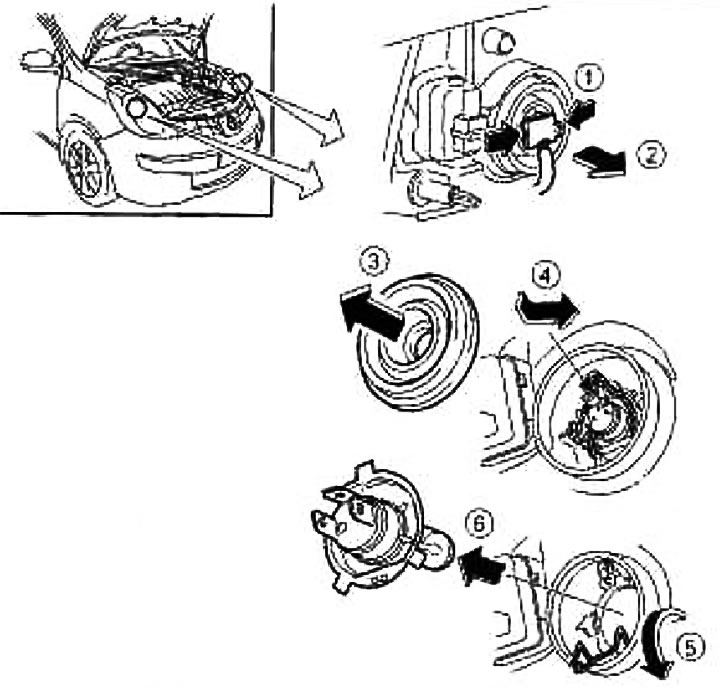
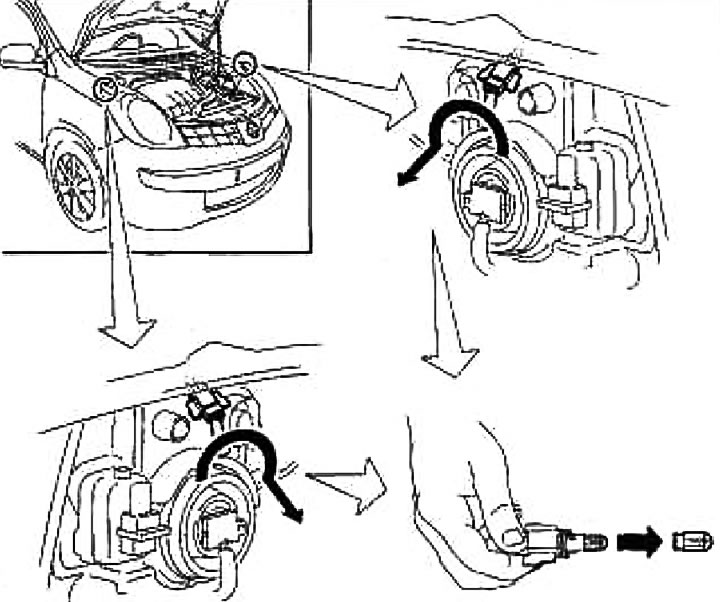
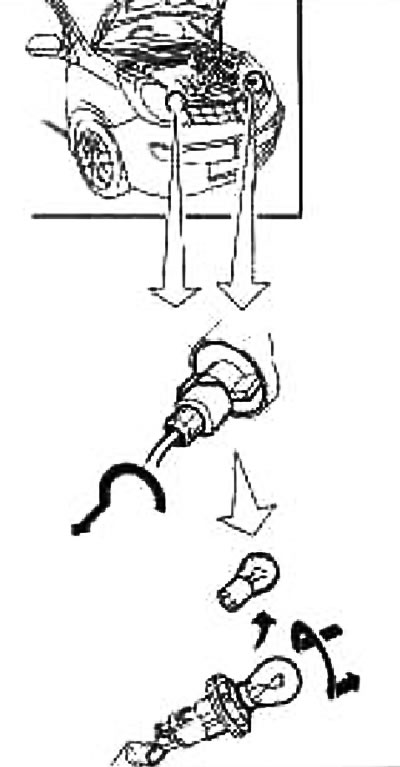
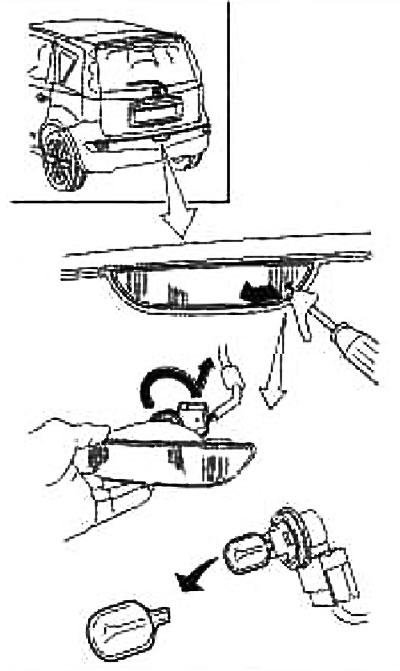
- 1. Open the hood.
- 2. Disconnect «negative» battery wire.
- 3. Disconnect the electrical connector from the lamp base.
- 4. Remove the rubber cover.
- 5. Press and turn the spring holder to release the lamp.
- 6. Remove the bulb from the headlight. Do not pull or rotate the lamp when removing it.
- 7. Install the new lamp following the steps described in reverse order. Check the tightness of the rubber sealing cover.
- 8. Connect «negative» wire to the battery and close the hood.
Note: Moisture may condense on the inside of the headlight and lamp lenses when it rains or when washing the vehicle. This effect is not a malfunction and is due to the temperature difference between the inner and outer surfaces of the headlight and lamp lenses. If large drops of water form inside the lighting fixtures, contact the service center to have them removed.
Replacing lamps in other outdoor lighting fixtures
| Lighting and signaling device | Lamp power, W |
| Front turn signal | 21 |
| Front position lamp | 5 |
| Anti-fog headlight (type H8, if available*1) | 35 |
| Side turn signal repeater | 5 |
| Rear combination lamp | |
| - Rear turn signal | 15 |
| - Stop/side lamp | 21/5 |
| - Reversing lamp | 16 |
| Top brake light | 18 |
| Registration plate lamp | 5 |
| Rear fog lamp | 21 |
*1: Contact a service station for replacement.
Replacing lamps in interior lighting devices
| Name of the lighting device | Lamp power, W |
| Interior lamp/local lamp | 5 |
| Plafond luggage compartment lighting | 10 |
Location of lighting and signaling devices
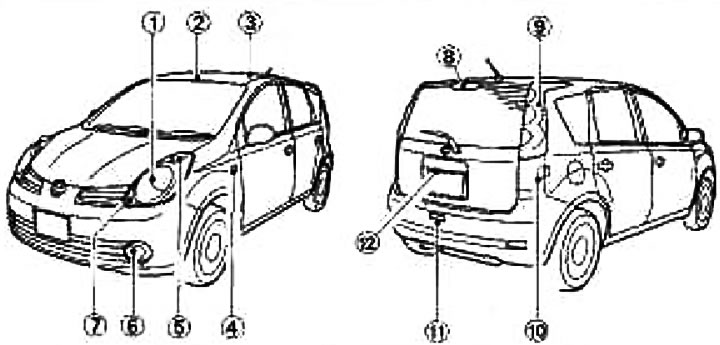
1. Headlight 2. Interior light/local light 3. Interior lampshade / local lampshades (if any) 4. Side turn signal repeater 5. Front position lamp 6. Fog lamp 7. Front turn signal 8. Upper brake light 9. Rear combination lamp 10. Luggage compartment light 11. Rear fog light 12. Registration plate light
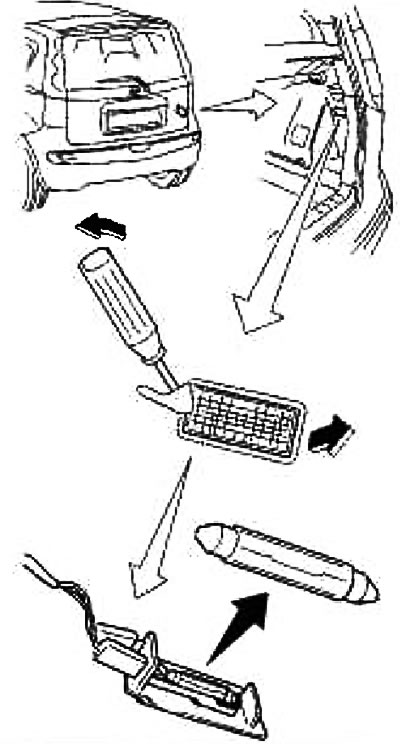
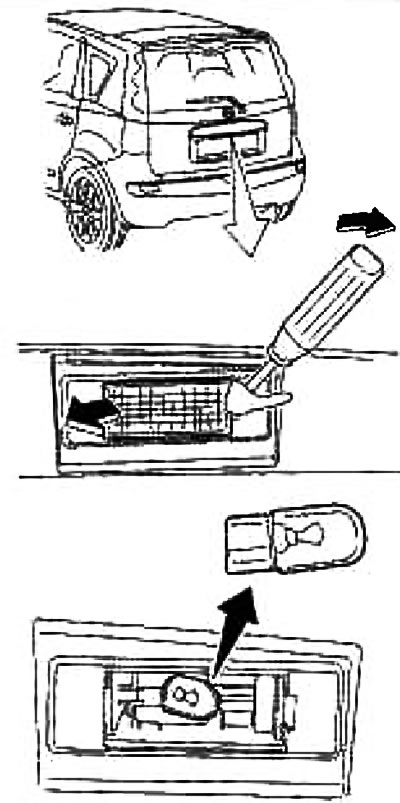
Lamp replacement
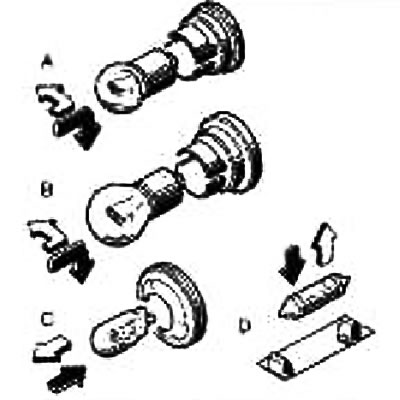
In the rest of the lighting and signaling devices, four types of lamps are used, which are indicated by the letters of the Latin alphabet: A, B, C and D, see fig. When replacing a lamp, first remove the diffuser and/or shroud.
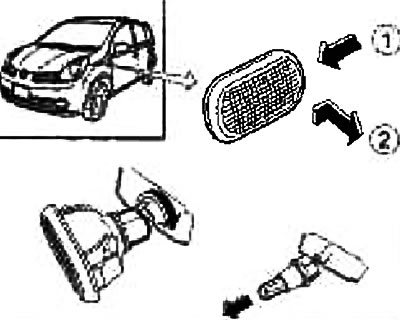
Front position lamp
Front turn signal
Side turn signal repeater
Interior lighting dome (version A)
Plafond for interior lighting and local lighting (version B)
Top brake light
Rear fog lamp
Plafond luggage compartment lighting
Registration plate lamp
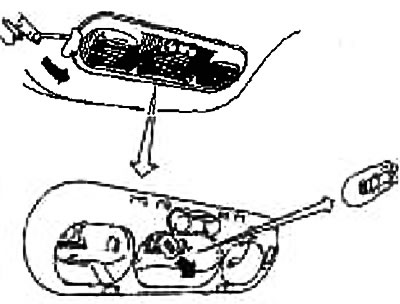
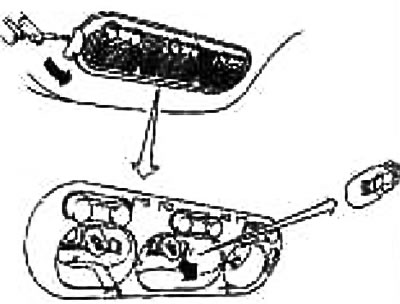
Rear combination lamp
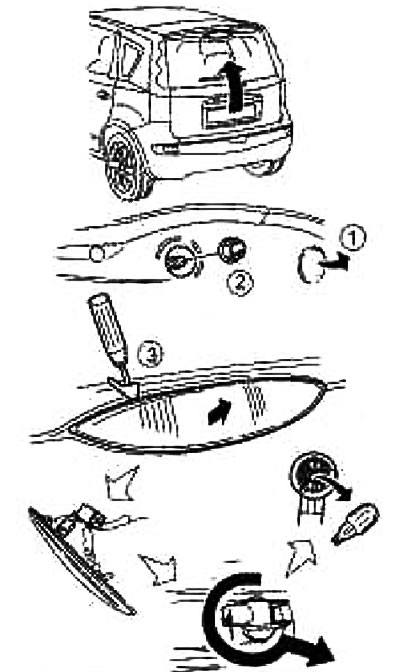
1. Open the tailgate.
2. Loosen the screws ①.
3. Firmly hold the outer edge of the lens ② of the lamp unit and pull it back firmly as shown in the figure.
Attention: The paintwork must be protected when using tools to remove the lens (e.g. tape).
4. Insert a new lamp and check its operation.
5. Install the diffuser in the reverse order of removal (step3).
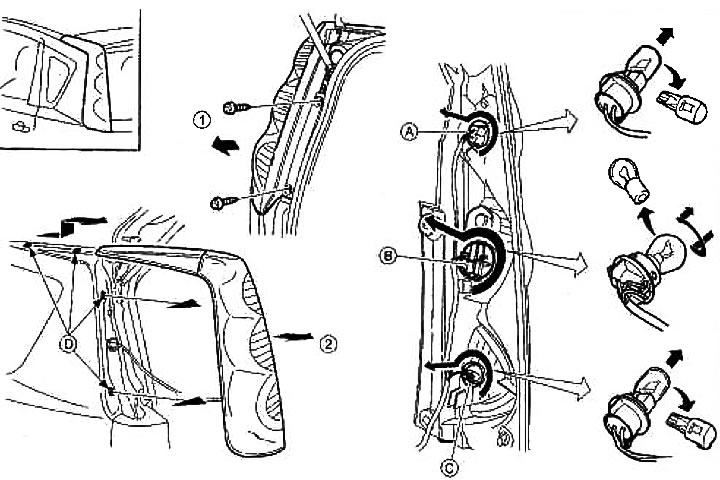
Ⓐ Turn signal
Ⓑ Brake/side light
© Reversing light