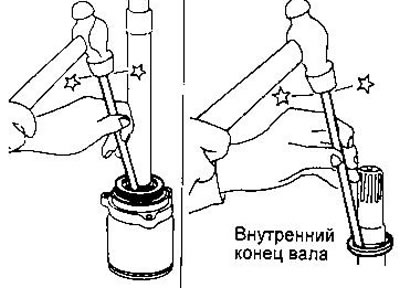
Disassembly
The drive shaft parts are shown in here and here.
From the gearbox side (types TS70C, TS79C, TS83):
1. Remove the clamps from the protective cover.
2. Before disassembling the inner joint, apply alignment marks to the joint housing and drive shaft.
3. Apply marks to the three-spike and shaft.
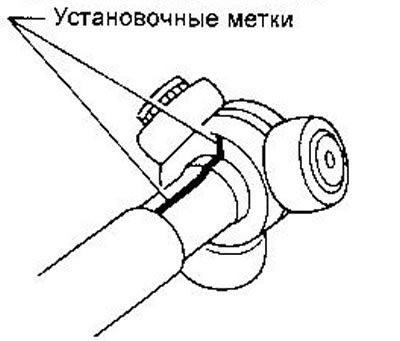
4. Remove the retaining ring and remove the three-spike.
WARNING: Do not disassemble the tri-spike.
5. Pull off the protective cover. First wrap the shaft splines with electrical tape to avoid damaging the cover.
From the gearbox side (type DS83):
1. Remove the clamps from the protective cover.
2. Before disassembling the inner joint, apply alignment marks to the joint housing and collar.
3. Remove the retaining ring A with a screwdriver and remove the hinge housing.
4. Apply alignment marks to the race and drive shaft.
5. Remove the retaining ring C, then remove the race and the ball separator as a unit.
6. Pull off the protective cover. First wrap the shaft splines with electrical tape to avoid damaging the cover.
From the wheel side:
WARNING: The wheel side hinge is a non-removable design.
1. Before removing the outer joint, apply alignment marks to the joint housing and drive shaft.
2. Remove the joint using the appropriate tool. Be careful not to damage the threads on the joint tail.

Thrust bearing:
1. Remove the mudguard ring.

2. Remove the retaining ring.
3. Press the support bearing off the drive shaft together with the holder.
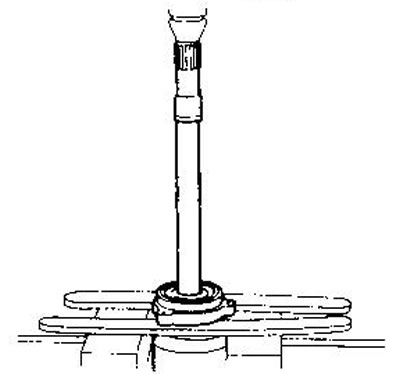
4. You press the support bearing out of the holder.
Examination
Clean all parts thoroughly in solvent and dry with compressed air, then check for deformations and other damage.
Drive shaft. Replace the shaft if it is bent or cracked.
Protective covers. There should be no cracks, signs of wear or abrasion on the covers. When installing the covers, use new clamps.
Internal constant velocity joint. Check the three-spike assembly for damage to the bearings, rollers and washers. Replace the three-spike assembly if necessary.
Check the hinge housing for damage. If necessary, replace the housing together with the three pins and the com.
When replacing only three studs and ka, it is necessary to install parts with the numbers given below. The numbers stamped on the old and new three-studs must match.
Replacing the hinge housing alone is not permitted. It must be replaced together with the three-stud.
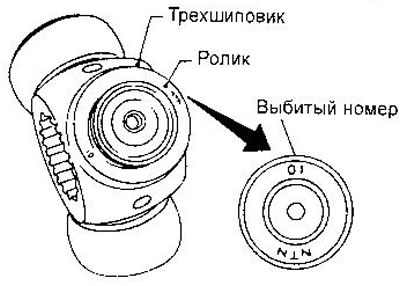
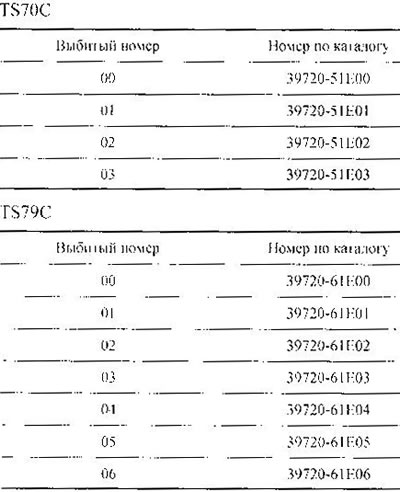
External constant velocity joint. Replace the outer joint assembly if it is deformed or damaged.
Assembly
After assembly, check for binding throughout the entire operating range of the drive shaft. Use NISSAN GENUINE GREASE or equivalent.
Outer hinge:
1. Place the protective boot and new small clamp on the drive shaft. Wrap the shaft splines with electrical tape to prevent damage to the boot during installation.
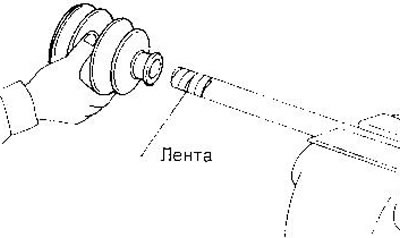
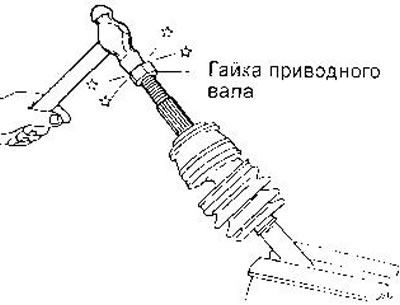
1. Press the outer joint onto the shaft, lightly tapping the end of the joint housing with a hammer. When installing, ensure that the marks made during disassembly are aligned.
3. Place the specified amount of grease into the hinge housing and protective cover:
- ZF80 - 15 g
- ZF90 — 115-135 g
- BF83 — 85-115 g
4. Make sure that the protective boot is correctly installed in the groove of the drive shaft. The boot should not be twisted or deformed.
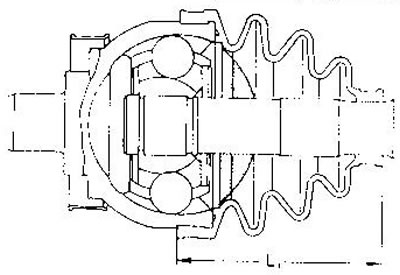
Distance L ₁:
- ZF80 — 90.5-92.5 mm
- ZF90 — 96-98 mm
- BF83 — 94-95 mm
5. Secure the large and small clamps using suitable tools.

Dynamic Damper:
1. Use new clamps when installing
2. Install the damper on the inner hinge side.
[Data copied from web resource www.NISSANBOOK.ru]
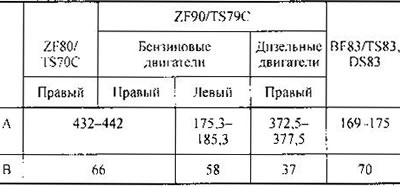
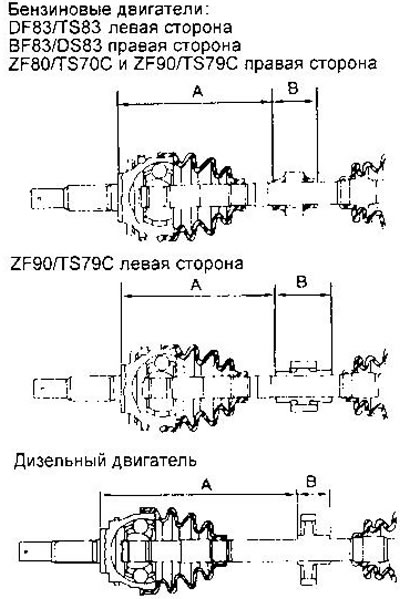
Installation dimensions, mm:
Outer hinge (type TS70C, TS79C, TS83):
1. Place the protective boot and new small clamp on the drive shaft. Wrap the shaft splines with electrical tape to prevent damage to the boot during installation.
2. Place the three-spike onto the shaft, aligning the marks made during disassembly.
3. Install a new retaining ring.
4. Apply the specified amount of grease to the hinge housing and protective cover:
- TS70C — 110-120 g
- TS79C — 155-165 g
- TS83 — 130-150 g
5. Install the hinge housing.
6. Put on the protective cover. The cover must be installed without twisting or deformation.
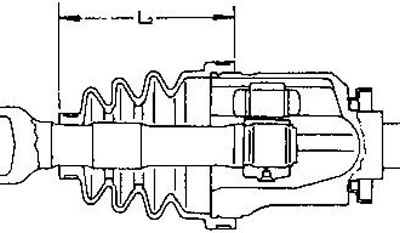
Distance L ₂:
- TS70C — 95.5-97.5 mm
- TS79C — 101.5-103.5 mm
- TS83 — 98-100 mm
Make sure the boot is properly installed in the drive shaft groove.
7. Secure the large and small clamps using suitable tools.
Inner hinge (type DS83):
1. Place the protective boot and new small clamp on the drive shaft. Wrap the shaft splines with electrical tape to prevent damage to the boot during installation.
2. Install the separator, race and balls as a single unit, aligning the marks made during disassembly.
3. Install a new retaining ring C.
4. Apply the specified amount of grease to the hinge housing and protective cover:
- DS83 — 115-135 g
5. Install the hinge housing and put on a new retaining ring A.
6. Make sure that the protective boot is correctly installed in the groove of the drive shaft. The boot should not be twisted or deformed.
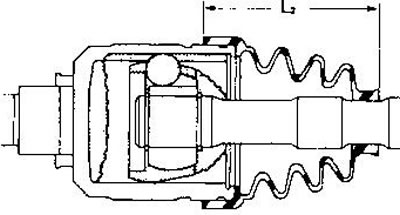
Distance L ₂:
- DS83 — 97-99 mm
7. Secure the large and small clamps using suitable tools.
Thrust bearing:
1. Press the bearing into the holder.
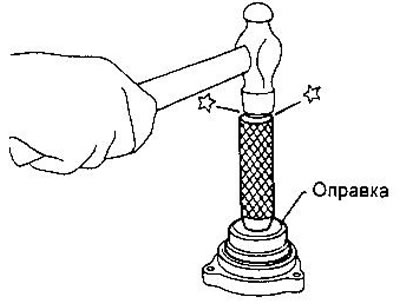
2. Press the drive shaft into the bearing.
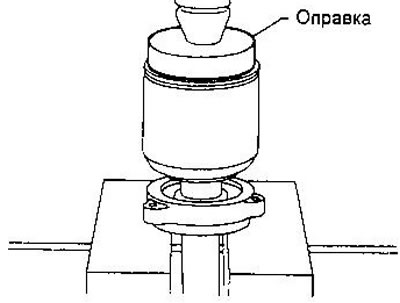
3. Install the retaining ring.
4. Install the new mud deflector ring.