Models of the early years of production (with carburetor distances 4.2 l and 3.0 l)
1. Disconnect the negative cable from the battery.
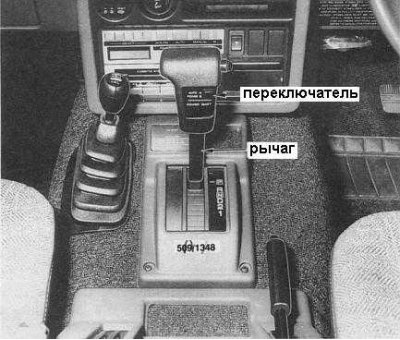
2. Using a small screwdriver, carefully separate the switch panel from the selector lever (see accompanying illustration).
3. Disunite an electric socket and remove the switch from the lever.
4. Check for continuity between the connector terminals. With the POWER switch position, conduction should take place, with the AUTO position, no. Replace the switch if necessary.
5. Installation is carried out in the reverse order.
Late Models 4.2L EFI
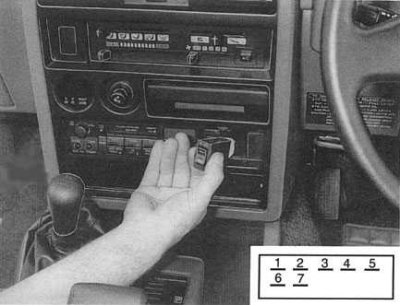
1. Using a small screwdriver, carefully pry the switch out of the center of the instrument panel (see accompanying illustration).
2. Disconnect the electrical wiring and remove the switch from the vehicle.
3. Perform a switch test:
- In the POWER position, continuity must take place between terminals 2 and 7 of the switch.
- In the HOLD position there must be continuity between terminals 2 and 3.
4. If necessary, replace the switch.
5. Installation is carried out in the reverse order.