Level check
Make sure the coolant level in the reservoir is between the MIN and MAX marks when the engine is cold.
If there is less or more coolant, bring the level to normal.
Leak test
Pressurize the cooling system with a hand pump to check for leaks.
- Limit test pressure: 0.1 MPa (1.0 kg/cm2)
Attention:
Check only on a cold engine.
In order not to deform the filler neck of the radiator, use a special adapter for the pump.
Replace or repair defective parts as necessary.
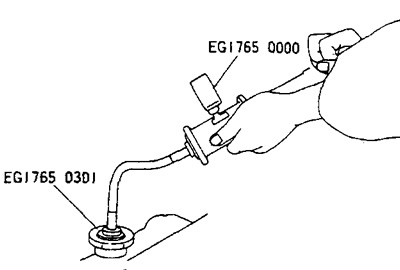
Checking the Radiator Cap
Check that the radiator cap vacuum valve seat is free of dirt and damage.
Make sure that no abnormalities are observed when opening and closing the vacuum valve.
Connect a tester and check the radiator cap release pressure.
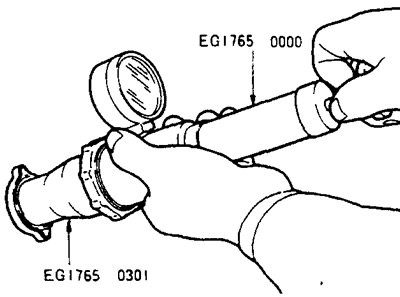
- Standard pressure: 0.06-0.10Mpa (0.6-1.0 kg/cm2)
Attention:
Do the check on a cold engine.
Before checking the radiator cap, apply coolant to the cap seal.
If there is an abnormality in the vacuum valve or the valve opening pressure is different from the specified value, replace the radiator cap.
Replacement
Replacement frequency
Individual vehicle use: initially after 3 years, then every 2 years.
For commercial use of the vehicle: every 2 years.
Coolant drain
Caution: Allow coolant to cool before draining.
1. Set the heater control to maximum heat.
2. Remove the radiator drain plug, remove the radiator cap and drain the coolant.
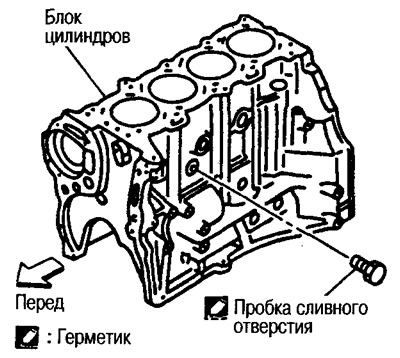
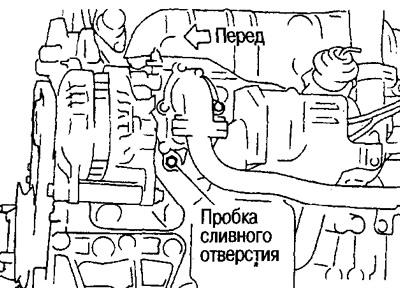
3. Turn off a stopper of a drain aperture of the block of cylinders. Drain the coolant from the cylinder block.
Models with SR engine
Models with YD engine
4. Remove the expansion tank and drain the coolant.
Filling with coolant
Engine coolant quantity (with tank reservoir up to MAX level):
Models with SR engine:
- Standard equipment: 7.5 l
- Models with rear heater: 9.2 l
Models with YD engine:
- Standard: 8.3 l
- Models with rear heater: 10.0 l
Antifreeze concentration:
- 30% (standard equipment)
- 50% (for regions with cold climates)
1. Install the tank.
2. Tighten the drain plugs of the radiator and cylinder block.
Apply Three Bond 1215B or equivalent to cylinder block drain plug threads and tighten.
3. Make sure that all clamps are tight and the plugs are tight.
4. Set the heater control to maximum heat.
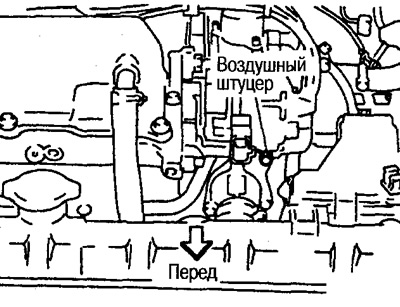
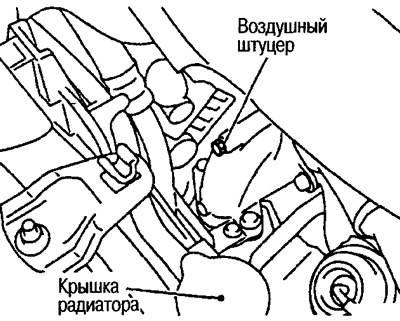
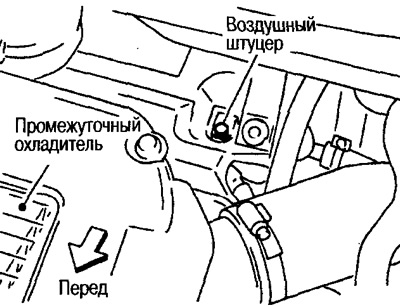
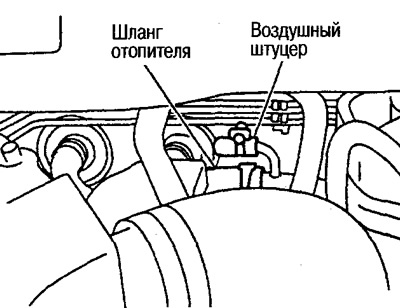
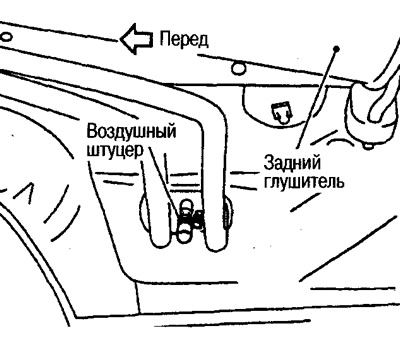
5. Unscrew the air fittings.
Location of air fittings:
- Models with SR engine: Thermostat housing
- Models with YD engine: Water inlet and intake manifold
- All models: Heater tube
- Models with rear heater: Rear heater bottom
Models with SR engine
Models with YD engine
Models with YD engine
Models with YD engine
Models with rear heater
6. Slowly pour coolant into the radiator at a rate of less than 2 liters per minute to allow air to escape from the system.
Caution: When pouring at a higher speed, the liquid will mix with air bubbles.
If coolant starts to leak out of the air bleeder hole, tighten the bleeder.
Replace the copper washer on the air inlet.
7. Add coolant to the reservoir up to the MAX mark.
8. Close the radiator cap and start the engine.
9. Keep engine speed at 3000 rpm. (SR) or 1000/min (YD). Feel the lower radiator hose with your hands and check that the thermostat valve has opened (the hose must be warm).
Caution: Be careful not to overheat the engine.
10. Stop the engine.
11. After the engine has cooled down (approx. up to 50°C) remove the radiator cap and check the coolant level. If necessary, top up the radiator with coolant up to the filler neck and repeat the work after step 8.
12. After the liquid level stops falling, add liquid to the tank to the MAX mark.
Method for checking by the sound of flowing liquid
1. Let the engine cool down to approx. 50°C.
Attention: Close all windows, hood cover, turn off the radio and other electrical equipment.
2. Set the heater control to maximum heat.
3. Start the engine, for approx. 30 sec. keep the engine speed at 1000 rpm. per minute, then gradually raise the speed to 3000 rpm. in min. Repeat the acceleration three times.
4. Set the heater control to maximum cooling.
5. Start the engine, boost the speed to 3000 rpm. in min. within 2 minutes (before thermostat valve opens). After that, leave the engine to idle and do the following check.
During the test, set the heater control to several positions between the maximum and minimum temperatures.
6. During the execution of the actions described above in paragraphs. 3-5 check that there is no sound of coolant flowing from the heater core.
7. If a sound is heard, repeat the steps from step 5.