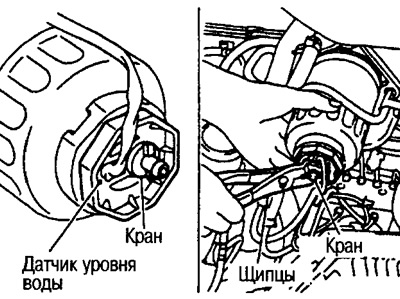
Removal and installation of the water level sensor
1. Remove the water level sensor along with the fuel filter (see ch. Accelerator, fuel system and exhaust system).
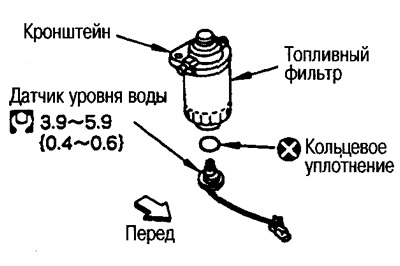
2. Remove the water level sensor from the fuel filter.
Checking the water level sensor
Remove the water level sensor and connect the wiring connector. Turn the ignition key to the ON position.
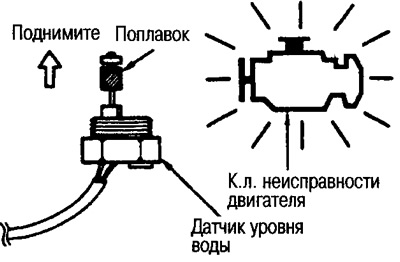
When the float is raised, the engine malfunction indicator lamp should light up.
- Water level sensor: 3.9-5.9 Nm (0.4-0.6 kg m)
Caution: Do not reuse the O-ring.
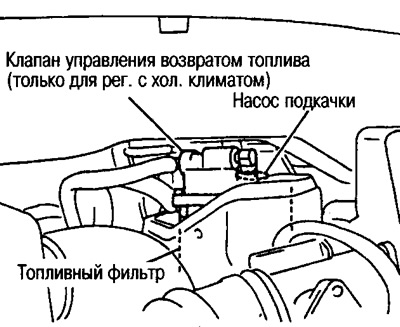
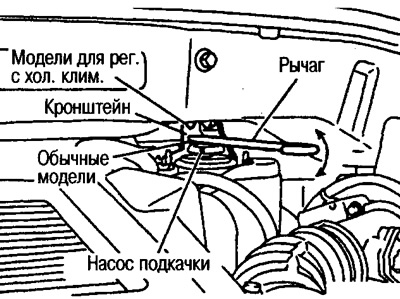
Removing air from the fuel filter
Bleed air from the fuel filter using the lever from the on-board tool kit while pumping the primer pump.
When the air is completely removed, the pumping force will increase dramatically.
 |  |
If air is removed poorly with the help of a booster pump (pumping force does not increase), remove the fuel supply hose connecting the fuel filter to the injection pump and check that fuel is flowing. Use a cup during this check to keep fuel from getting on engine parts. After checking, install the hose and bleed again.
Fuel filter replacement interval
Fuel filter replacement interval: every 60,000 km or every 5 years.
Removing water from the fuel filter
If the check engine light comes on while the engine is running (except when the lamp is flashing), remove water from the fuel filter in the following order.
1. Remove the fuel filter, its bracket and guard assembly from the vehicle.
(1) Remove the following items.
Upper air cleaner housing and air duct assembly.
Air hose between intercooler and intake manifold.
Caution: Close open openings to prevent foreign particles from entering the engine.
(2) Disconnect the fuel hoses, water level sensor wiring connector.
(3) Unscrew 2 fixing nuts and 1 bolt from the side of the bulkhead with the engine compartment, remove the fuel filter, its bracket and protection assembly from the vehicle.
Attention: Be careful not to damage the brake pipes in the ABS drive area and the noise insulation in the area of the top of the hood.
2. Using tongs or a similar tool, loosen the water drain cock located at the bottom of the fuel filter.
3. Prime with a fuel priming pump.
Connect the drain hose to the water drain tap.
- Amount of water at which the control lamp lights up: 65-100 cm2.
Attention: When water is removed, fuel also flows out, so prepare a receiving container in advance, and also make sure that fuel does not get on insulators, bushings and other rubber parts.
4. Tighten the cock and install the fuel filter, bracket and guard assembly in the reverse order of removal.
Caution: If the tap is overtightened, water and fuel may leak out due to damage to the tap threads.
5. Bleed the fuel filter.
6. Start the engine and check that the engine malfunction indicator lamp goes out.