


On-car checks
Functional check. Press the brake pedal several times with the engine stopped to equalize the pressure in the booster cavities. Make sure that the pedal stroke no longer changes.
While pressing and holding the brake pedal, start the engine. If the pedal moves forward a little, the booster is working properly.
Checking for leaks. Run the engine for 1-2 minutes. After stopping the engine, press the brake pedal several times. If the pedal travel decreases slightly each time, the booster is leaky. Press and hold the brake pedal with the engine running, then stop the engine. The pedal travel should change after holding it down for 30 seconds.
Removal
CAUTION: When removing the brake booster, be careful not to deform or bend the brake lines.
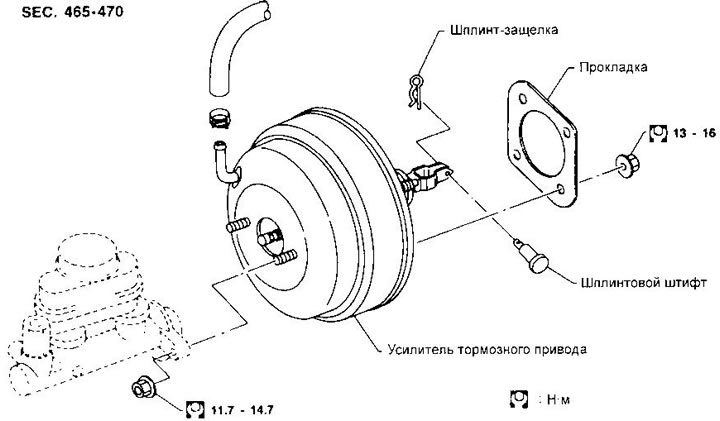
Removal has no special features and is performed in accordance with the drawing.
Examination
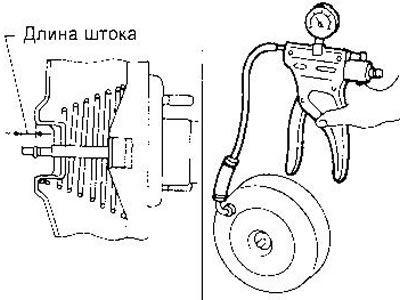
Measure the length of the rod by creating a vacuum of -66.7 kPa in the amplifier (-500 mmHg.).
- Rod length (M195, S205 and C205) — 10.275-10.525 mm
Installation
WARNING: During installation, there is a risk of damage to the threads of the amplifier studs by the edges of the holes.
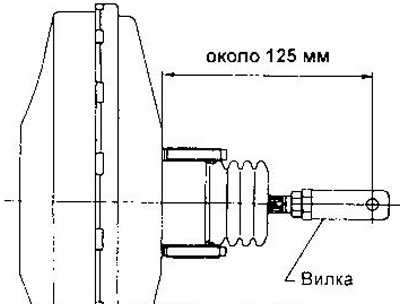
1. Before installing the amplifier, adjust the length of its pusher as shown in the figure (this does not apply to models with ABS).
2. Insert the booster and lightly tighten the nuts securing it to the brake pedal bracket.
3. Connect the pedal and the pusher fork with a pin.
4. Tighten the booster mounting nuts.
- Tightening torque: 13-16 Nm
5. Install the master cylinder (see the relevant section).
6. Remove air from the system (see section "Removal air from the hydraulic drive").