


Backlash
1. Screw a suitable bolt into the connecting flange.
2. Install the indicator on the screwed bolt.
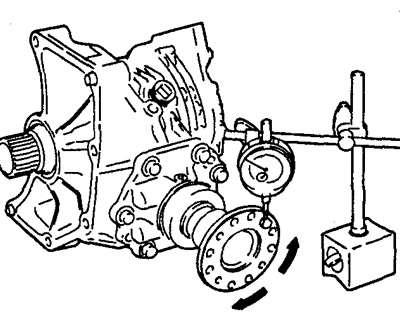
3. Measure the clearance around the circumference of the connecting flange and make sure it is within the normal range.
- Normal clearance: 0.13-0.19 mm
If the play is outside the normal range, disassemble, check and adjust.
Gear engagement
1. Remove the drive pinion clutch assembly, apply lead red on the drive pinion.
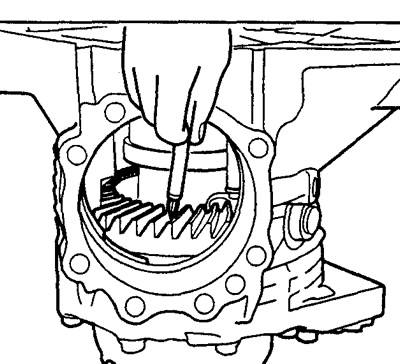
Note: Apply red lead evenly to both faces of teeth 3-4 in 4 places evenly distributed around the circumference of the drive gear.
2. Install the adjusting shim and pinion clutch assembly.
3. Unscrew the plug from the top of the transfer case housing.
Caution: Before installing the plug, apply sealant 1215 to its threaded part (KR61000250), insert the plug and tighten it to the required torque.
 : 14.7-19.6 Nm (1.5-2.0 kg·m)
4. Rotate the connecting flange several times in both directions and check the shape of the contact patch of the teeth of the drive gear and the pinion gear through the hole under the plug.
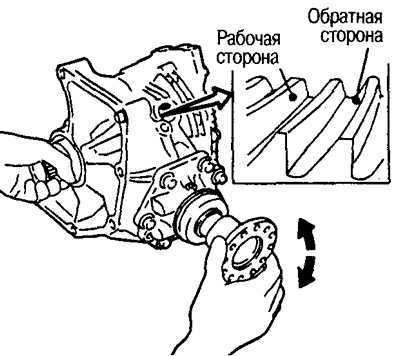
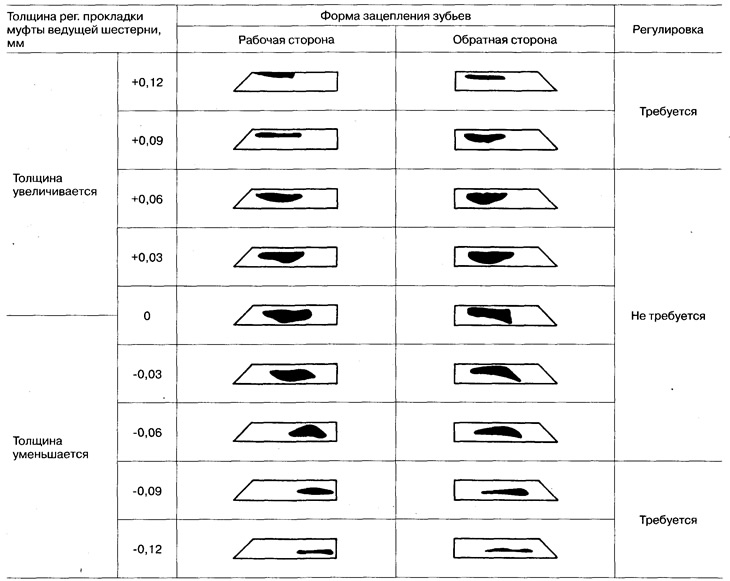
5. If the engagement shape is abnormal, adjust the height of the pinion gear (dimension "X" in the figure) in the following order.
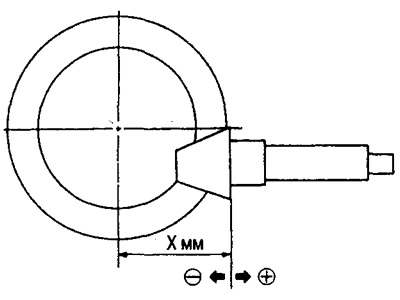
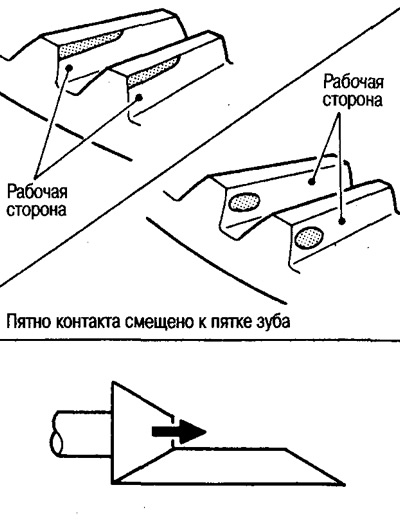
If the contact patch is offset towards the end face or heel of the tooth, reduce the thickness of the pinion clutch adjusting shim and move the pinion closer to the drive pinion.
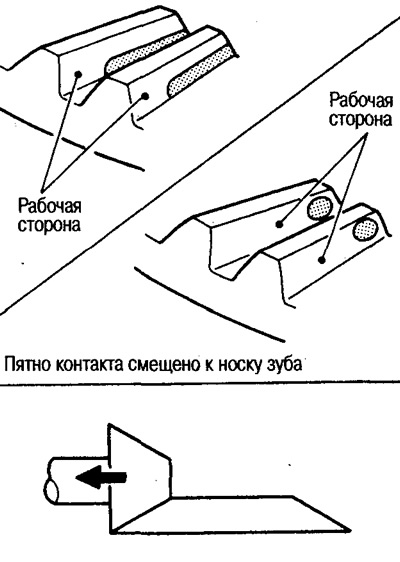
If the contact patch is shifted toward the tooth root or tooth toe, increase the thickness of the pinion clutch adjusting shim and move the pinion further away from the drive pinion.
Preload
Pinion bearing
1. Remove the drive pinion coupling assembly, rotate the coupling flange 2-3 times in both directions. Make sure there is no extraneous noise, jamming or other abnormalities.
2. Rotate the connecting flange 20 times or more to allow the bearing to run in.
3. Using a special tool, measure the bearing preload.
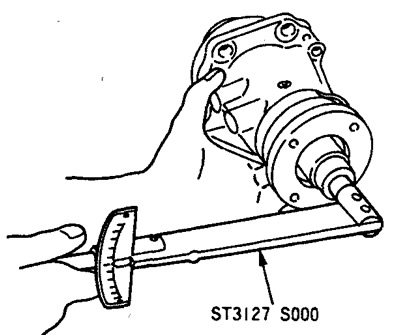
- Bearing preload: 1.08-1.66 Nm (0.11-0.17 kg·m)
Caution: Apply transmission oil to all rotating components.
If the measured value is different from the standard, disassemble the pinion clutch and check and adjust each component.
Total preload
1. Measure the preload (P,) of the pinion bearing.
2. Install the adjusting shim and pinion clutch assembly.
3. Rotate the connecting flange 20 times or more to allow the bearing to run in.
4. Using a special tool, measure the preload.
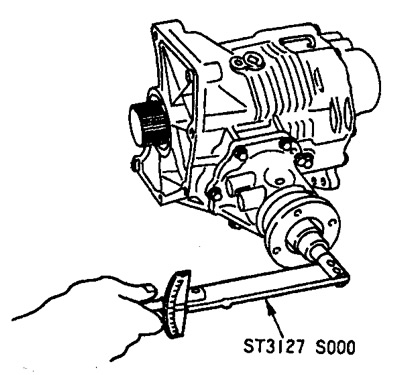
Total preload:
- If all oil seals are installed: P₁+0.16-0.22 N·m (0.016-0.023 kg * m)
- Without transfer case and ring gear oil seals: P₁+0.06-0.12 N·m (0.006-0.013 kg * m)
If the measured values are different from the standard, disassemble, check and adjust each component. When measuring the total preload after disassembly, measure it with the transfer case and ring gear oil seals removed, then install the oil seals.
Runout of the connecting flange
1. Install the indicator on the surface of the connecting flange (from the inside of the holes for the driveshaft mounting bolts).
2. Rotate the connecting flange and measure the runout.
- Maximum runout: 0.08 mm
3. Install the indicator inside the hole on the end of the flange.
4. Rotate the connecting flange and measure the runout.
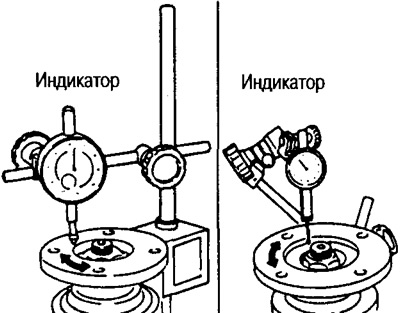
- Maximum runout: 0.08 mm
5. If the runout exceeds the specified limit, make adjustments as follows.
(1) Check the runout by changing the angle between the coupling flange and the pinion gear in 90° steps and find the point where the runout is minimum.
(2) If the runout still exceeds the limit value after changing the angle, replace the connecting flange.
(3) If the runout still exceeds the limit value after replacing the coupling flange, adjust the bearing condition of the pinion gear and the pinion assembly or replace the pinion gear bearings.