


Radiator and fan mounting components for models with AT and K/V, as well as all models without K/V
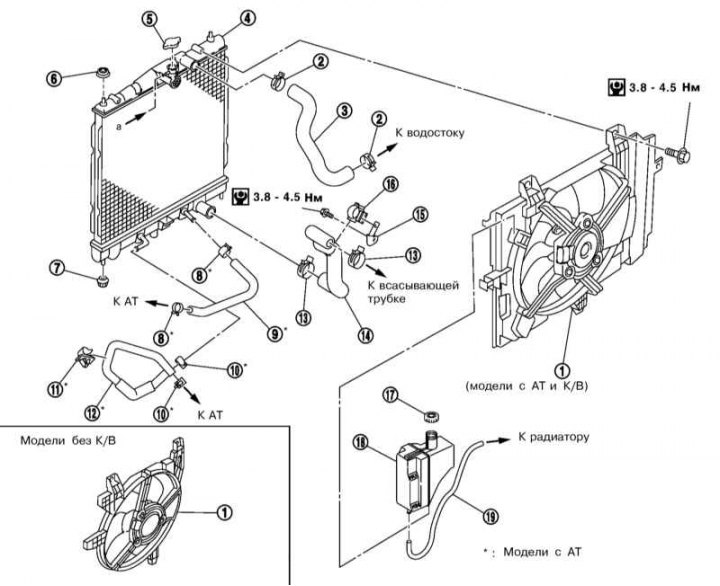
1 - Assembling the fan; 2, 13, 16 - Hose clamp; 3 - Upper radiator hose; 4 - Radiator; 5 - Radiator cap; 6, 7 - Rubber supports; 8, 10, 11 - Hose clamp (models with AT); 9, 12 - ATF cooler hoses; 14 - Lower radiator hose; 15 - Bracket; 17 - Expansion tank cap; 18 - Expansion tank; 19 - Expansion tank hose
Radiator and fan mounting components for models with manual transmission and air conditioning
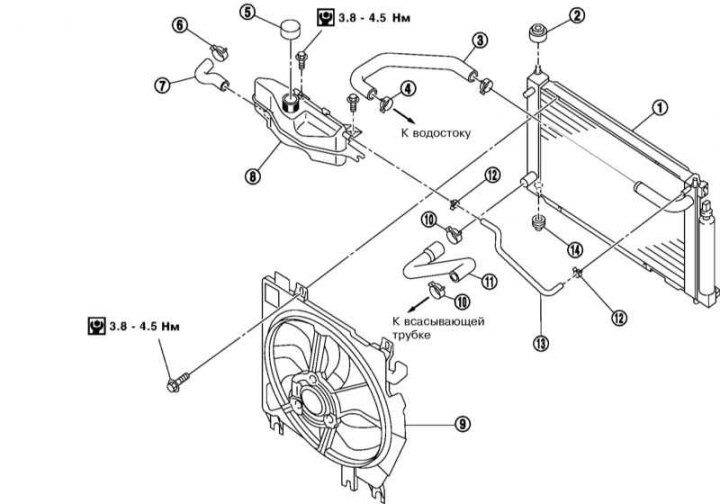
1 - Radiator; 2, 14 - Rubber supports; 3 - Upper radiator hose; 4, 6, 10, 12 - Hose clamp; 5 - Radiator cap; 7, 13 - Expansion tank hose; 8 - Expansion tank; 9 - Assembling the fan; 11 - Lower radiator hose
1. Drain the cooling system (see section Replacing the coolant).
2. Loosen the mounting bolts to allow the relay box to be moved.
3. Remove the wheel arch liners and radiator grille (see section Removal and installation the heater fan electric motor).
4. Remove the upper and lower radiator hoses.
5. On models with AT remove the oil cooler hoses and plug them.
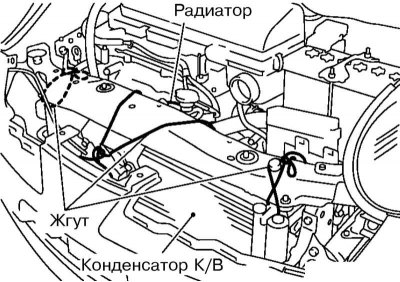
6. Hang the radiator on the harnesses (together with the fan) and the condenser of the K/V system on the upper support beam of the radiator.
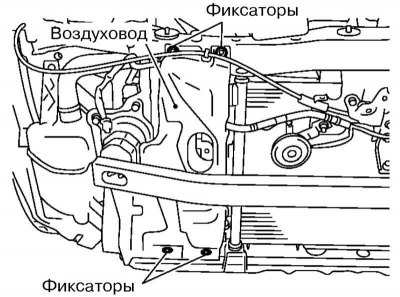
7. Remove the upper air duct retaining clips on the right side of the radiator.
Data copied from web resource: nissanbook
8. Remove the bolts securing the lower radiator support beam (see Chapter Body).
9. Remove the lower air duct retainers and the lower radiator support beam.
10. Loosen the harnesses and remove the radiator assembly with the fan, lowering them under the car.
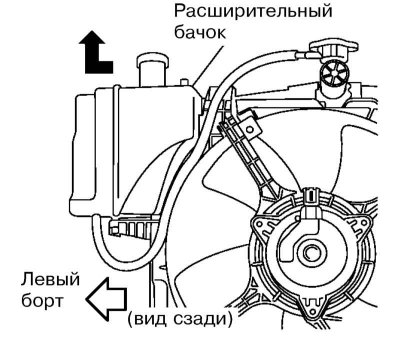
11. Separate the expansion tank from the fan housing by pulling it up and towards the left side of the vehicle.
12. Remove the fan assembly from the radiator.
13. Installation is performed in the reverse order of component removal. When installing the lower radiator support beam, make sure that the rubber supports fit into the corresponding holes.