


Thermostat Installation Components
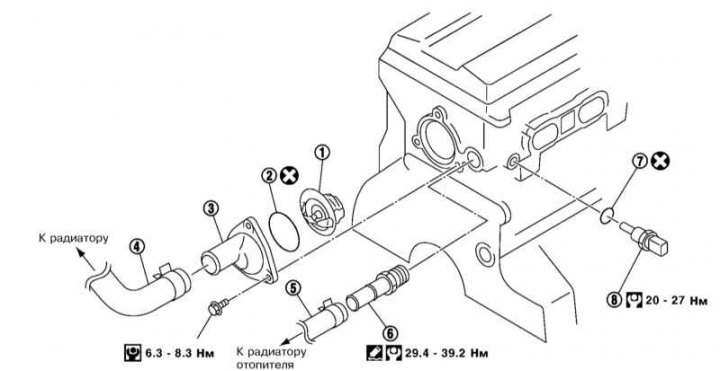
1 - Thermostat; 2 - Sealing ring; 3 - Drainpipe; 4 - Upper radiator hose; 5 - Heater hose; 6 - Heater tube; 7 - Copper washer; 8 - ECT sensor
1. Drain the cooling system (see section Replacing the coolant).
2. Remove the air intake sleeve and air cleaner cover assembly (see section Removal and installation air intake tract components).
3. Remove the upper radiator hose.
4. Remove the drain pipe and thermostat.
5. If necessary, remove the ECT sensor and heater pipe.
6. To check the thermostat, lower it on a wire into a container with water so that it does not touch the walls of the container. While heating the water, check the temperature of the beginning and end of the opening of the thermostat, as well as the stroke of the thermostat valve. Compare the obtained values with the requirements Specifications and replace the thermostat if necessary.
7. Installation is carried out in reverse order. Please note the following points.
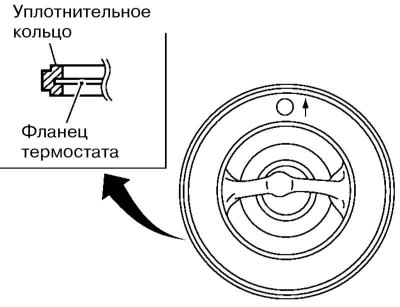
8. Make sure that new the sealing ring is securely installed on the thermostat flange around its entire circumference.
9. The thermostat and drain pipe must be oriented as shown in the illustrations below.
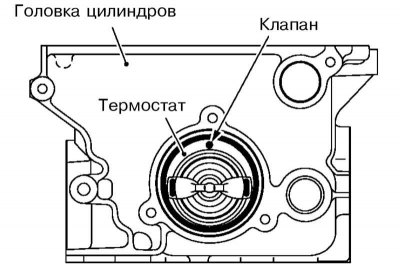
Thermostat orientation
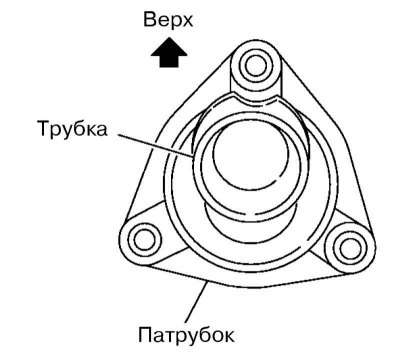
Orientation of the drain pipe
10. When installing the heater tube, lubricate its threads with sealant.
11. If the ECT sensor was removed, replace its copper washer.