Valve sizes
Check the dimensions of each valve.
If the measurements obtained are not correct, replace the valve with a new one and check the contact of the valve with the seat.
Valve guide clearance
Note. All service values are given in the section «Service data and specification» at the end of the chapter.
1. Measure the valve stem diameter with a micrometer (A).
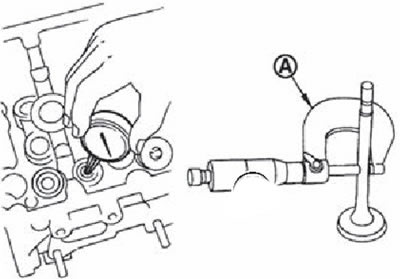
2. Measure the inside diameter of the valve guides with a bore gauge.
3. Calculate valve guide clearance:
Guide bushing clearance = Bushing inner diameter - Valve stem diameter.
4. If the obtained values exceed the maximum allowable values, replace the valve and/or guide sleeve with new ones.
Valve seat seat
After verifying that the dimensions of the valves and guides correspond to the nominal values, check the correct seating of the valve in the seat.
Apply a thin coat of Prussian Blue to the valve bevel. Press the valve face against the seat, but do not rotate the valve. Then remove the valve and inspect the seat and valve face.
If the ink is imprinted around the entire circumference of the valve seat, the valve guide and valve seat are aligned.
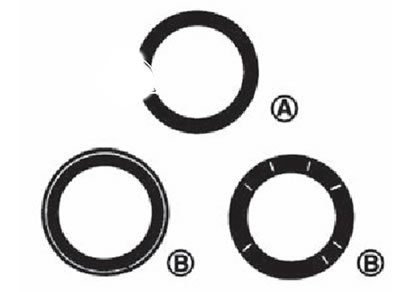
A. Fine.
B. Abnormal.
Otherwise, grind the chamfer and check again. Replace the valve seat with a new one if the correct seating of the valve cannot be achieved.
Valve spring misalignment
Using a bench square, check that the valve spring is perpendicular to the seating surface. By rotating the spring, measure the maximum value of the gap between the upper edge of the spring (IN) and square (A).
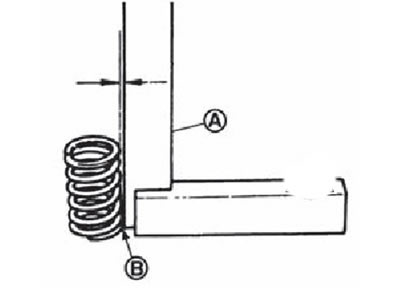
If the measured value is out of specification, replace the valve spring with a new one.
Spring Sizes and Elasticity Characteristics
Check the generated load at a certain height of the valve spring, using a special stand.
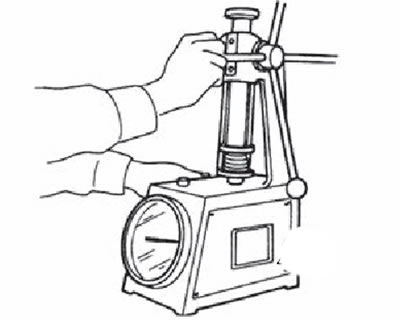
If at least one of the received sharpenings is not correct, replace the valve spring with a new one.
Check after installation (leak check)
1. Before starting the engine, check fluid levels, including coolant in engine oil. If necessary, add appropriate liquids to the correct level.
2. Use the procedure below to check for fuel leaks:
- Turn the ignition switch to position «ON» (do not start the engine), this will create pressure in the fuel lines. Check for the presence of a fuel drain in the places where the fuel lines are located.
- Start the engine, increase the crankshaft speed, and then check again for the presence of fuel depletion.
3. Check the operation of the engine for roaring noises in vibration.
4. Fully warm up the engine to make sure that there are no fuel leaks, exhaust fumes and working fluids, including engine oil in the coolant.
5. Remove air by pumping from the pipelines into the hoses of the hydraulic systems that have been disconnected (e.g. engine cooling systems).
6. After the engine has cooled down, check fluid levels again. If necessary, top up to the correct level.