For more information on how to perform a quick test, see the Quick Gauge Instruction Manual.
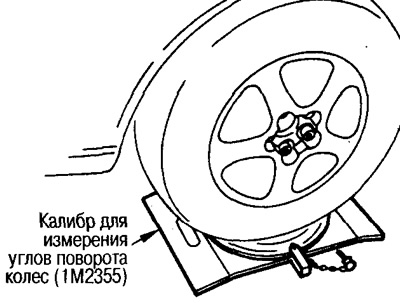
1. Roll the vehicle with the rear wheels onto a steering angle gauge. Place a stand of the same height under the front wheels so that the vehicle is in a horizontal position.
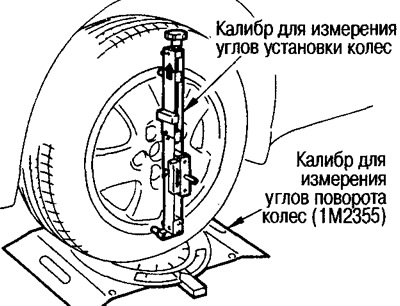
2. Install the express gauge vertically, with the arrow on the sticker pointing upwards, as shown in the figure.
- Camber: -0°44'±45'
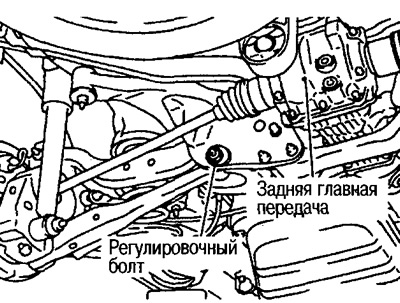
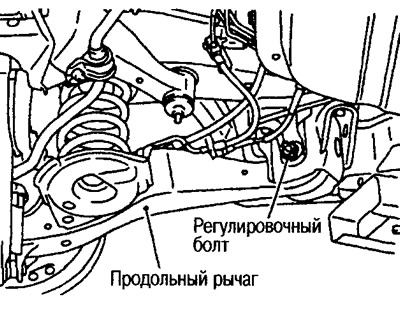
3. If the measurements are out of specification, adjust using the adjusting bolts on the lower suspension arms.
Note: After adjusting the camber angle, check the toe angles.
Toe Angle Check
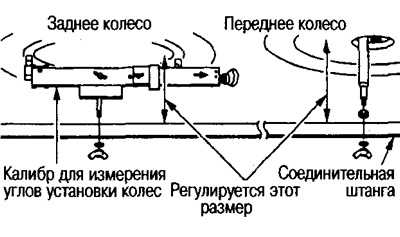
1. Place the Express Gauge on a flat surface using the supports and bring the level bubble to the mark "0".
2. Move the caliber forward (in the direction of the arrow on the sticker) on the tested wheel.
3. Remove the 1 wheel nut on the front wheel closest to the center line and install the adapter onto the hub stud.
4. Install the connecting rod on the vehicle.
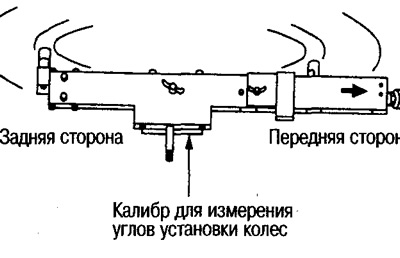
Attention: Adjust distances A and B so that the connecting rod is parallel to the vehicle.
5. Remove the express gauge from the vehicle, measure on a flat surface, and convert the value obtained using the following formula.
Sin ([received value]* [decimal]) x tire diameter (mm) = convergence (mm)
*: The resulting value is the sum of the left and right wheels.
Calculation example:
Received value 0°30' (0,5°) with a diameter of 600 mm
Sin 0.5x600=5.2mm
Convergence: int. 4-0 mm
6. If the measurements are out of specification, adjust using the adjusting bolts on the trailing arms.
Note: Adjust the toe of the right and left wheels by turning the adjusting bolts the same number of turns.