Removing
1. Remove cardan shaft.
2. Align the final drive flange and the threaded end of the ATC coupling and mark.
Attention: Apply paint alignment marks. Do not scratch the surface.
3. Using the special tool, unscrew the nuts from the flange. Remove the flange.
4. Unscrew the fixing bolts of the clutch cover, remove the ATC clutch assembly from the final drive housing.
5. Remove the final drive housing.
Installation
1. Attach the ATC clutch to the final drive housing assembly (drive gear spline).
2. Apply Three Bond 1217 or equivalent to the coupling cover mounting surface around the entire body.
Attention: Before applying the product, remove any residues of the old product, dirt, etc. from the mounting surfaces.
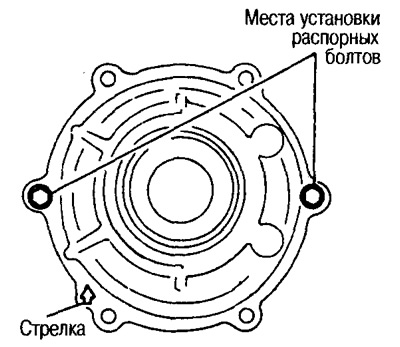
3. Install the coupling cover with the arrow pointing up. Install and hand-tighten the two spacer bolts at the locations shown in the illustration.
4. Tighten the spacer and fixing bolts to the required torque.
5. Install the flange.
Attention: In case of repeated use of the ATC coupling, install it so that the marks made before removal are aligned.
6. Using the special tool, tighten the flange nuts to the required torque.
Attention: Do not reuse nuts, replace them with new ones.
7. Install cardan shaft.