


Table of contents: General check ↓ Checking and setting the ignition…↓
Warning! The voltage generated by the ignition system is much higher than the voltage from other vehicle systems. Special care must be taken when working with the ignition on. Persons with an implanted pacemaker are prohibited from working near ignition system circuits and devices, as well as control and measuring equipment.
The condition and serviceability of the devices and instruments of the ignition system should be checked using the description in the relevant subsections.
General check
1. The spark plug wires should be checked whenever the spark plugs are replaced. If necessary, remove the distributor cap.
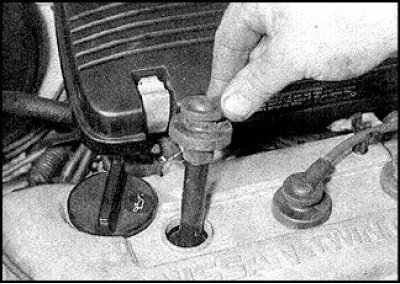
2. Before disconnecting the high-voltage wires, make sure that they are numbered to indicate which wire belongs to which cylinder.
3. Remove wires by holding the tips and not the wire to avoid tearing the wire's conductive core away from the tip
4. Check for corrosion inside the tips, corrosion usually shows up as a white powder. Put the tip back in place and make sure it is securely attached to the spark plug. If the contact is not secure, remove the tip and carefully bend the adapter inside the tip until it fits snugly around the spark plug terminal.
5. Wipe the entire wire dry. Do not bend or pull the wire excessively.
6. Disconnect the opposite end of the wire from the distributor by pulling on the tip. Check the tip on the distributor side for corrosion and the reliability of the wire fastening, proceeding in the same way as when checking the tip on the spark plug side. Measure the resistance of the wire by connecting an ohmmeter to the terminal on the spark plug side and to the segmented area inside the distributor cap. After checking, replace the wire.
7. Check the remaining wires in the same order.
8. If you need to replace the high-voltage wires, purchase a set of new wires of the type that matches your vehicle and engine.
9. Loosen the distributor cap mounting screws. Remove the cap and seal. Wipe the cap clean and check the inside and outside of the cap for cracks, traces of surface breakdown (thin charred tracks), wear and burning of contacts.
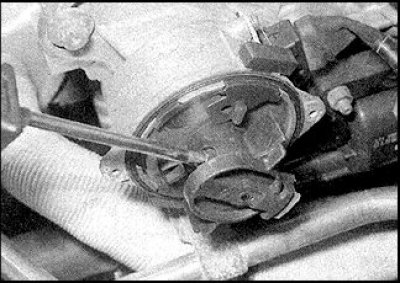
10. Check the wear of the carbons, their freedom of movement under the action of the springs and the reliability of contact with the runner. Also check the condition of the distributor cap seal; if damage is found, replace the seal. Loosen the screws and remove the runner from the distributor shaft; check the condition of the runner.
11. When replacing high-voltage wires, it is recommended to replace the rotor and distributor cap. When replacing, disconnect the wire from the old cap and insert it into the new cap in the same place from which it was removed on the old cap. It is prohibited to remove two or more wires from the old cap at the same time, otherwise they may be installed incorrectly and the order of operation of the cylinders may be disrupted.
12. Press the runner securely onto the distributor shaft, tighten the screw. Place the gasket and install the distributor cover, tighten the screws. Install the cap.
13. Even if the condition of the distributor is not in doubt, some engines may still occasionally experience difficulty starting due to moisture getting into the ignition system components. In this case, an effective measure is the use of aerosols that ensure moisture dissipation or the application of a water-repellent sealant coating.
Checking and setting the ignition timing
For the procedure for checking the ignition timing, see subsection 7.7.7.