Removal and installation
The components for installing and assembling the front suspension strut are shown in the illustration Front suspension.
1. Remove the corresponding wheel.
2. Remove a fairing of a windscreen.
3. Remove the ABS wheel sensor wiring harness from the rack (see chapter Brake system) and brake hose retainer plate.
4. Remove a rack of the stabilizer of a suspension bracket.
5. Give nuts and bolts of fastening of a rotary fist to a rack of a suspension bracket.
6. Turn out the top bolts of fastening of a rack of a suspension bracket and remove it from the car.

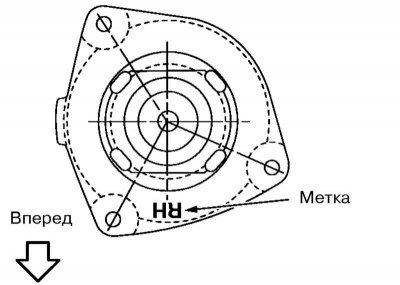
7. Installation is carried out in the reverse order. The label on the top of the rack should face forward.
Disassembly and assembly
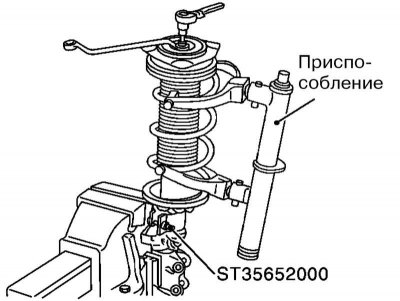
1. Secure the removed suspension strut in a vise, and install the spring compressor on it.
2. Loosen the lock nut slightly, compress the spring, and only then finally loosen the lock nut.
Attention! Do not fully release the locknut until the spring is locked in the compressed position.
3. Remove the spring seat, bearing, spring and boot from the strut.
4. Check up a condition of the shock-absorber and the removed components, if necessary replace them.
5. If a spring replacement is required, carefully release the compression tool and install it on the new spring.
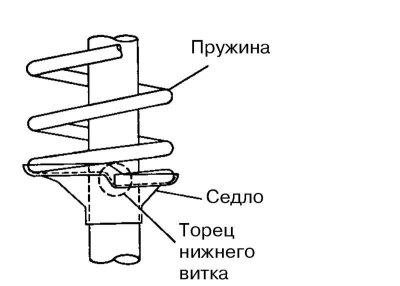
6. Install the spring on the post so that the lower coil rests against the appropriate ledge.
7. Install boot, bearing and top spring seat. Make sure that the top spring seat is installed correctly.
8. Finger tighten the locknut, remove the spring remover and tighten the locknut to 60÷75 Nm.