Note. The following is a description of withdrawals only. Installation is in the reverse order.
Block headlights
Note. A description of headlight alignment is given in Section Headlight alignment check.
1. Remove the corresponding wheel arch locker and front bumper trim (see chapter Body).
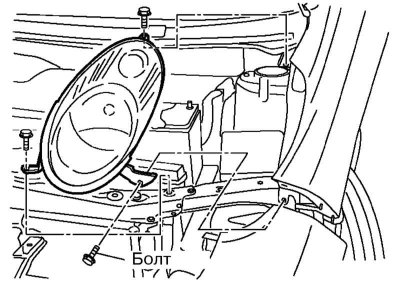
2. Separate a socket of an electroconducting of the block headlight and turn out its fixing bolts.
3. While lifting the top bracket, pull the headlamp forward.
Fog lights
1. Remove the locker and front bumper (see chapter Body).
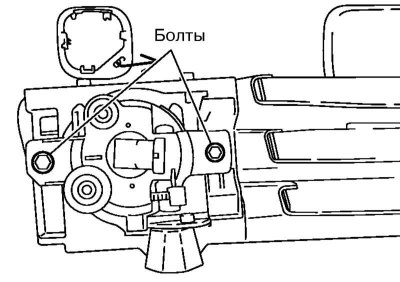
2. Turn out bolts and remove a fog lamp.
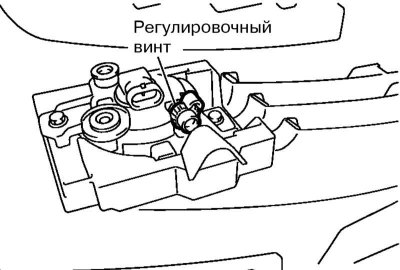
3. After installing the headlight, align it with the adjusting screw as described below.
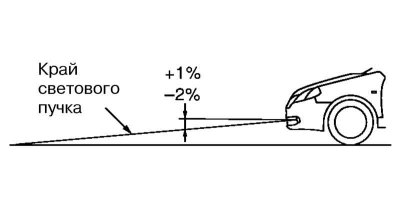
4. Align the upper edge of the fog lamp lens as illustrated and turn on the fog lamps. Close headlights if necessary.
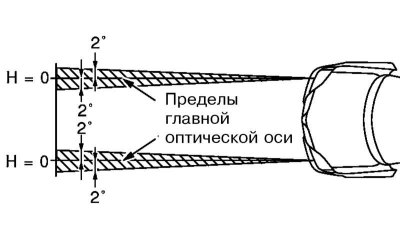
5. Turning the adjusting screws, set the optical axes of the headlights in accordance with the illustration.
Front direction indicators
1. Remove the decorative grille (see chapter Body).
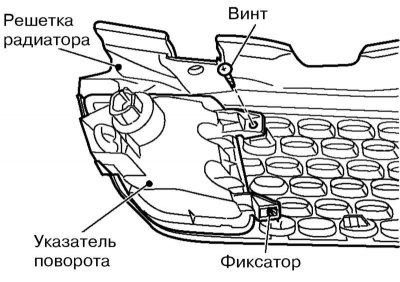
2. Turn out screws of fastening of the index of turns and remove it, having released from clamps.
Side direction indicators
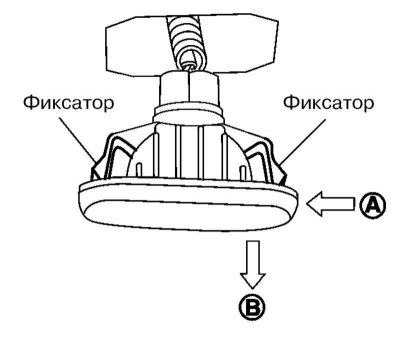
1. Pull the side turn signal in direction B while pushing it in direction A, and separate from the fender.
2. Separate a socket of electroconducting of the lateral index of turn.
License plate light
1. Use a plastic wedge to pry the diffuser and remove the license plate light assembly from the bumper.
Upper level stop signal
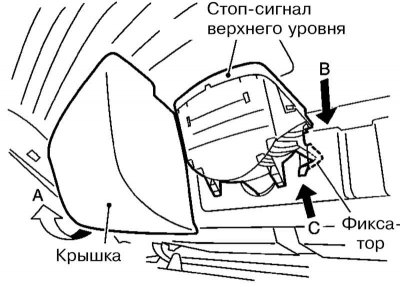
1. Open the tailgate and use both hands to pull the top level brake light cover in direction A to remove it.
2. Press the tabs in direction B, unhook the upper clips, and push the brake light in direction C to remove it.
Rear combination lamp
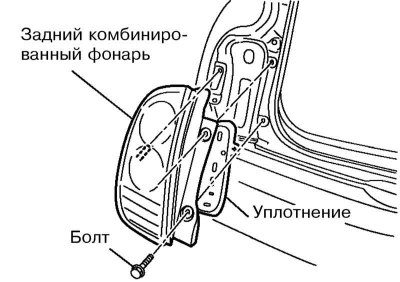
1. Open the tailgate and remove the rear combination lamp mounting bolts.
2. Remove the light from the vehicle by pulling it back and disconnect the wiring connector.
Salon lamp

1. Taking care not to damage the ceiling finish, pry the back of the interior light with a plastic wedge and release the light from the metal clips.
2. Disconnect the wiring connector and remove the lamp.