


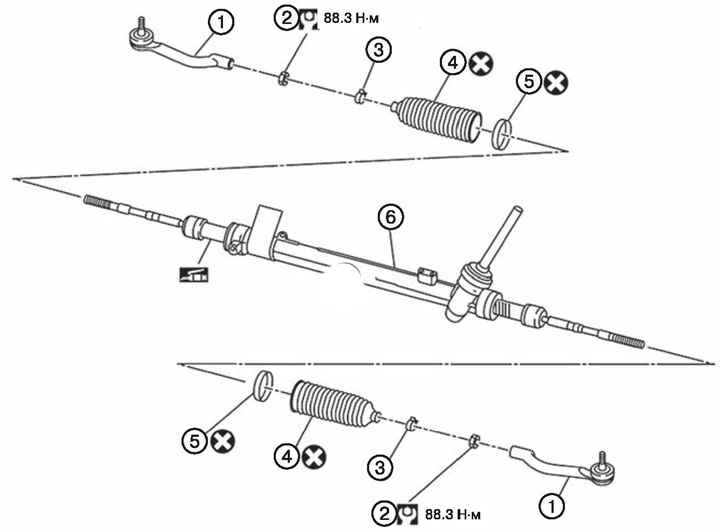
1. Tie rod end.
2. Tie rod end locknut.
3. Small boot collar.
4. Anther.
5. Large boot collar.
6. Steering gear housing assembly.
Note.
: replace the part with a new one after each removal.
: Apply Molywhite LSG or equivalent.
Disassembly
1. Unscrew the locknut and remove the tie rod end.
2. Remove the anther collars and anthers from the inner parts of the steering rods.
Attention. Be careful not to damage the inner parts of the tie rods and the steering gear housing assembly when removing the anthers. If damaged, the inner parts of the steering rods and the steering gear housing assembly must be replaced with new ones, since foreign particles can get inside the steering gear.
Check after disassembly
Anthers
Check the anthers for cracks. If defects are found, replace the boot with a new one.
Steering gear housing
Check steering gear housing for damage and scratches on internal surfaces. If defects are found, replace the case with a new one.
Tips and inner parts of steering rods
Carry out the checks below and replace the relevant parts with new ones if the checks are not within specifications.
1. Check the breakaway moment of the ball joints:
Hook up the spring dynamometer as shown in the figure and pull. Make sure that the readings of the spring dynamometer at the moment the ball joint pin begins to move correspond to the set values. If the values obtained are not correct, replace the inner and outer ball joints with new ones.
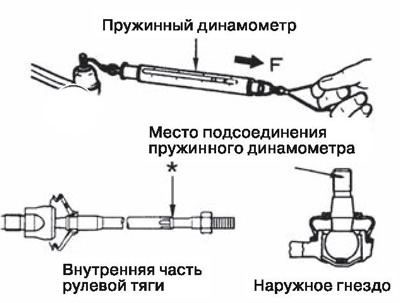
Note. Standard values are given in section «Service data and specification» at the end of the chapter.
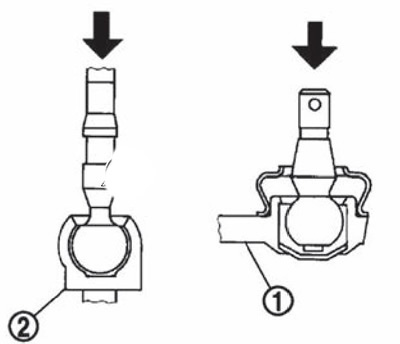
2. Check the axial play of the ball joint pin:
Generate axial load 490 N (50 kgf) on the ball joint pin. Using a dial indicator, measure the amount of finger movement. Verify that the value obtained is within the specified range. Replace outer (1) or internal (2) ball joint if the measurement result is not correct.
Assembly
1. Set the central position of the steering rack.
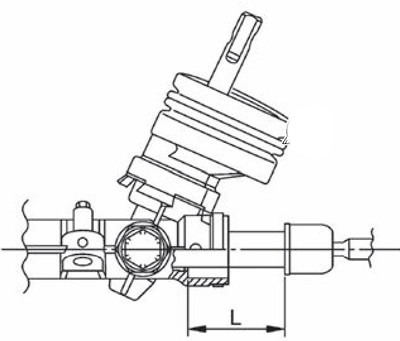
Note. Dimension L with neutral position of the steering rack: 77.5 mm.
2. Install the anthers on the steering gear housing and the inner parts of the steering rods.
3. Install larger diameter anther clamps (1) on the anther and crimp it with a special tool (A) (KV40107300).
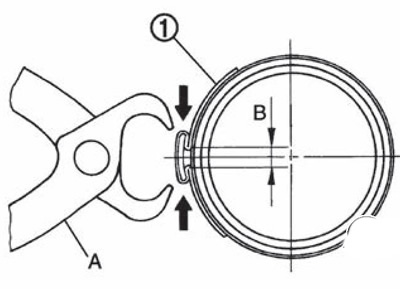
Note. Securely install the large diameter boot clamp (1) into the groove of the anther, then compress the clamp so that the gap shown in the figure does not exceed 3 mm.
4. Install the small diameter clamps on the anthers.
5. Adjust inner tie rods to standard length «L» and tighten the locknuts to the specified torque. After tightening the locknuts, check the length again «L».
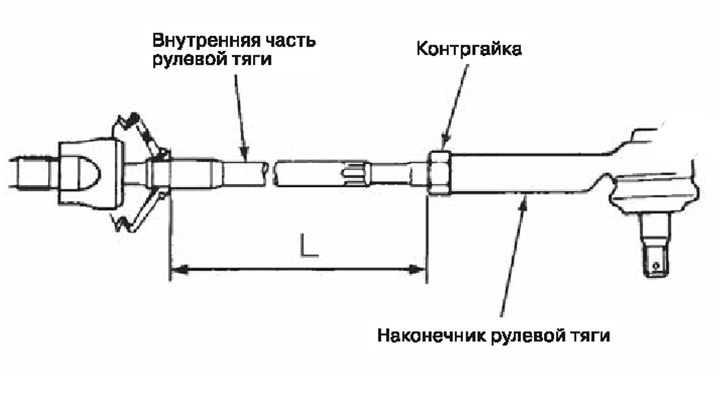
Attention. Adjust wheel alignment. The length set after adjustment does not have to match the specifications.
Note. When tightening the lock nut, hold the tie rod end with a wrench or similar to prevent contact between the ball joint and the steering knuckle!