Note. The following is a description of mounting the engine on a disassembly stand using the bearing surface on the gearbox side. When using a stand of a different design, the necessary differences must be taken into account.
1. Remove the engine and gearbox assembly from the vehicle and disconnect the gearbox from the engine.
2. Install the engine on the dismantling stand as follows:
Remove flywheel (versions with manual transmission) or master disk (1) (version with variator). Lock the flywheel or drive plate with a locking plate (KVT1105210) and loosen the fixing screws.
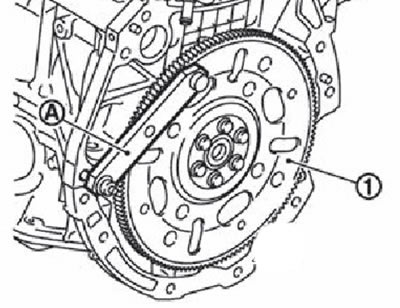
Note. The illustration shows an engine with a drive disc as an example (version with variator).
Attention.
- Do not disassemble the flywheel.
- Do not place the flywheel or drive plate with the impulse plate down.
- Be careful when handling the impulse disk so as not to damage or scratch it.
- Avoid exposure of the impulse disk to magnetized objects and electromagnetic fields.
4. Lift the engine with a winch and install it on a disassembly stand.
Attention. It is necessary to use an engine dismantling stand of the appropriate load capacity (approximately 135 kg or more). If the load capacity of the dismantling stand is less than necessary, it is necessary to remove some of the components from the engine before installing it on the stand: intake collet, exhaust manifold, rocker cover.
Note. The figure shows the most common engine dismantling stand, using the bearing surface of the cylinder block on the transmission side with the flywheel removed.
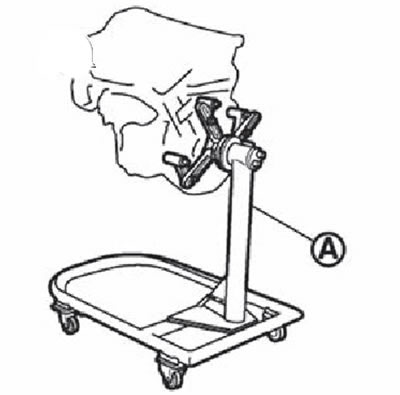
Attention. Before removing the winch slings from the engine, make sure that the dismantling stand is securely installed and there is no risk of tipping over.
3. Drain engine oil.
Attention. Clean the drain plug thoroughly and install with a new washer.
4. Drain the engine coolant by removing the drain plug (1) from the inside of the engine.
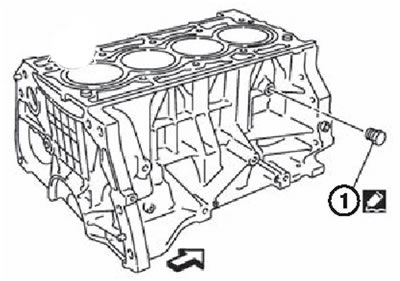
Note.
- The arrow in the figure shows the front of the engine.
- When installing the drain plug, use genuine NISSAN sealant or equivalent.