


Preparatory work
Drain the coolant.
Remove the air cleaner housing and air duct.
Remove the intercooler.
Remove the engine cover (see point 1).
Remove the intercooler bracket.
Remove the crankcase ventilation hose (from the valve cover).
Disconnect fuel pipes and hoses and move aside (see point 2).
Remove all electrical connectors, tubes and hoses and move aside.
Removal and installation of the engine cover
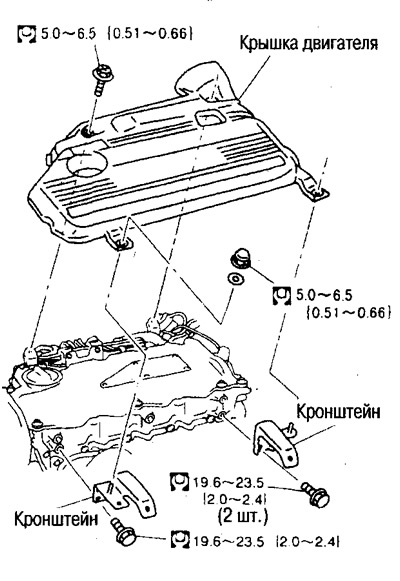
Removal and installation of fuel pipes and hoses
Removing
Install caps after disconnecting the hoses to prevent fuel spillage.
Caution: Be careful not to spill fuel into the engine compartment.
Installation
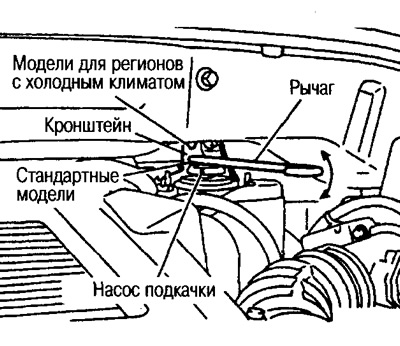
After installation, bleed the fuel pipes and hoses using the lever (from the on-board tool kit) and booster pump.
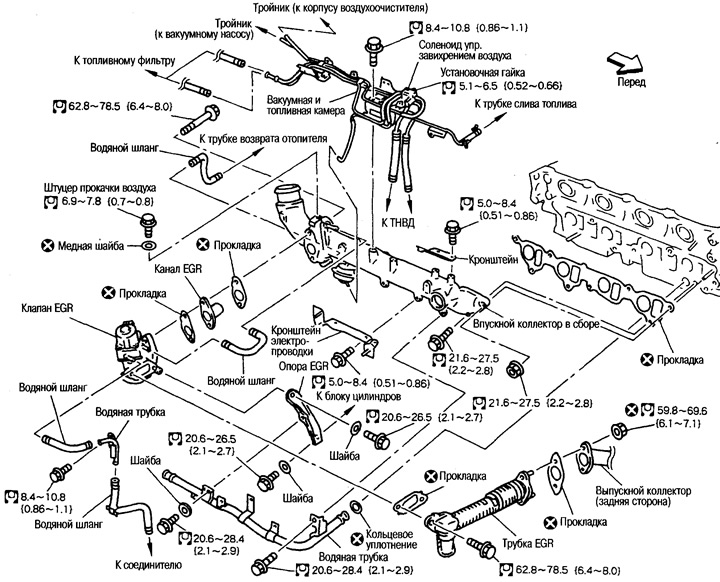
Removal and installation of an inlet collector
Removing
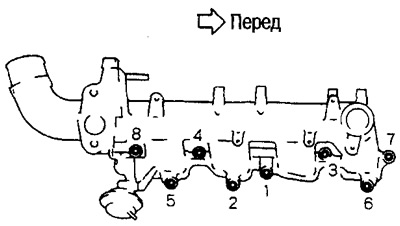
Loosen the mounting bolts and nuts in the reverse order shown in the figure.
Caution: Do not disassemble or adjust control valve. air swirl and its drive.
Installation
If the threaded studs were removed, tighten them with a force of 9.8-11.8 Nm (1.0-1.2 kg m).
Tighten the set bolts and nuts in the order shown in the figure.
Removing the Electronically Controlled EGR Valve
Attention:
Do not damage the valve.
Do not disassemble or adjust.
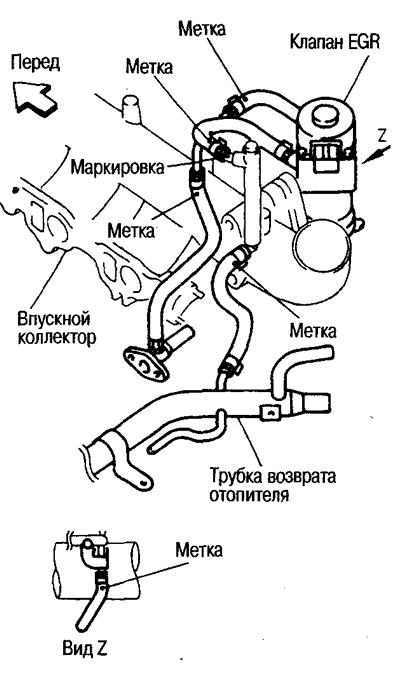
Installing water hoses
Install hoses according to marks. Do not kink hoses.
If there are no stoppers on the tubes, insert the hoses to depth A. If the tubes are shorter than dimension A, insert the hoses to the end of the tube.
Size A: 25-30mm
If the tubes have restrictors, insert the hoses as far as they will go.
If there are marks on the tubes, insert the hoses so that the mark overlaps halfway.