


2. Install the cylinder head gasket.
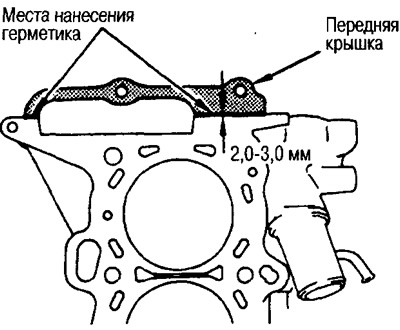
Align the gasket with the dowel pins.
Do not allow oil, water, etc. to come into contact with the gasket surface.
During installation, do not damage the gasket at the marking location.
3. Install the cylinder head assembly.
Do not damage the cylinder head gasket.
Install by aligning with the mounting pins.
The publication is reprinted from this resource: NISSANBOOK.RU
4. Install the cylinder head.
Since the working portion of the cylinder head bolt may be deformed if the length L exceeds the limit specified below, replace the bolt.
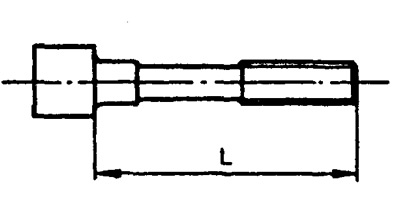
- Maximum bolt length: 158.2 mm
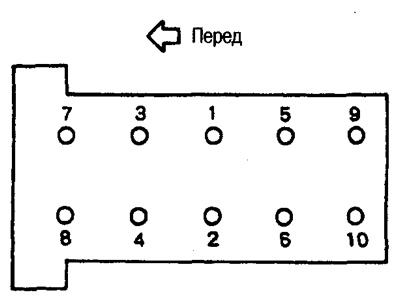
Tighten the bolts in the order shown in the illustration on the next page as follows:
- 1) Tighten to 39.2 Nm (4 kg·m).
- 2) Tighten to 78.5 Nm (8 kg·m).
- 3) Loosen completely to 0 Nm (0 kg·m).
- 4) Tighten to 34.3-44.1 Nm (3.5-4.5 kg·m).
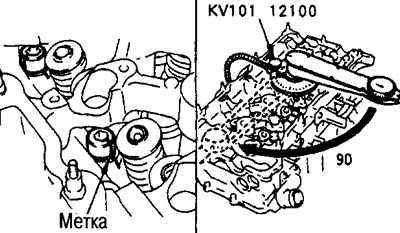
5) Apply paint marks to the bolt heads to indicate the direction relative to the cylinder head surface (for further evaluation of the tightening angle using a protractor).
6) Tighten to 90-95° (standard is 90°).
7) Tighten again to 90-95° (standard is -90°).
Caution: Check the tightening angle with a protractor or a wrench. Avoid estimating "by eye" without using tools.
5. Tighten the auxiliary cylinder head mounting bolts in the order shown in the illustration.
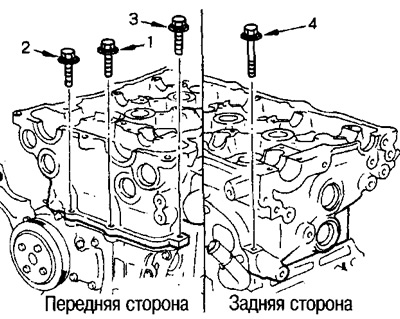
Please note that the length of one bolt in the rear is longer than the length of the three bolts in the front.
6. Install the remaining components in the reverse order of removal.