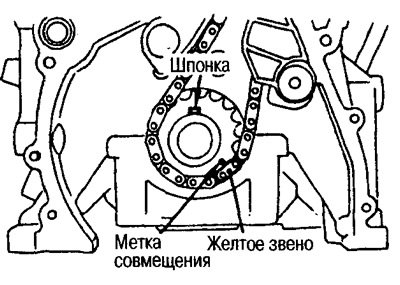
Make sure the crankshaft key is pointing straight up (cylinder #1 at TDC).
2. Install the timing chain.
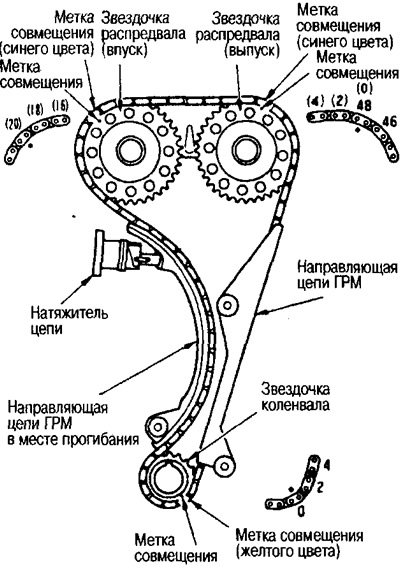
When installing, align the mark on the crankshaft sprocket with the yellow link on the timing chain.
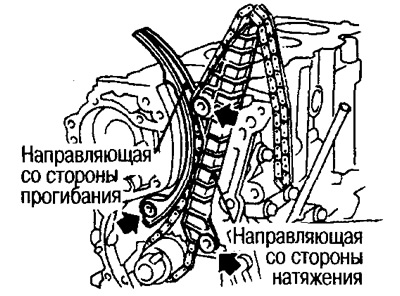
3. Install the timing chain guide on the deflection side and the timing chain guide on the tension side.
bolts (3 pcs.), marked with arrows in the figure, must be tightened sufficiently so that there is no gap between the parts to be installed.
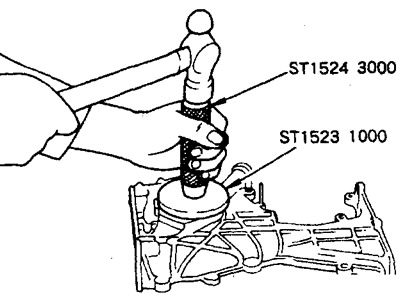
4. Press the oil seal into the front cover.
Press in the oil seal with a drift until it is flush with the front end of the oil pump housing.
The marking on the stuffing box must be outside (from the front).
Do not damage the gland or create burrs around the perimeter of the gland.
5. Install the front cover.
A. Apply Three Bond 1207C sealant (KP5 1000 150) continuous strip as shown.
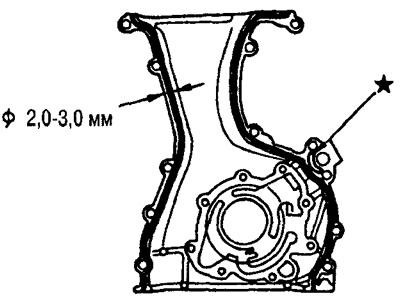
Do not apply sealant to the groove marked with an asterisk in the illustration.
b) Fit the o-rings to the cylinder block and install the front cover.
Attention: Make sure that the mark on the crankshaft sprocket and the yellow link of the timing chain do not move during the installation of the front cover.
Note: The crankshaft sprocket and timing chain are designed so that they do not move after the front cover is installed.
6. Remove excess sealant between the contact surfaces of the front cover * and cylinder head and the contact surfaces of the front cover and oil pan.
7. Install the cylinder head.
8. Install camshafts.
9. Put on the timing chain, aligning the marks (links in blue) on the chain with camshaft sprocket marks.
10. Tighten the camshaft sprocket bolts.
11. Install the timing chain tensioner.
12. Make sure that the marks on the timing chain are aligned with the marks on the camshaft sprockets as shown in the figure.
13. Install the crankshaft pulley.
Using the locking plate, fix the drive disc and tighten the fixing bolts.
14. Further installation is carried out in the reverse order of removal.