Removing
1. Remove the right engine protection from the bottom and the right mudguard.
2. Remove the valve cover.
3. Set the piston of cylinder No. 1 to TDC in the following order:
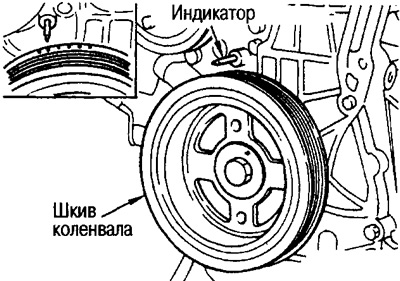
A) Rotate the crankshaft pulley clockwise and align the front cover indicator with the yellow stamped mark on the crankshaft pulley.
b) At the same time, check that the alignment marks on the camshaft sprockets line up with the colored timing chain links.
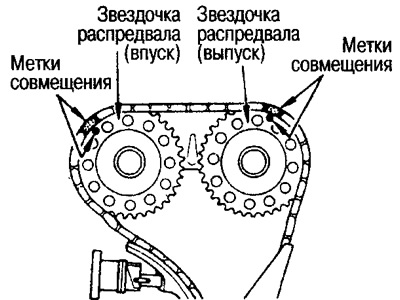
Otherwise, turn the crankshaft pulley one more turn and align the marks.
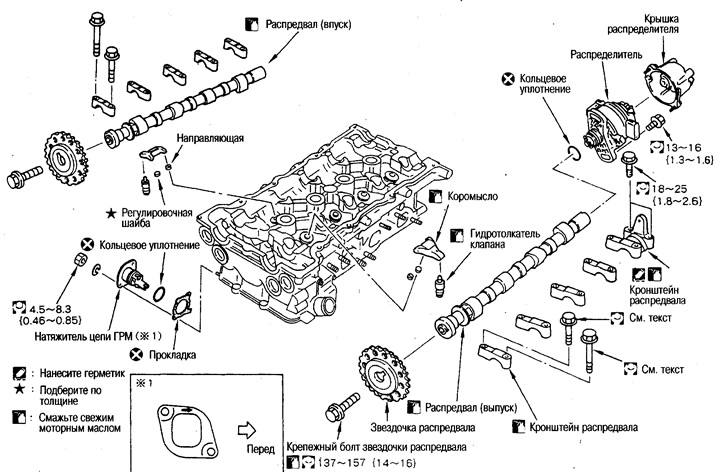
4. Remove the distributor.
5. Remove the timing chain tensioner.
While holding the chain tensioner down with a rag, loosen the two set nuts one by one and remove the chain tensioner.
Caution: Be careful as the tensioner is spring loaded and may pop out and oil may splash out.
6. Remove the camshaft sprockets.
Fix the hex part of the camshaft with a wrench, loosen the bolt and remove the sprocket.
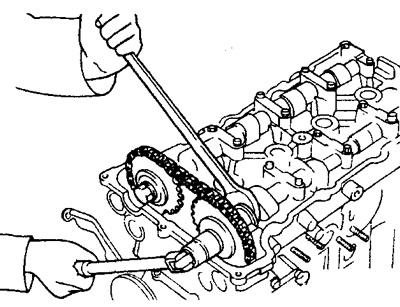
Attention: Do not fix the camshaft in other places than the hex part, and also do not use chain tension when loosening the bolt.
Note: Because the position of the crankshaft sprocket does not change with respect to the timing chain when the front cover is attached, it is not necessary to hold the chain tension.
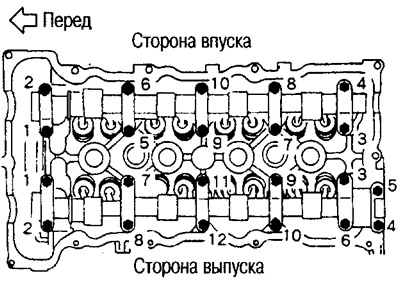
7. Remove the camshaft brackets.
Mark the brackets prior to removal to identify where they should be installed.
Loosen the mounting bolts in several steps in the order shown in the figure.
8. Remove rocker arms, shims, rocker guides and valve lifters.
Attention:
Check the mounting locations of the parts, mark them if necessary, and arrange the parts in order so as not to confuse them.
Do not disassemble rocker arms.
Do not disassemble valve lifters.
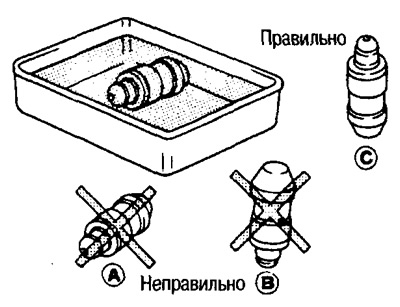
Hydraulic pushers are stored in a vertical position. If you need to store them for a long time, soak them in fresh engine oil.