Attention! This description does not apply to vehicles equipped with an airbag.
Steering gear without hydraulic booster
Removing
1. Raise the front of the car and place on stands.
2. Remove both wheels.
3. Set the wheels to the straight ahead position.
 |  |
4. Loosen and loosen the tie rod nut, press out the tip hinge, unscrew the nut.
5. Disconnect the other tie rod end.
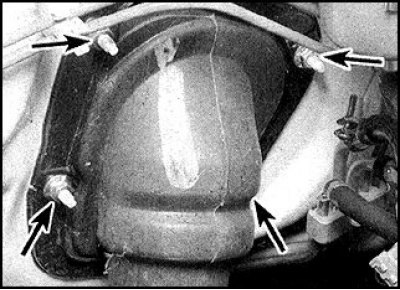
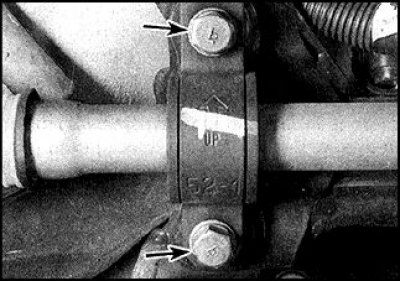
6. Loosen the nuts inside the engine compartment (indicated by arrows) and pull off the gimbal cover.
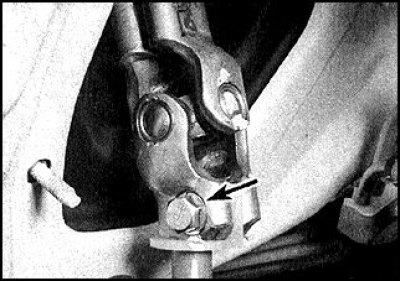
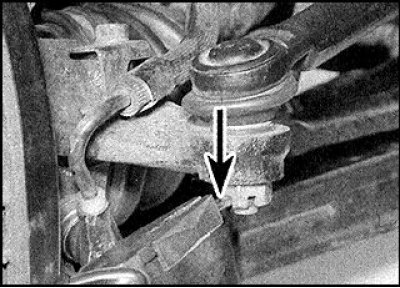
7. Mark the mutual position of the hinge and the shaft of the steering mechanism, release the bolt (indicated by an arrow) and disconnect the hinge.
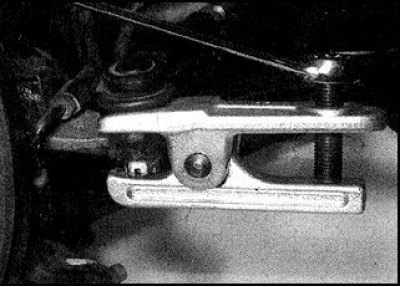
8. Turn away bolts and remove arms of the steering mechanism.
9. Remove the steering gear through the right wheel well (on vehicles with right-hand drive) or lift the steering gear and remove it from the engine compartment (for vehicles with left hand drive).
Examination
1. Check for signs of wear or damage.
2. Check the freedom of movement of the rack, make sure there are no backlashes and jamming.
3. Check for deformation and damage to the rack.
4. Check the condition of the covers.
5. Check the play in the tie rod ends.
Installation
1. Center the steering gear.
2. To do this, determine the number of revolutions of the shaft between the extreme positions of the rack.
3. From the extreme position of the rack, unscrew the shaft by half this number of revolutions.
4. Install the mechanism and brackets, tighten the bolts.
5. Attach the universal joint by aligning the marks (if a removed mechanism is installed).
6. Put on the cover, frame and wrap the nuts.
7. Attach the tie rod joint and tighten the nut.
8. Tighten the nut and pin.
9. Attach the second link.
10. Install wheels and lower vehicle.
Steering gear with hydraulic booster
Removing
1. Raise the front of the car and place on stands.
2. Remove both wheels.
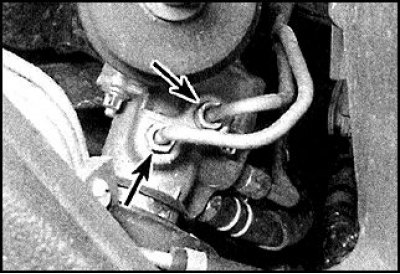
3. Unscrew the fitting (indicated by arrows) on the steering gear and drain the fluid.
4. Remove the front exhaust pipe.
5. Turn away a nut, press out a tip and disconnect steering draft.
6. Disconnect the second tie rod.
7. Inside the engine compartment, unscrew the nuts and pull off the cardan joint cover.
8. Mark the relative position of the hinge and the steering shaft, loosen the bolt and disconnect the hinge.
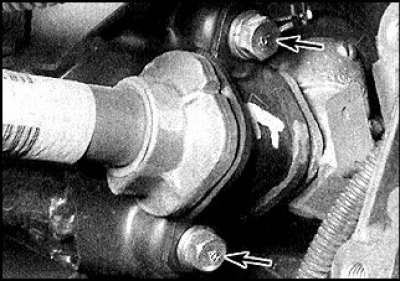
9. Loosen the bracket bolts on the left side (indicated by arrows).
10. Loosen the bracket bolts on the right side (indicated by arrows).
11. Remove steering brackets.
12. Remove the steering gear from the left side of the vehicle.
Examination
1. Clean and check for signs of wear or damage.
2. Check for deformation and damage to the rack.
3. Check the condition of the covers.
4. Check the play in the tie rod ends.
Installation
1. Center the steering gear.
2. To do this, determine the number of revolutions of the shaft between the extreme positions of the rack.
3. From the extreme position of the rack, unscrew the shaft by half this number of revolutions.
4. Install the mechanism and brackets according to the existing marks, tighten the bolts.
Attention! Lightly tighten the lower bracket bolts first, then install the remaining bolts and tighten in sequence.
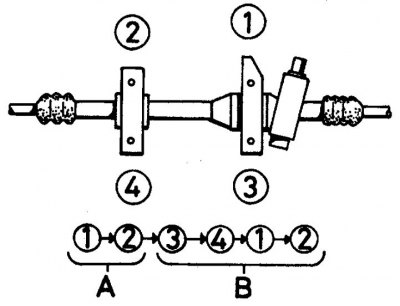
A. 1st stage tightening
B. 2nd stage
5. Install the front exhaust pipe.
6. Attach the universal joint by aligning the marks (if a removed mechanism is installed).
7. Tighten the bolt.
8. Put on the cover, frame and wrap the nuts.
9. Attach the tie rod joint and tighten the nut.
10. Tighten the nut and pin.
11. Attach the second link.
12. Attach tubing.
13. Install wheels, bleed air from hydraulic drive (see subsection 12.14).
14. Lower the car.