Removing
1. Remove cotter pins and loosen fixing nuts. Press the tie rods out of the steering knuckles using a suitable puller.
Attention:
Do not damage the anthers on the ball joints of the steering rods.
Tighten the nut by hand before using the puller.
2. Paint marks on the lower pivot and steering gear. Loosen the lower pivot pinch bolt on the machine side.
3. Remove the steering tubes and hoses mounted on the rack bracket (From the left side) and cable tie (on the right side).
4. Remove tubes and hoses from the steering mechanism.
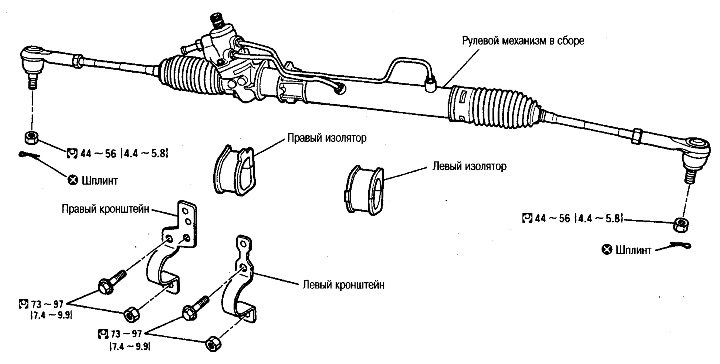
5. Unscrew the fixing bolts and nuts of the rail brackets and remove the brackets and insulators.
6. Tilt the steering gear to the right and remove it.
Installation
Installation is carried out in the reverse order of removal, taking into account the following.
After installation, bleed air, see above.
After tightening the bolts and nuts of the bracket in 5 places, evenly tighten them to the required torque.
If it is difficult to install the lower joint on the steering gear, remove the lower cover, clamp, unscrew the fixing bolt and nut above the lower joint, slide the joint and reinstall.
Caution: Do not reuse column guard and cotter pin.
Before installing the tie bolt under the lower pivot, ensure that the groove on the bottom of the lower pivot aligns with the drive pin. Also, before installing the lower pivot to the steering gear, make sure that when the steering wheel is in the straight-forward position, the tip is positioned as shown in the illustration in section «Bottom hinge and hole cover», see above.