Removal and installation of a door, rack and striker of the lock
1. Remove tailgate trim panel (see Section Removing and installing door trim panels).
2. Disconnect the connectors inside the door, release the electrical wiring from the latches and pull it out of the door.
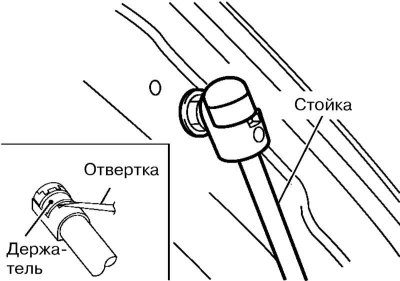
3. While holding the tailgate, use a screwdriver to remove the upper holders of the door pillar and remove the rack from the hinge.
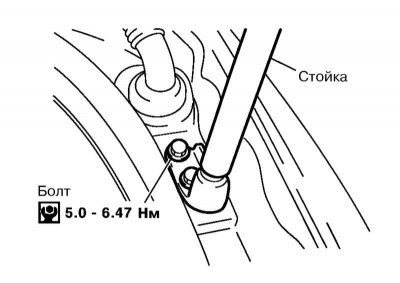
4. If it is necessary to remove the rack, turn out the bolts of its fastening to the body.
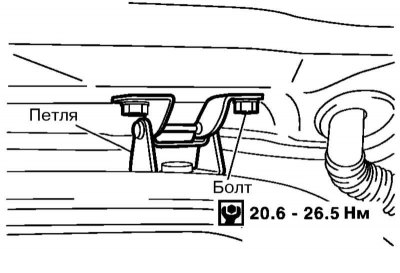
5. Turn out bolts of fastening of loops of a door of a back to a body and remove a door.
6. If necessary, unscrew the screws and remove the striker of the tailgate lock, having previously removed the bottom bar of the tailgate opening.
7. Installation is carried out in the reverse order. Finally, adjust the position of the door.
Removal and installation of the lock
1. With the tailgate trim panel removed, disconnect the door lock wiring connector.

2. Turn out bolts and remove assemblage of the lock from within a door.
3. Installation is carried out in the reverse order. In conclusion, check and, if necessary, adjust the operation of the lock.
Removal and installation and tailgate handles
1. Remove the tailgate trim panel.
2. On models with «Intelligent Key» remove its receiver, as well as the holders and connectors of its electrical wiring in the tailgate.
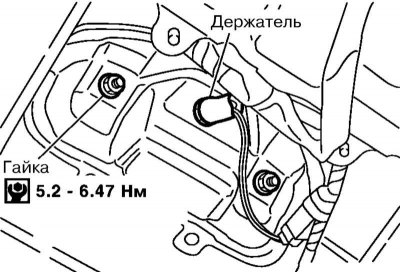
3. Give nuts of fastening of the handle and remove it.
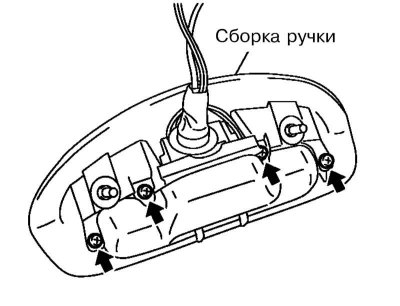
4. If necessary, remove the screws and disassemble the handle.
5. Installation is carried out in the reverse order.
Adjustment

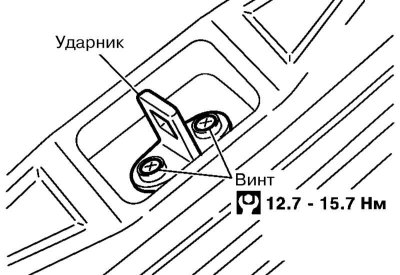
1. Remove the lower bar of the tailgate opening and loosen the screws securing the striker of the tailgate lock.
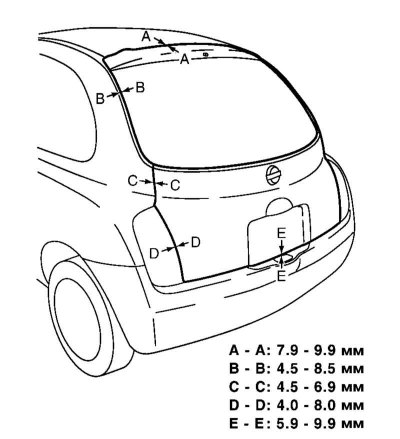
2. By moving the drummer, adjust the position of the tailgate in the opening in accordance with the illustration. In this case, the difference between the gaps B // C // D on the left and right should not exceed 2 // 1.5 // 2 mm, respectively.
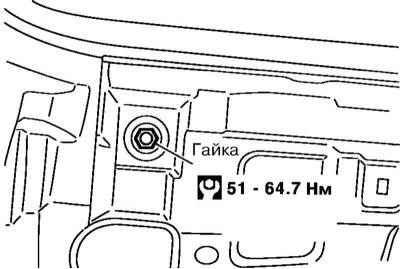
3. If it is not possible to achieve the correct position of the door by moving the drummer, give the nuts securing the tailgate hinges to the body.
4. After adjustment, tighten the fasteners to the required torque.