Upper
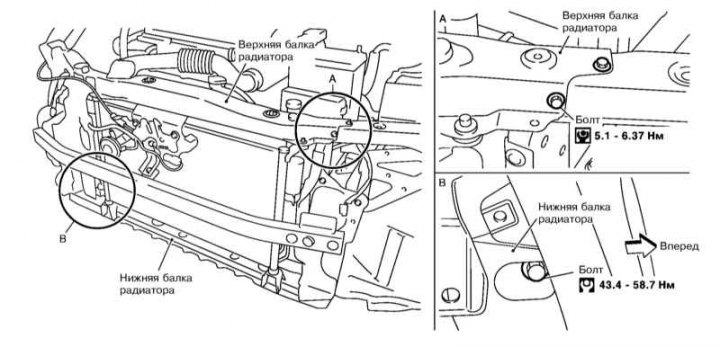
Fixture of basic beams of a radiator
1. Remove the headlights (see chapter Onboard electrical equipment).
2. Remove the hood lock assembly and lock bracket (see Section Removal and installation of locks of a cowl and the hatch of a fuel jellied mouth).
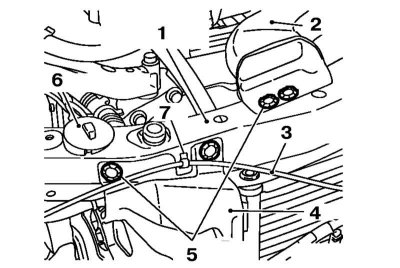
3. Remove the hood latch cable retainers and air intake sleeve retainers from the upper support beam of the radiator.

1 - Upper beam; 2 - Sleeve; 3 - Cable; 4 - Air duct; 5 - Clamps; 6 - Cover; 7 - Retainer
4. Remove the washer fluid reservoir cap and pull down the reservoir neck.
5. Turn out bots and remove the top basic beam of a radiator (see the illustration Mounting the radiator support beams).
6. Installation is carried out in the reverse order.
Lower
1. Remove the radiator grilles (see Removal and installation of a decorative grille of a radiator) and clamps at the top of the duct.
1 - Upper beam; 2 - Sleeve; 3 - Cable; 4 - Air duct; 5 - Clamps; 6 - Cover; 7 - Retainer
2. Remove the lower clips of the front bumper (see Section Removal and installation of the front bumper and front spoiler).
3. Remove the screws, remove the clips and separate the bumper pad from the lockers (see Section Removal and installation of the front bumper and front spoiler).

4. Fasten the radiator and A/C condenser to the upper support beam of the radiator with bundles.
5. Turn out bolts (see the illustration Mounting the radiator support beams) and remove the lower support beam.
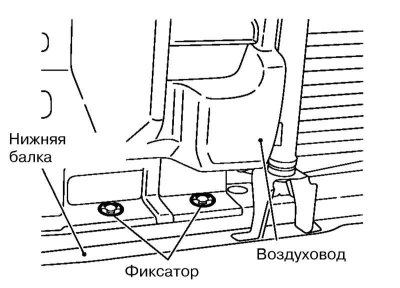
6. Remove the lower duct clamps.
7. Installation is carried out in the reverse order.