2. Remove the door glass (see Section Removal and installation of glasses and power windows of side doors).
3. Separate sockets and remove holders of electroconducting in a door then pull out an electroconducting from a door.
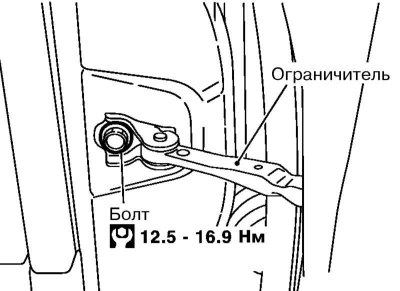
4. Give fixture of the limiter of the course of a door.
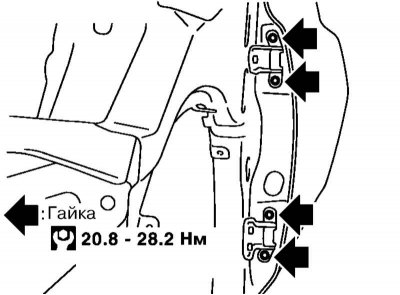
5. Give nuts of fastening of loops to a door and remove a door.
6. Installation is carried out in the reverse order. Finally, adjust the position of the door.
Note. The following describes how to adjust the position of the side doors on 5-door models. On 3-door models, the adjustment is made in the same way.
7. To adjust the position of the front door, remove the wing (see Section Removal and installation of the front fender and lockers), loosen the pillar hinge bolts and move the rear edge of the door so that it is flush with the fender and tailgate (on 3-door models - with a body), and the gaps between the door and the wing, as well as between the front and rear doors (on 3-door models - between the rear of the door and the body) were 4.7±1mm. After adjustment, tighten the hinge fasteners.
8. To adjust the position of the rear door, you must first remove the trim panels of the middle pillar (see Section Removal and installation of other finishing panels), then, working from the inside and outside of the vehicle, loosen the bolts and nuts securing the rear door hinges to the pillar. When moving the rear of the rear door, align it so that it is flush with the front door and the body, and the gaps between the doors and between the rear of the door and the body are 4.7±1mm. After adjustment, tighten the hinge fasteners.
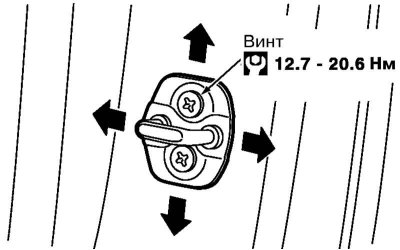
9. Loosen the screws securing the striker of the door lock and adjust its position so that the lock engages with the striker without distortion. Tighten the striker mounting screws.