Removal and installation of assembly of the top hatch
Note. Enlist the help of an assistant first.
Top hatch assembly components
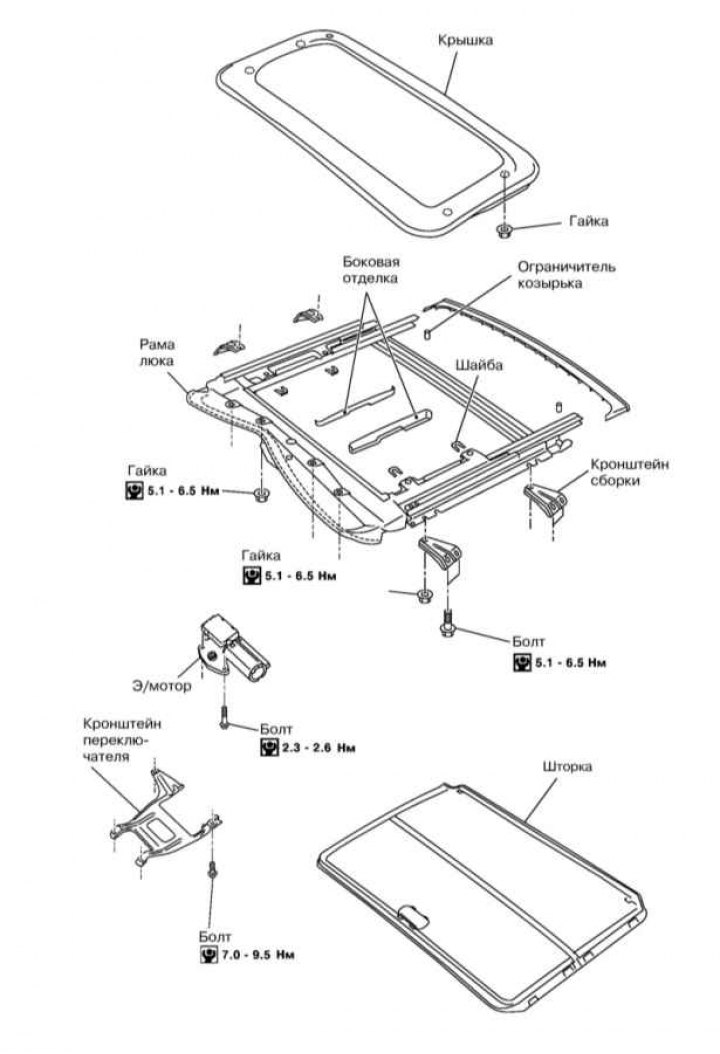
1. Remove headlining (see Section Removal and installation of other finishing panels) and disconnect 4 drain hoses.
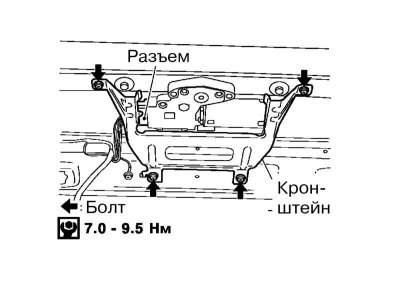
2. Disconnect the interior lamp wiring connector, unscrew the bolts securing the top hatch control switch bracket and remove the sunroof cover drive e/motor.
Note. Do not rotate the e/motor removed from the sunroof assembly.
3. Give away all fasteners (bolts and nuts) first the front and then the rear bracket for attaching the top hatch assembly.
4. Give at first forward nuts of fastening of assembly of the top hatch, and then nuts of side guides. Remove the sunroof assembly from the roof.
5. Installation is carried out in the reverse order. Tighten fasteners first by hand so that you can align the position of the assembly in the opening.
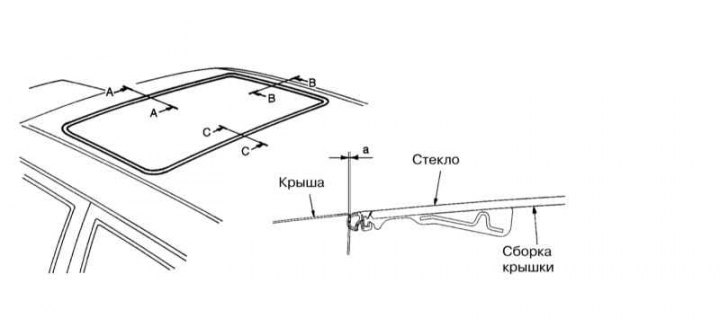
Removing, installing and adjusting the position of the cover
Adjusting the Position of the Sunroof Cover
1. Lift the lid and remove the side trim pieces of the opening.
2. Give nuts and remove a glass cover.
3. Installation is carried out in the reverse order. Finally, adjust the position of the lid.
4. With the cover nuts released, lower the cover.
5. Adjust the position of the cover in accordance with the illustration Adjusting the position of the top hatch cover: dimension a in sections AA, BB and CC should be made accordingly 0.7÷2.2, 0.3÷1.7 and 0.2÷1.6 mm.
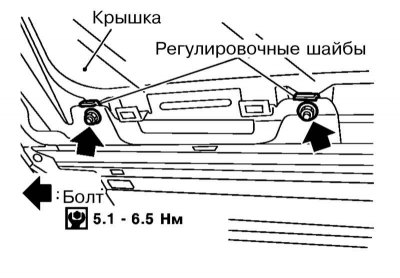
6. Selecting the thickness of the shims, align the roofs and surfaces of the hatch cover. The tolerance is±1.5 mm.
7. Tighten the nuts, lower and raise the manhole cover several times and check the gaps again. Re-adjust the cover if necessary.