


Table of contents: Removal ↓ Installation ↓
Attention! If the chain drive cover is removed without damaging the cylinder head mount, then after assembly, slight oil leaks are possible at the joint between the cover and the cylinder head. Keep this in mind, and when removing the chain drive cover, decide in advance whether or not to replace the cylinder head gasket.
Removal
1. Remove the crankshaft pulley (see subsection 3.2.1.5).
2. Remove both oil pans and the oil receiver assembly with the coarse filter (see subsection 3.2.1.12).
3. Remove the power steering pump (see subsection 12.15).
4. Remove the coolant pump pulley.
5. Remove the generator (see subsection 7.3).
6. Raise the engine by placing a jack under the cast frame of the main bearing caps in the crankshaft housing, having first placed a board under the frame. You can also hang the engine on a hoist hoist or on a crossbar, hooking the hoists onto the technological eyes provided on the engine.
7. Unscrew the right powertrain support tie bolt, then unscrew the mounting bolts and remove the support assembly from the engine compartment. If the rubber support pads have come loose from the body bracket, remove the pads as well.
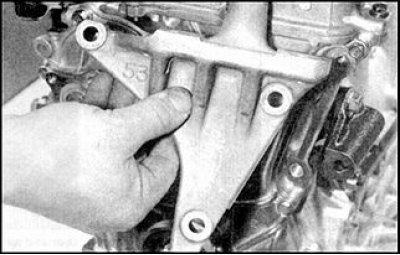
8. Loosen the bracket mounting bolts and remove the right powertrain support bracket from the engine.
9. Loosen and remove the timing chain cover bolts, including the three upper bolts that secure the cover to the cylinder head. The bolts are different lengths, so mark their original positions.
10. Remove the cover from the crankshaft nose, then manipulate the cover out of the engine compartment. Remove the O-ring from the oil channel, which must be replaced.
11. If the lid guide pins are loose, remove them and store them with the lid.
12. Remember the correct location of the oil jet for chain lubrication. If the jet is easily accessible, remove it and store it with the cap.
13. Remove the spacer sleeve of the oil pump drive gear from the crankshaft nose. Remove the key from the crankshaft (if the key fit in the groove has become loose) and store together with the spacer sleeve.
Installation
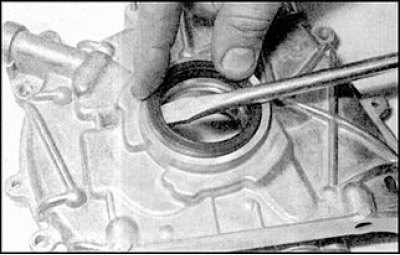
1. It is recommended to replace the crankshaft oil seal before installation. Carefully remove the used oil seal by prying it up with a large screwdriver.
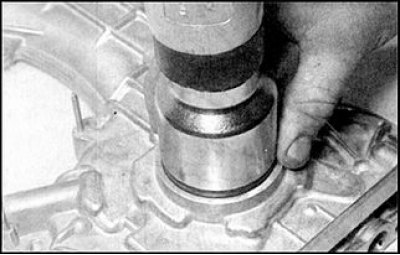
2. Install the new seal so that the lips of the working edges are directed inward. Press the seal into place until it stops against the flange. The seal can be pressed in using a tubular mandrel that rests only on the outer edge of the seal.
3. Make sure the sealing surfaces of the cover and cylinder block are clean and dry.
4. Install the key onto the crankshaft (if it was filmed).
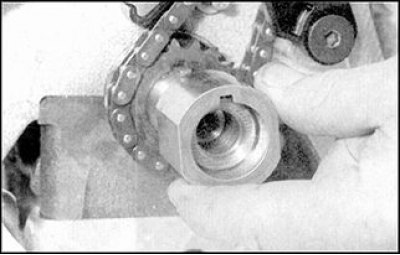
5. Align the keyway in the oil pump spacer sleeve with the key, then slide the sleeve onto the nose of the crankshaft.
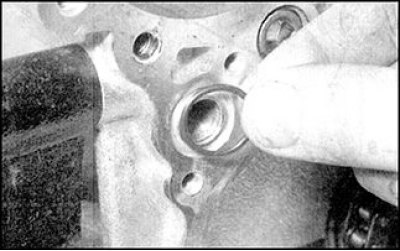
6. Insert the dowel pins into place (if they were filmed) and place the O-ring in the groove around the oil channel. Also check that the chain lubrication nozzle is installed correctly (if the injector was removed).
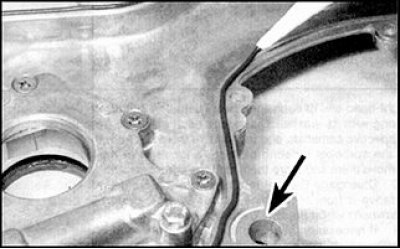
7. Apply a thin layer of sealant to the separating surface of the cover with the cylinder block.
Caution! Do not apply sealant near the cover oil channel opening and oil groove (in the photo this place is indicated by an arrow).
8. If the cylinder head has not been removed, also apply sealant to the top surface of the cover.
9. Bring the cover up and position the oil pump drive gear so that the gear engages the spacer sleeve when the cover is installed in place. Place the cover on the crankshaft, being careful not to damage the seal lips, and install the cover on the guide pins.
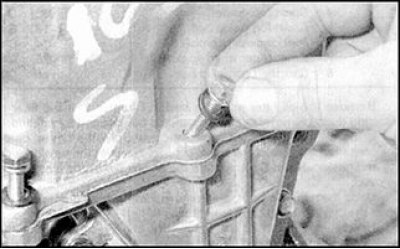
10. Screw the cover fastening bolts into the previous holes, tighten the bolts evenly along the cover plane. Tighten in several stages, gradually increasing the force until the specified tightening torque is reached.
[The material is based on data from the portal: nissanbook]
11. Install three M6 bolts securing the timing chain cover to the cylinder head and tighten the bolts to the specified torque.
12. Install the right powertrain mount bracket onto the engine, tighten the bolts to the specified torque. Install the rubber pads on the mount bracket from the body side (if the pillows were taken out), making sure that the pillow studs enter the holes in the bracket. Install the support and tighten the bolts to the specified torque.
13. Align the right powertrain support with the body bracket, insert the tie bolt and tighten the bolt nut to the specified torque. Remove the vehicle from the stand.
14. Install the oil receiver with a coarse filter and an oil pan (see subsection 3.2.1.12).
15. Install the cylinder head cover (see subsection 3.2.1.4).
16. Install the generator (see subsection 7.3).
17. Install the coolant pump pulley and tighten the bolts securely.
18. Install the power steering pump (see subsection 12.15).
19. Install the crankshaft pulley (see subsection 3.1.1.5).