Stopping the car
1. Observing safety measures, turn off the carriageway to the side of the road.
2. Turn on the hazard warning lights
3. Stop the car on a flat horizontal platform.
4. Apply the parking brake.
5. On a vehicle with a manual transmission, engage reverse gear. If the car is equipped with an automatic transmission, move the selector lever to position P.
6. Stop the engine.
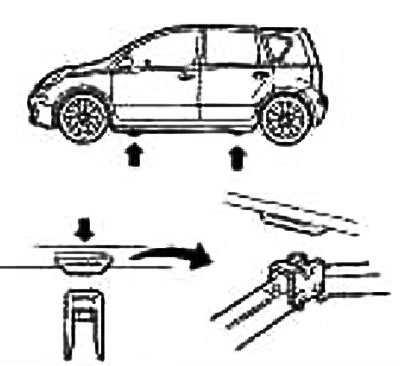
Wheel chocks
suitable wheel chocks ① front and rear under the wheel that is diagonally opposite the damaged one to block the vehicle from possible movement during jacking up.
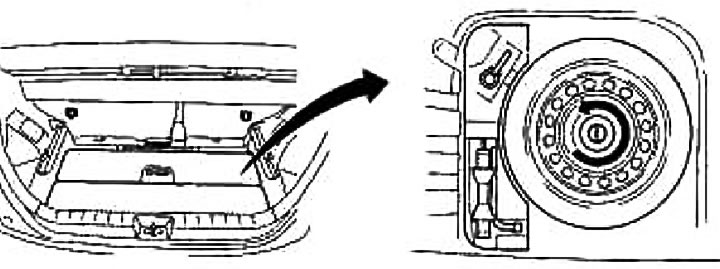
Spare wheel and tool preparation
Spare wheel, jack and necessary tools are in the luggage compartment
1. Open the tailgate.
2. Remove the items listed in the following order:
- Convertible floor panels (if any)
- floor mat
- Spare wheel: unscrew counterclockwise
- Jack
- Tools
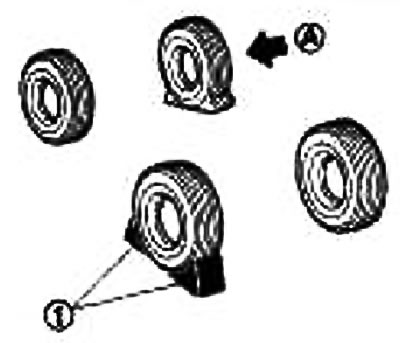
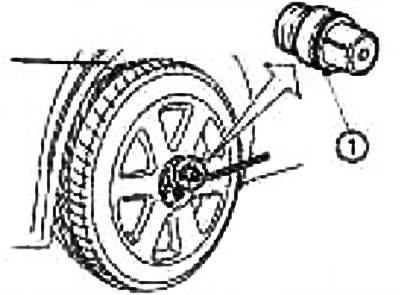
Removing the decorative cap (if available)
Using a suitable tool, remove the decorative cap as shown in the illustration. You can also carefully remove the cap with both hands.
To properly install the center cover, first align the NISSAN logo (on the center cover) with bolt holes, i.e. perpendicular to the nipple hole (if available).
Removing a damaged wheel
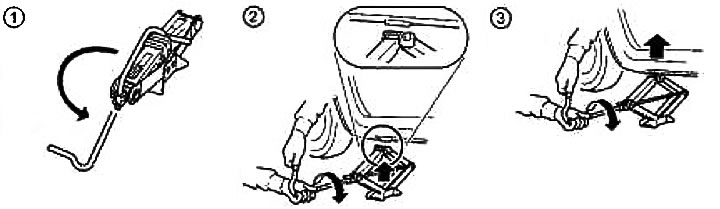
1. Move the jack to the support point under the body sill as shown in the figure. The upper head of the jack must be positioned exactly under the specified support points on the body.
2. Align the center of the jack head with the protrusion at the anchor point of the body as shown.
3. Align the groove in the head of the jack with the rib on the body.
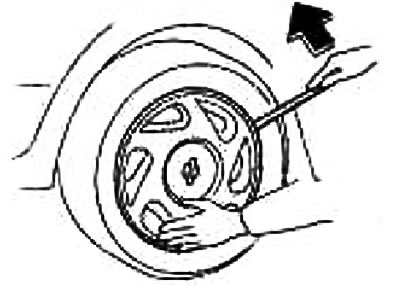
4. Loosen all wheel nuts by unscrewing them with a wheel wrench one or two turns counterclockwise.
Do not fully loosen the wheel nuts while the wheel is resting on the road.
Wheels equipped with «secret» nuts (if any):
- If the wheel is equipped «secret» ① on it and loosen the nut as described above.
- «Secret» the bolt can only be removed with a special tool
5. To raise the vehicle, turn the jack handle while holding it with your hand.
6. Raise the vehicle carefully until the wheel is completely clear of the road surface.
7. Turn away wheel nuts and remove a wheel with the punctured tire.
Wheel installation
1. Clean the contact surfaces of the wheel and hub from dirt.
2. Carefully install the wheel and hand tighten the wheel nuts.
Wheels equipped with «secret» nuts (if any):
- Alternately install a special nozzle on the nuts and tighten the wheel nuts by hand.
3. Tighten the nuts with a wheel wrench in the sequence 1 - 4 shown in the figure.
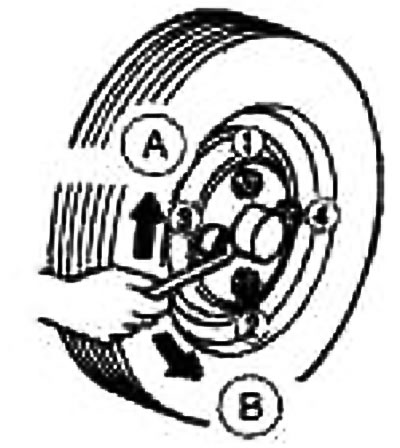
Ⓐ Tightening
Ⓑ Turning away
4. Slowly lower the vehicle until the wheel touches the surface on which the vehicle is standing.
5. Finally tighten the nuts with a wheel wrench in the same sequence.
6. Lower the car completely.
At the first opportunity, tighten the wheel nuts to the required torque using a torque wrench.
Wheel nuts tightening torque: 105 Nm (11 kgf-m)
Attention: Tighten the wheel nuts after the vehicle has run 1000 km (after replacing a defective wheel).
The wheel nuts must be constantly tightened to the required torque. It is recommended to tighten the wheel nuts at every oil change.
Stowing the removed wheel and tool
1. Place the damaged wheel, jack and tool in the designated places.
2. Replace convertible floor panels (if available).
3. Close the tailgate.