The scheme of installation of rings on the piston
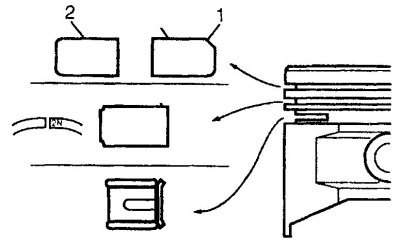
1. For SR20DE modification
2. For modifications SR20Di and SR20De
Arrangement of joints of piston rings

1. Top compression ring; 2. Oil scraper ring expander; 3. To the front of the engine; 4. Lower compression ring; 5. The lower disk of the oil scraper ring; 6. Upper oil scraper disc
Installation
1. Before installing new piston rings, check the clearance at their joints. Lay out the pistons assembled with the connecting rods and the new piston rings in such an order that the set of rings corresponds to the cylinder in which the joint clearance will be measured and in which the checked rings will be installed.
2. Insert the upper ring into the first cylinder and push the piston head inward, so that the ring inside the cylinder becomes perpendicular to its axis. Push the ring to such a depth at which the edge of the piston skirt is aligned with the split plane of the cylinder block, then remove the piston.
3. Measure the gap with a feeler gauge and compare the result with the standard specified in subsection 3.2.1.1.
4. If the gap is too small (which is unlikely if rings manufactured by Nissan are installed), then it should be expanded. Otherwise, serious damage will occur due to the closing of the rings during engine operation. It would be best to pick up new rings with a standard gap in the joint. At worst, the gap can be expanded by carefully sawing the ends of the joint of the ring with a thin file. To do this, clamp the needle file in a vise with soft jaws, insert the ring so that the butt ends are on both sides of the file, and, slowly moving the ring, remove excess material. Keep in mind that the ring is very fragile and can break easily.
5. It is unlikely that the gap in the new rings will be too large. If the clearance is higher than normal, then make sure that the ring matches the given engine and cylinder size group.
6. Repeat the procedure for each ring of the first cylinder, as well as for the rings of the remaining cylinders. Keep rings and pistons corresponding to the same cylinder together.
7. After selecting the rings, measuring and adjusting the gap, the rings can be installed on the pistons (see fig. The scheme of installation of rings on the piston).
Attention! Always follow the ring manufacturer's instructions as different manufacturers recommend different procedures for fitting rings to the piston. Do not confuse the upper and lower compression rings, which have different cross sections.

8. The oil scraper ring is installed first (the bottom of the piston). This ring is made up of three parts. Install the expander into the groove.
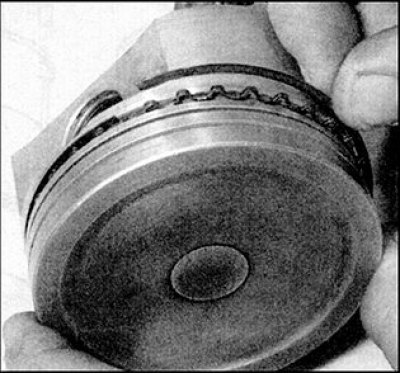
9. Then, between the expander and the piston groove pads, install in order the upper and lower disks of the oil scraper ring.
10. Install the lower compression ring next.
Attention! The top and bottom compression rings differ in cross section.
11. Orient the ring correctly before installation (The orientation marks on the compression rings must face up) and install the ring in the middle groove on the piston, while not pushing the ring too far apart.
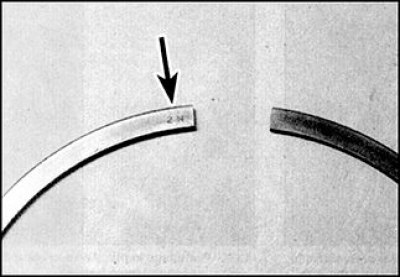
12. Install the top compression ring in the same way, orienting it correctly first. If the ring has a symmetrical section, then position it so that the identification mark (arrow) was facing up.
13. After installing the rings on the piston, arrange the joints in accordance with Fig. Arrangement of joints of piston rings.
14. After repeating these procedures, install the rings on the remaining pistons.