2. If a shoulder has formed in the upper part of the cylinders, then it must be removed with a reamer or scraper, without damaging the cylinder wall. The formation of a shoulder indicates increased wear on the cylinder.

3. The connecting rod and connecting rod cap must be stamped with the number of the cylinder to which the connecting rod belongs. Cylinder N1 is located on the side of the timing chain cover. If the numbers are not visible, then mark with paint or mark. Apply marks on the polished side surface of the connecting rod and cap.
4. Turn the crankshaft and set the pistons of the 1st and 4th cylinders to the BDC position.
5. Loosen the connecting rod cap nuts on the 1st cylinder. Remove the cover and remove the lower connecting rod bearing. If the liner is to be installed again, stick it with adhesive tape to the removed cover.
6. Tape the threads of the connecting rod cap bolts to prevent damage to the crankshaft journals.
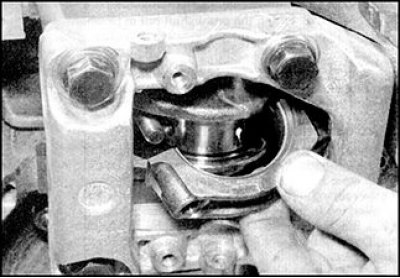
7. Use a hammer handle to push the piston into the cylinder and remove the piston through the top of the cylinder block. Remove the upper connecting rod bearing and tape it to the removed connecting rod.
8. Place the cap on the connecting rod and secure with nuts to maintain the same assembly order.
9. After repeating the above operations, remove the connecting rod with the piston of the 4th cylinder.
10. Turn the crankshaft 180°and set the pistons of the 2nd and 3rd cylinders to BDC. Remove the connecting rods with pistons from these cylinders.