Disassembly
Attention! New and overhauled cylinder heads are supplied as spare parts to repair points by the manufacturer. Due to the fact that specialized tools are required for disassembly and inspection procedures, and spare parts are sometimes difficult to find, it seems more appropriate to purchase a new block head than to disassemble, check and repair a used head.
1. Remove the cylinder head.
2. Remove the intake and exhaust manifolds if these parts have not already been removed (see subsection 6.1.12 and subsection 6.1.13).
3. Remove the valve actuating levers and hydraulic regulators.
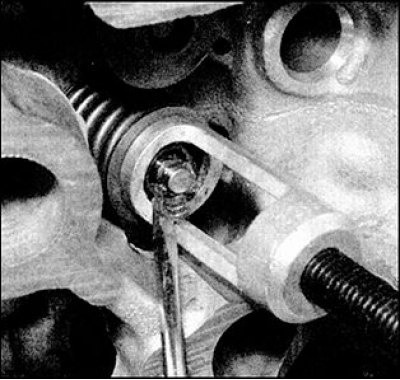
4. Turn away bolts and remove branch pipes of system of cooling from a head of cylinders.
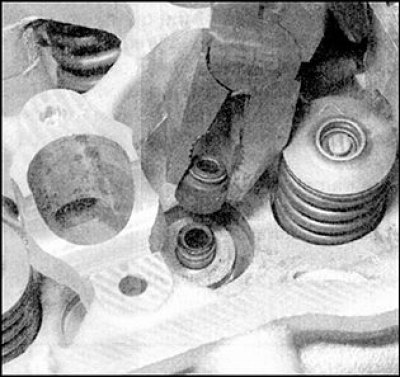
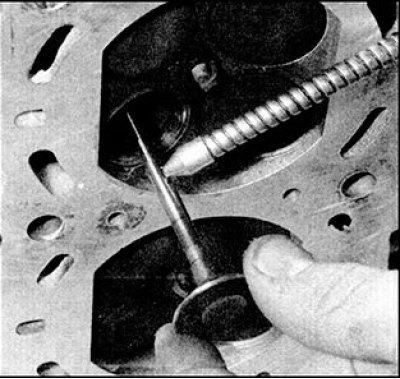
5. Compress the first valve spring with the tool and remove the crackers. Carefully release the valve spring, remove the spring cap, spring and thrust washer. Remove the valve stem seals from the guide bushings with pliers.
6. If, when compressing the fixture, the valve spring poppet does not move away and release the crackers, then lightly tap the fixture directly above the poppet with a soft-faced hammer, which will facilitate the removal of the poppet.
7. Remove the valve from the cylinder head from the side of the combustion chamber.
8. The valve should be stored together with crackers, spring, spring plate and support washer. Valves should also be marked so they can be reinstalled, except for those that show severe wear that requires valve replacement.
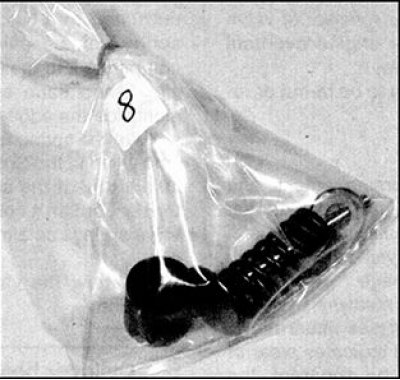
9. If the valves are to be installed again, place them in a separate plastic bag with the corresponding number. Keep in mind that valve N1 is located next to the timing chain cover.
Assembly
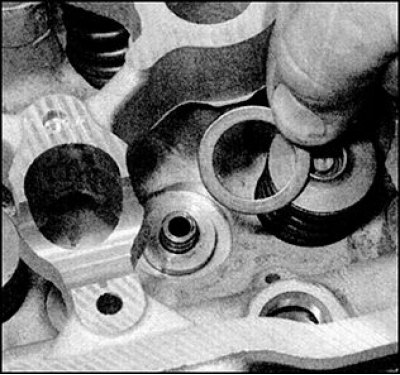
1. Install the spring support washer, then dip the valve stem seal in fresh engine oil. Carefully place the cap on the valve stem and sleeve. Be careful not to damage the caps when fitting onto the valve stem.
2. Press the cap onto the guide bushing using a mandrel.
3. Lubricate the valve stems with fresh engine oil and install the valves in their respective guides on the cylinder head following the original installation procedure. New valves should be installed in the seats to which they were lapped.
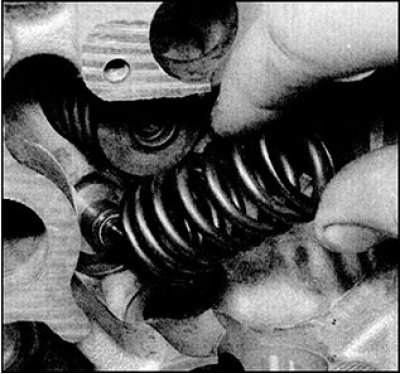
4. Install the spring onto the support washer, orienting so that the tightly coiled coils of the spring are facing down.

5. Install the spring plate.
6. Compress the springs and insert the crackers into the groove on the valve stem. Release the valve spring and remove the tool. Install the rest of the valves in the same way.
Attention! To keep the cotters in the valve grooves while removing the tool, secure the cotters by dotting them with grease.
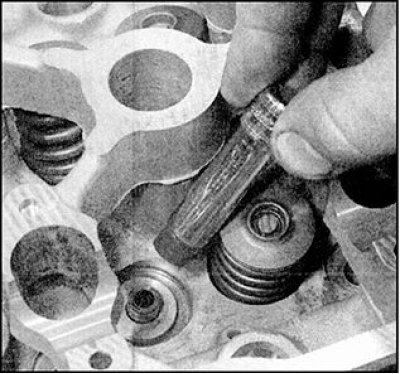
7. After installing all the valves, turn the cylinder head over and upset the valve train parts with light blows of a hammer through a wooden spacer on the stem of each valve.
8. Check the cleanliness of the split surfaces of the cylinder head and the cooling system pipe. Apply a bead of sealant to these surfaces and install the nozzle, tightening the bolts securely.
9. Now you can assemble the cylinder head with the rest of the parts.