


2. To access the outside temperature sensor (only models with automatic C/V) remove the radiator grille (see Chapter Body). Give up the nut and remove the sensor (see illustration Location of the components of the A/C system).
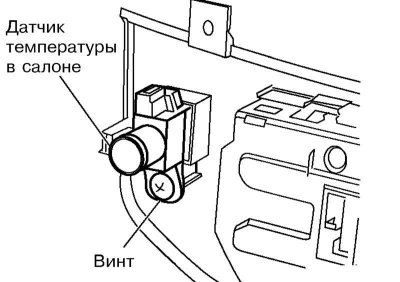
3. To access the interior temperature sensor (only models with automatic C/V) remove the ventilation system control unit (see section Removal, installation, disassembly and assembly of the ventilation system control unit with heater and air conditioning). Remove the screw from the back of the unit and remove the sensor.
4. To remove the sun sensor (only models with automatic C/V) first, remove the sensor trim (see illustration Location of the components of the A/C system).
5. Installation is carried out in reverse order.
Evaporator temperature sensor
1. Discharge the AC system in a specialized workshop.
2. Remove the A/C unit (see section Removal, installation, assembly and disassembly of the K/V unit).
3. Remove the cabin filter (see Chapter Vehicle settings and routine maintenance) and the right air duct "to the feet" (see section Removal and installation of air ducts and deflectors). On models with automatic A/C, additionally remove the mode flap electric motor.
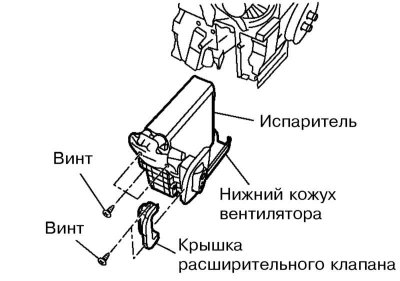
4. Remove the lower heater fan housing and expansion valve cover.
5. Slide down the evaporator and fan shroud and remove the evaporator temperature sensor.
Note: When removing and installing the sensor, do not rotate the thermistor insert.
6. Installation is carried out in the reverse order. Replace the sealing rings of the tubes and hoses.
7. Finally, check the A/C system for leaks.