Assembling the control unit for models without automatic A/C
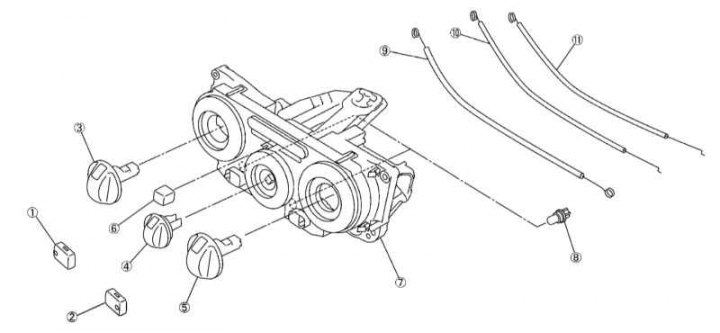
1 - Rear window heating switch; 2 - A/C switch; 3 - The handle of the switch of modes of distribution of air; 4 - Fan speed control knob; 5 - Temperature controller knob; 6 - Tip of the air damper drive lever; 7 - Control unit; 8 - Backlight lamp; 9 - Cable drive damper modes; 10 - Air damper drive cable; 11 - Air mixing damper cable
Assembling the control unit with automatic A/C
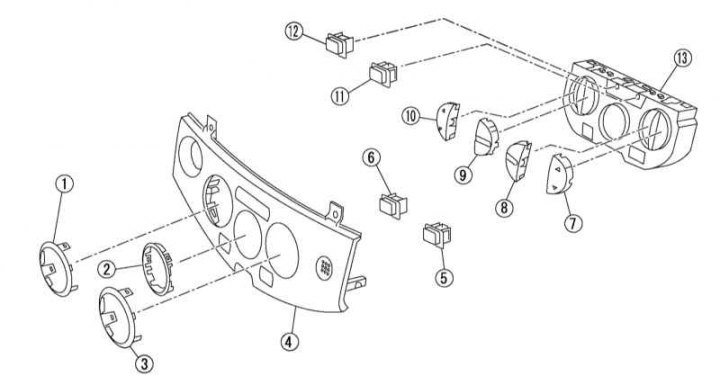
1 - Fringing of the switch of modes of distribution of air; 2 - Display trim; 3 - edging of the temperature controller; 4 - Overlay of the control unit; 5 - A/C switch; 6 - Rear window heating switch; 7 - Temperature controller; 8 - Automatic mode switch; 9 - Switch for air distribution modes; 10 - Fan speed controller; 11 - Circulation mode switch; 12 - Supply ventilation mode switch; 13 - Control unit
1. Remove the center console trim (see chapter Body).
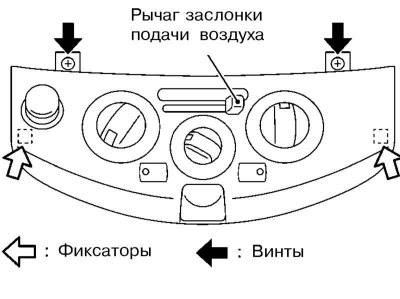
2. On models without automatic A/C remove the tip of the air damper drive lever, unscrew the screws, release the clamps and remove the control unit panel. On models with automatic A/C turn out screws, release clamps and remove the control unit. Go to item.
Note. Retainers and screws on models with automatic A/C are located the same as on models without it.
3. Remove the air mixing, air distribution and air supply damper cables.
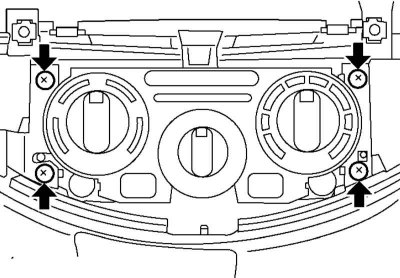
4. Turn out screws and pull out the block from the central console. Disconnect the electrical wiring from the unit and remove it.
5. If necessary, disassemble the control unit in accordance with the illustrations Assembling the control unit for models without automatic A/C and Assembling the control unit with automatic A/C.
6. Installation is carried out in the reverse order.