Components of the installation of the fuel tank and its filler neck
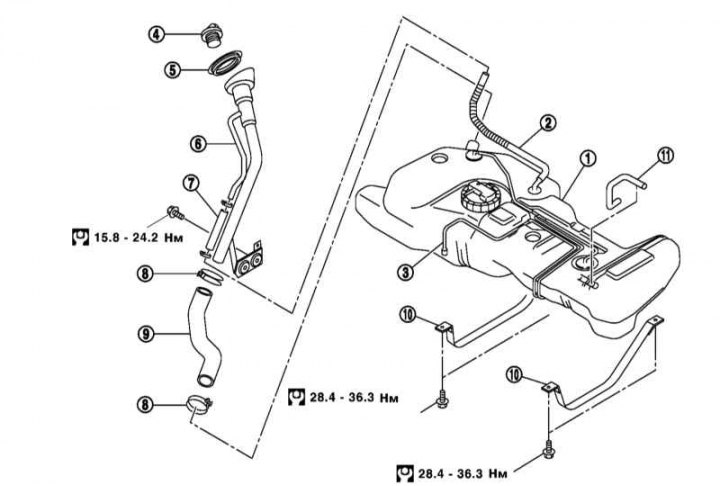
1 - Fuel tank; 2, 7 - Ventilation hose; 3 - EVAP tube; 4 - Filler cap; 5 - Gasket; 6 - Filler tube; 8 - Clamp; 9 - Inlet hose; 10 - Bandage tape; 11 - EVAP hose
1. Remove the right wheel and fuel pump assembly with filter and sensor. Do not remove the sensor.
2. Remove the main and central mufflers and their hangers.
3. Slide the parking brake cable off the bottom of the fuel tank and remove the cable retainers.
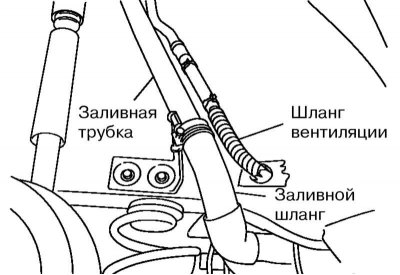
4. Disconnect the filler hose from the side of the fuel tank.
Note. Do not disconnect the hose from the fill tube side. If it is still necessary to do this, put installation marks on the tube and hose.
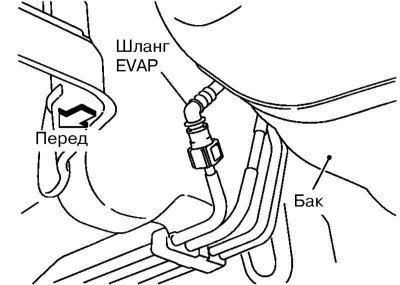
5. Remove the ventilation hose on the side of the right rear wheel arch, as well as the EVAP hose on the front side of the fuel tank. Place plastic bags over the open ends of the fuel lines.
6. Support the center of the fuel tank with a jack, after laying a wooden block between them.
7. Remove bandage tapes of fastening of a fuel tank.
8. Carefully lower the tank on the jack, holding the tank with your hand. At the same time, pull the ventilation hose through the hole in the body and pull the parking brake cable by hand.
9. Installation is carried out in the reverse order. Install the bandages according to the marks «R» (right) And «L» (left) on them.
10. After installation, check the power system for leaks (see chapter Vehicle settings and routine maintenance).